

Introduction: How to Sew a Baby Penguin.


I saw in the news that people have discovered a new thing about penguins! When penguins huddle together for warmth they do a kind of Mexican wave to shuffle everyone around, making sure everyone has a turn in the middle!
Watch the video here: http://www.bbc.co.uk/news/science-environment-13616778
This Mexican wave penguin huddle is pretty cute. But a Mexican wave baby penguin huddle would be even cuter!
Here's how to make your very own Baby Penguin. Maybe you could make a whole huddle! Let's just start with one though.
Step 1: You Will Need.

- Grey, black and white felt.
- Black and grey thread.
- Glue.
- Stuffing.
- A penny.
- Pins.
- A needle.
- A pencil.
- Some paper.
- Scissors.
Step 2: Paper Pattern Pieces.


1. Draw the body in the first picture above on to your paper. Draw it the size that you want your penguin to be. Make sure you have enough grey felt to cut out two of these body shapes,with a bit left over for other parts.
2. Cut out the body shape and use it to draw the head shape. Draw around the top of the body shape three times like in the second picture above.
3. Draw foot shapes and wing shapes on to your paper.
4. Cut these shapes out, cut across the bottom of the head shapes.
5. Draw a wiggle on one head shape like in the third picture above. Cut along the wiggle.
See how to pin them in the fourth picture above.
6. Fold some of the grey felt over in half and pin the body and a wing shape to it.
7. Pin one head shape to the white felt.
8. Pin the wiggly head shape and the other head shape to the black felt.
9. You probably won't be able to pin the feet to the felt if they are quite small. Now that you have practised drawing the shape and cutting it out in paper, you should be able to cut the feet out of the felt without a pattern with no problems!
10. Cut all of these shapes out. Save a few of the small triangles you get from cutting out the feet. One of these could be the right size for a beak.
Step 3: Assembling the Body.


- Two body pieces.
- Two wings.
- Two feet.
- A beak.
- One white head piece.
- One black head piece.
- One wiggly head piece.
2. Put the two body pieces together like a sandwich with nothing inside and pin them together.
3. Sew around the curved edge with over stitch (see second picture) and double thread that matches the felt. I'm using black so that you can see my stitches. Start from the bottom corner next to the flat edge. Don't sew up the flat edge!
4. When you have sewn all the way around the curved edge, stuff the body tightly with stuffing. See the third picture.
5. Draw around the bottom of the body on to the grey felt as in the fourth picture.
6. Cut the circle out.
7. Pop it on to the bottom of the body and start to sew around with over stitch like in the fifth picture.
8. Before you get all the way around, pop the penny in to the bottom. See the sixth picture.
9. Sew up the rest of the way around the bottom.
Step 4: The Head.


1. Have a look at the first picture above. Glue the black wiggly head piece to the white head piece. Do two little stitches in the white spaces for eyes.
2. Put a tiny dab of glue on to the back of the penguin face and glue it to the top of the body with a bit sticking up like in the second picture.
3. Do the same with the black head piece so it looks like the third picture.
4. Sew up the edge of the head with over stitch using matching thread. I'm using grey thread in the fourth picture so that you can see what I'm doing.
Step 5: Finishing Touches.


1. Put a small amount of glue on the top of the wings and glue them on to the side seam near the head.
2. Glue the feet on to the bottom of the penguin.
3. Find one of the tiny triangles you cut out earlier and put a tiny amount of glue on the penguin's face where you want it to go. Put the short edge of the triangle in to the glue and hold it for a few seconds until it stays. See second picture.
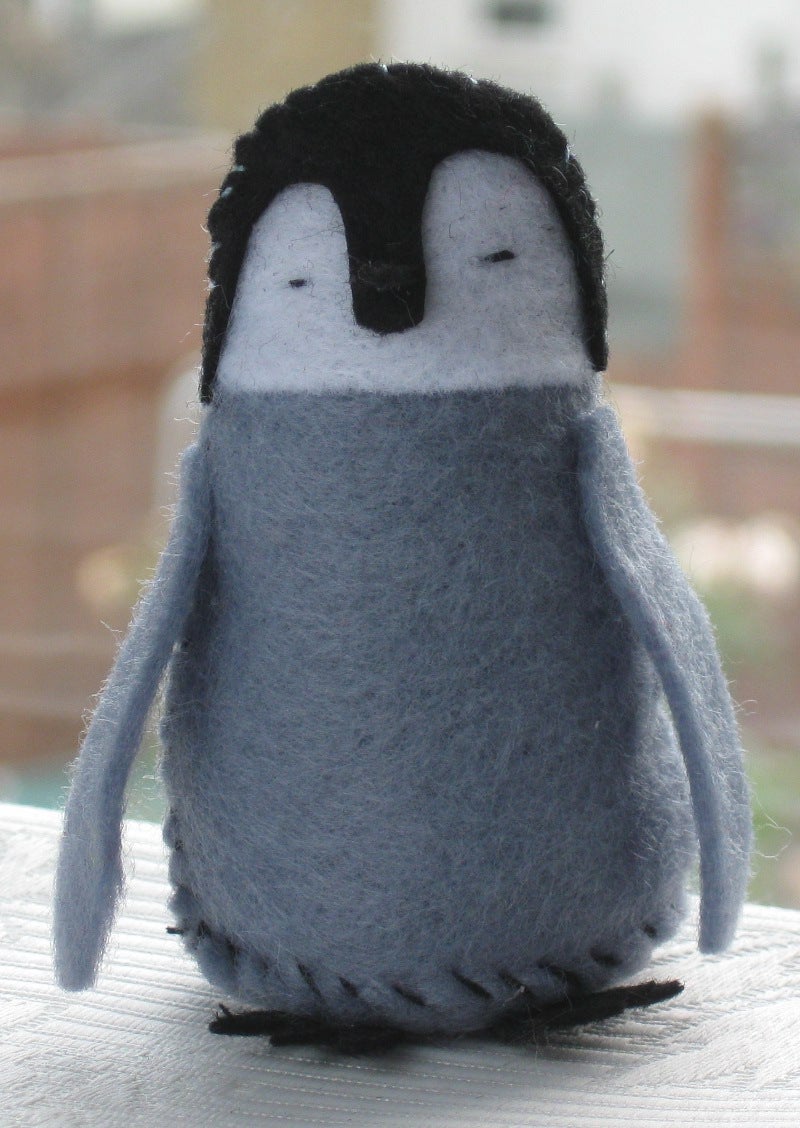
And you're done! Ooh what a cute little penguin!


