

Introduction: Subway Hook


When my friend Sarah approached me about a "subway project" I was disappointed when it had nothing to do with sandwiches, but I listened to her request nonetheless. Sarah is unable to comfortably reach the bar on a subway car, and often times, during rush hour all of the straps are taken. Being six feet tall, I have never experienced this trouble but I can imagine the frustration. Together we developed Subway Hook. The Subway Hook is a personal, fashionable transportation accessory made from domestic hardwood and natural leather.
One rainy day, while I was working on the Subway Hook a friend sent me a photo of some kids using their umbrellas as hooks. These kids are obvious experts at adapting to their environment and using the tools at hand for alternate purposes.
Step 1: Materials

Hardwood Veneer: I used maple and walnut.
Glue: Any wood glue will work.
Leather: I used raw leather, but an old belt would work great as well.
Rubber: The picture shows a bike tube, but I ended up using some gasket tape.
Tape: Packing tape and blue painters' tape will be necessary.
Scrap Wood: This will be for the molds, so a 2x4 will work just fine.
Hardware: One bolt and one nut is all you technically need but grommets are a nice addition.
You will also need a few tools:
A ruler and utility knife are the most readily used tools in this project. A few good clamps are a necessity too as well as a drill and a leather punch. You will also need a band saw, a sander and a rotary tool such as a Dremel. If you are using raw leather I suggest some burnishing gum and a slicker. Sand paper is also a good thing to have.
Step 2: Mold Making


This project employs a fabrication technique called bent lamination, or bent lam. Bent lam happens to be one of my all-time favorite techniques in woodworking (see Tiny StumpChair, Wooden Air Plant Pendant, and Bent Lamination Bracelet for more bent lam projects).
Bent lamination uses multiple very thin strips of veneer layered on top of one another with glue in between to create extremely strong curved pieces of wood. The first step in any bent lam project is mold making. This project uses a fairly simple three part mold.
I traced a glue bottle to mark out my curves. Next I cut a lollypop shape out of the 2x4 piece to create the basic shape of the mold. For this mold it was important to keep the cut off pieces since they will be used as parts of the mold as well. Use a sander to smooth out the mold pieces in order to ensure a smooth surface on the inside of the hook.
Step 3: Tape the Mold


It is important to cover the mold in packing tape in order to keep it from getting covered in glue and sticking to the hook during the drying process.
Simply wrap the curves surfaces of the mold with tape and cut off the excess.
Step 4: Veneer Preparation


Veneer usually comes in fairly large sheets. Before creating any bends you'll need to cut the veneer into uniformly sized strips. I used 16 layers for the hook but you could use more if you are concerned about strength. Each strip was approximately 2 inches wide and 14 inches long.
Another optional step here is to cover two of the strips with painters' tape on one side. These strips will go on the outside of the lamination and the tape is there to keep gobs of glue off of the finished product. You can skip this step if you would like but it will result in a bit more sanding work later.
Step 5: GLUE


This is the fun part. I love wood glue.
Lay all your pieces of veneer out on a work bench and cover one side of each one with glue. Use enough glue that when you spread it out it covers the entire piece of veneer with a thin layer. You don't want any dry spots at all in your lamination, because the will cause weak points.
Once all your layers are covered in glue, stack them up leaving the pieces with blue tape on the top and bottom of the stack.
Bend the stack of veneers around the top of the mold. The veneers should go all the way down one side of the mold but only extend slightly past the curve one the other side. Place the cut off pieces from the mold making step on either side of the lamination and clamp the entire thing with a few clamps as shown above. If you have used the correct amount of glue some should be squeezing out from between the layers of veneer.
Once the veneers are in the mold wait approximately 24 hours for the glue to dry. Even if the bottle says the glue will be dry sooner, wait a full day before removing the clamp. Laminations use way more glue than most applications, so the drying time is way longer.
Step 6: Trim and Sand


Use the band saw to cut off a strip from either edge of the lamination. The ultimate width of the hook should be about an inch and a half to an inch and three quarters. Cut the ends off of the hook too, to clean up the ragged edge created by inconsistency in the layer length. Round each end with a belt sander to eliminate all of the potentially sharp corners. Use a rotary tool to round off the edges and sand paper to smooth out the whole thing.
Step 7: Drill

Near the end of the hook drill one 3/8 inch hole. You could use a drill press, but I just used a simple hand drill. It is good to use a backing block when drilling through wood so that you don't damage the table and to prevent tear-out in the piece you are drilling. There are big holes in the work bench I was using, that are meant for clamping, so I was drilling over one of them in this photo. In hindsight, a backing block would have been a much better idea.
Step 8: Cut the Leather Strap


Cut the leather into a rectangle that is about 12 inches long by 1.5 inch wide. I used a 1.5 inch dowel to mark off a nice curve on the ends of my leather strap, but you could do it by eye or trace any other one inch diameter object. Use a leather punch to cut a hole at each end of the leather.
Step 9: Grommets

Grommets are an optional improvement to the hook, but something I highly recommend. They will improve the durability and look of your hook. Use a grommet setter and hammer to set one grommet in each of the holes in your leather strap.
Step 10: Rubber

In order to give the strap some grip on the poles in the subway I cut a short section of rubber gasket tape, tapered the ends with a sharp razor blade and stuck it on the inside of the curve.
Step 11: Finishing


Wood and leather both benefit from some quality finishing.
For the wooden part of the hook, I used a few layers of clear paste wax. Paste wax does not change the color of the wood much but does protect it from the elements. It is also a very low gloss finish, which is usually something I like.
I used Jessyratfink's instructable on burnishing for help with finishing the edges of my leather strap. I suggest reading Jessy's notes on the subject, but in short, use some gum tragacanth to make the edge of your leather a little sticky and a slicker to smooth it out. This process takes a little while but it is well worth the time. I also used some leather dye to darken the strap and make it match the wood a little more.
Step 12: Assembly

The last step is to attach the leather strap to the wooden hook. It is best if you have a nylon insert lock nut so that the strap can swing freely without the nut getting lost.
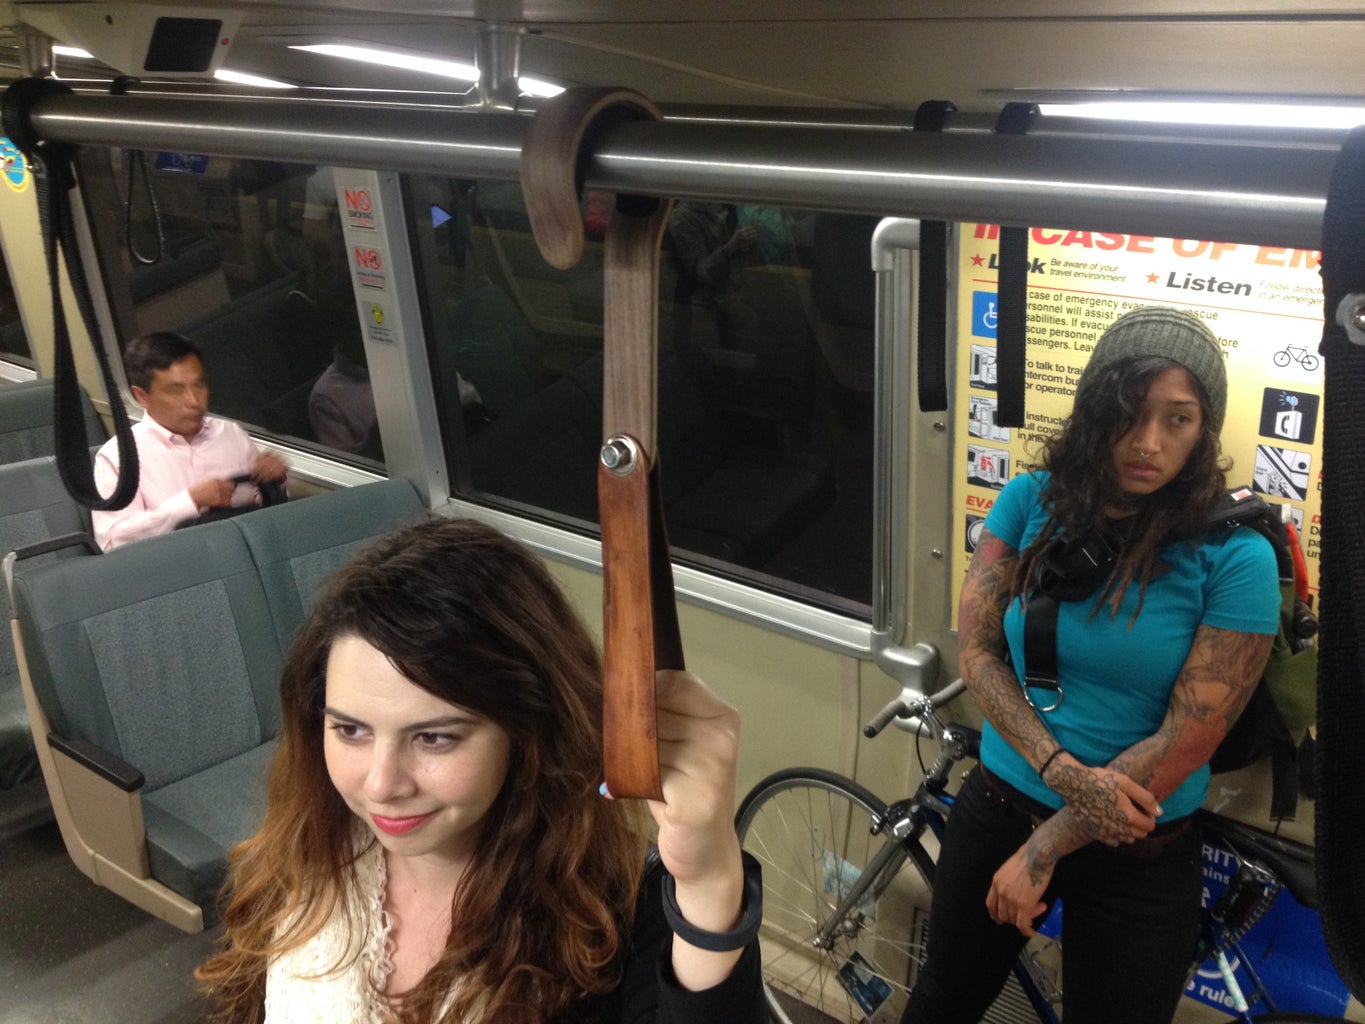
Step 13: Use and Enjoy


Now that you have your very own subway hook you won't have to worry about being left strapless on public transportation if you can't reach the bar. No matter how crowded the train car is you won't ever have to hold onto the shoulder's of strangers to steady yourself when the train jolts and jostles.
If you are a germaphobe, you no longer need to be concerned about the hundreds of people per day who touch the bars on subway cars and busses.

Participated in the
Leather Goods Contest


