

Introduction: 5 Piece Cardboard Lounge Chair


This lounge chair is made entirely out of cardboard! No fasteners, no glued joints, just friction and slots. With two and a half 4'X4' sheets of heavy duty cardboard, paper templates, and a box cutter, you can make this comfortable and sturdy piece in a few hours.
It's in a book!
This project has been included in Asa Christiana's new book, Handmade: A Hands-On Guide: Make the Things You Use Every Day available now on Amazon.
https://www.amazon.com/Handmade-Hands-Guide-Things...

Step 1: Design


I went with the Barcelona Pavillion Chair's dimensions as a starting point. Chair design is such a dense topic that I've been sticking with the posture and dimensions of this chair as a way to focus on material and structure experimentation. Also, I find the chair to be really comfortable. If it ain't broke, don't fix it!
After deciding on the general parameters of the chair, I moved on to thinking about assembly. Since cardboard is rigid and flexible, I didn't see any reason to use glue or fasteners for the joints. I designed the chair to be press-fit with slot joints, hoping that the friction between the parts and the semi-rigidity of the planes would keep everything in place.
After measuring the thickness of the cardboard, I came up with a few iterations in the computer before I decided on one. The last iteration seemed the best one to me for a number of reasons. I was inspired by Chairigami for this project, and it looked to me like this was they way they were making their awesome furniture.
- With this design, none of the parts are longer than 47 inches when cut out, which means I was able to work with 4X4 sheets instead of larger ones.
- It seemed the most rigid since it had four slot joint locations instead of three.
- I liked it better from an aesthetic point of view- it seemed more balanced in the side profile.
The Fusion 360 file is attached in this step in case you want to make your own tweaks to the design. It's free for students and hobbyists, and there's a ton of educational support on it. If you want to learn to 3D model the kind of work I do, I think this is the best choice on the market. Click the links below to sign up:
Attachments

Step 2: Laminating & Cutting


To get a really sturdy result, I decided to make my own 3-ply sheets. When I was done with the project, I found out you can just buy it that way! Here's a link to it at Uline.
The "template" PDF file can be printed to scale and serve as a template that you can stick to the surface and follow with a box cutter. The DWG file is a CAD file that can be used for lastercutting or any other CNC cut.
I used out Metabeam laser cutter for most of this project, but I'm demonstrating here how to do it by hand. It's totally doable with a straight edge and a boxcutter with templates, it's just takes longer. Here are the steps for doing it by hand:
- Cut down the 5X10 sheets of cardboard to manageable sizes (no more than 48" in either dimension).
- Go Jackson Pollock with a tube of glue on one side of a sheet.
- Press on the next sheet. IMPORTANT: the corrugation needs to be oriented in the same direction on all the sheets your'e laminating. This allows you to crease it without much trouble.
- Repeat step 3, then put something heavy and flat (like a 1/2 sheet of 3/4" plywood) for a few hours.
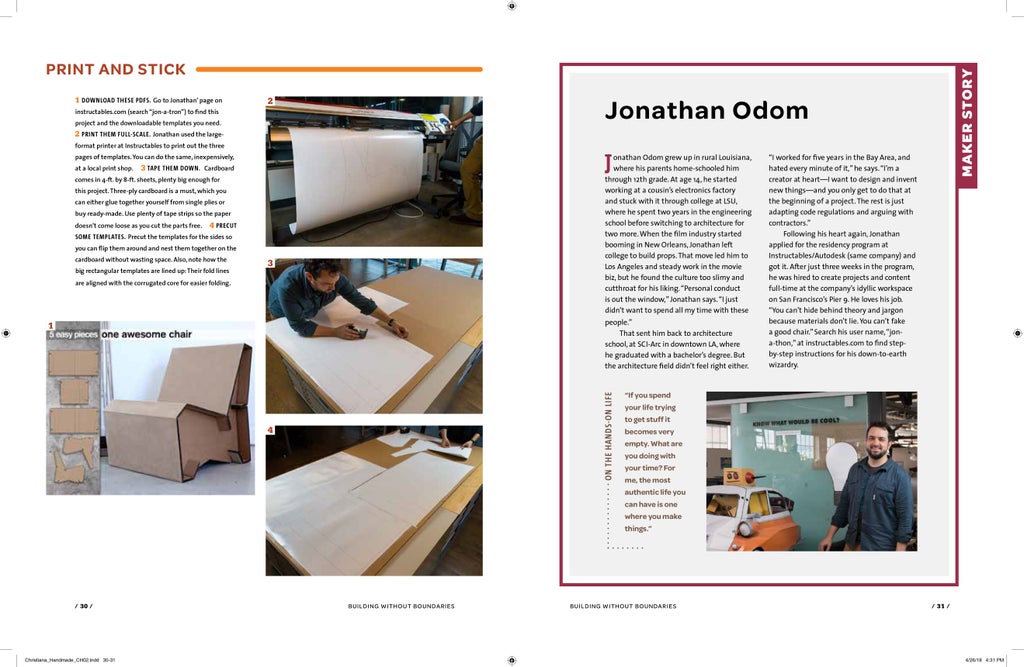
- Print the templates at full scale, 1:1. The sheets are 4X4, which any professional print shop that does construction printing will be able to handle. You can either get the prints on cheap bond paper and use Super 45 spray glue to attach them for cutting, or you can print on sticky back material, like I did here.
- Use a good straight edge and a sharp box cutter, and cut out the pieces. You'll get straighter cuts with a fresh blade, so for best results replace the blade frequently.


Step 3: UPDATE: Creasing Jig

Coolteper asked for some more info on the creasing jig. I didn't document making it, but the drawing in this step should explain it pretty clearly.
There are two parts: the block that you clamp to the table and the arm that pivots on a bolt through the block.
BLOCK
The block is made of three 3/4" plywood pieces: one 3/4" X 6" X 6" piece for the middle and two 3/4" X 6" X 12" pieces that make the sides. The gap in the middle is for the arm to slot into.
ARM
The arm is a piece of 3/4" plywood that's 6" deep by about 48" long. There's a an angled cut at the pivoting end so it doesn't bind to the block and a 45º miter cut along the length of the arm. This cut gives you a sharp edge to do the creasing. There's a bolt through drilled holes in the block and arm that the arm pivots on. I used a 1/4"Ø bolt for this and a locknut to keep it from unscrewing on its own.
I used a pressure clamp to attach the block to the work table and adjusted it so that the edge is perfectly flush with the table.
Step 4: Creasing


To get the creases even and clean, I whipped up the creasing jig shown in the photos. It's just 3 pieces of plywood with a gap in the middle, and a bolt through a hole in the top that turns the arm into a lever. The arm has a 45º miter on its edge (that I cut on the table saw) that makes for a nice sharp crease.
I clamped it to the table so that the edge was flat on the table top, and used it to make the creases. This part's really easy and goes very quickly.
Step 5: Assembly


Assembly is the easy part! All you have to do is align the folded surfaces with the proper slots and put them together. Each piece makes it sturdier, and when you insert the last one you end up with a rock solid chair made of paper!
The pieces only fit together one way, and the creases (obviously) have to be edge-out, so you can't mess this up if everything was cut properly.
Step 6: Finished Product


The chair is very sturdy


_VOBLK_FZ.jpg)