Introduction: 9 Easy Ways to Distress Wood
Distressed wood has the look of being weathered and old, giving it texture and a rustic, homey appeal. In some lumber stores you can buy salvaged wood called barn wood, so named as it's mostly salvaged from old barns which have seen many years of weathering. If you were to buy wood like this for a project you can expect to pay a premium for the aged look of barn wood. However, making your own distressed wood is incredibly easy, and can be made a fraction of the price.
We'll explore nine simple techniques that will take any store bought wood from cheap to chic. The best part about doing it yourself is that you can modify any of the techniques to suit the tools on hand, and combine the treatments in different ways to get just the look you want.
Let's distress!
Step 1: Use Cheap Wood
Distressing wood to look old usually involves some superficial damage to the wood surface, because of this there is no need to use expensive wood.
More expensive wood is usually free of knots and warping, whereas cheap wood usually has more knots and other surface imperfections that will add to the effect of distressing. Though you don't want warped wood, having surface damage will add depth to the wood when stain or paint is added.
Skip the expensive stuff and find inexpensive wood.
Step 2: Beat It Up
Aged and distressed wood looks like it's been through a lot in its life. That's not going to be the case with new wood, so we'll have to improvise on how to add a story to the wood surface through texturing.
A great way to add texture is to make marks in the wood with just about any hard instrument you have on hand. The more varied the better.

Hammerhead divots will add a dished depression.
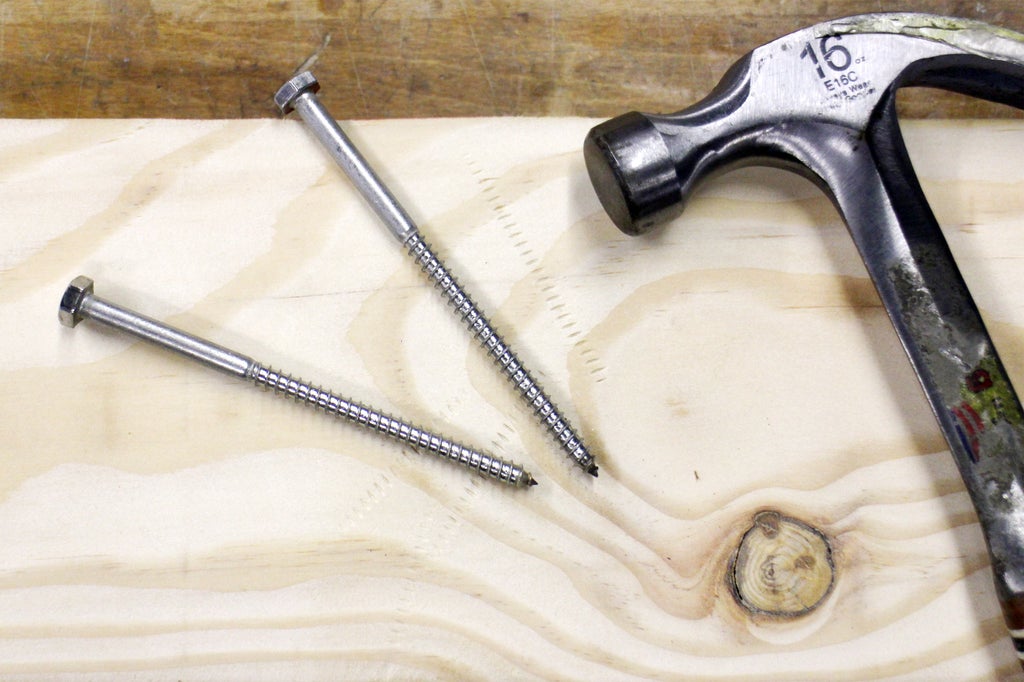
Threading from large screws leave an evenly spaced pattern.
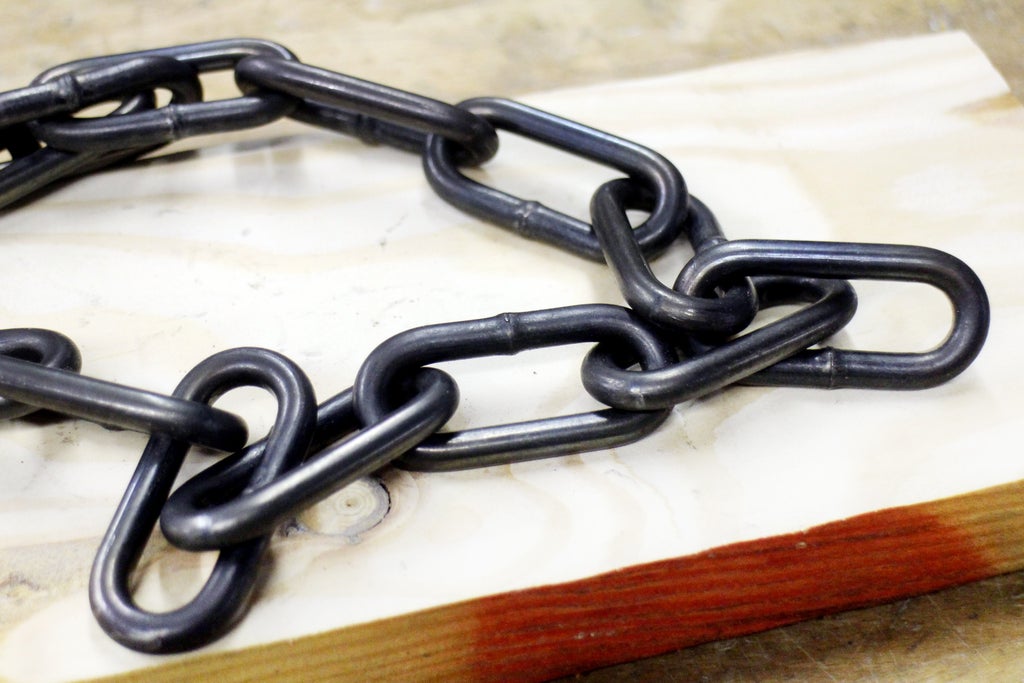
Steel chain can make irregular divots. greasy chains leave divots and some discoloration.
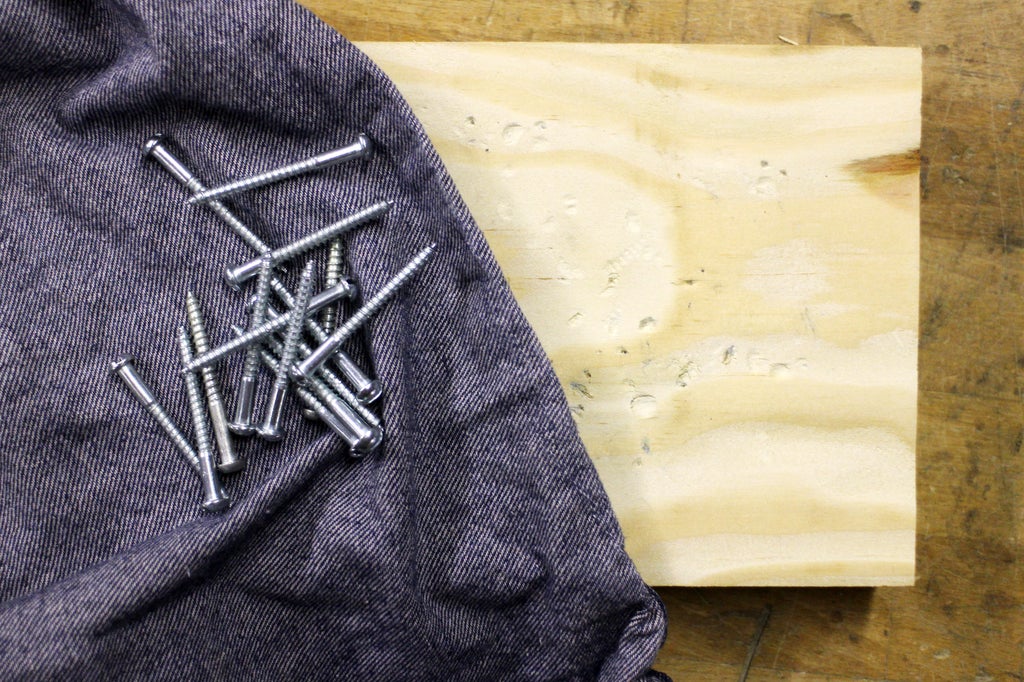
Placing a handful of nails into a shop rag and beating on the wood allows all kind of small indents to be made, rounded marks from the heads, spirals from the threads, and sharp pocks from the pointed ends. This is one of my favorites.
Of course, this is just what I had on hand. Experimenting with anything dense that has some shape or texture can provide pleasing results.

The divots and dents are just part of the process. To really make these imperfections stand out you need to add color.
Step 3: Wire Brush
Barn wood is prized due to the deep weathering that comes from being left exposed to the elements. You can mimic this in a fraction of the time by using a variety of wire brushes that fit into your drill.
If you're using any kind of softwood (and if you're using cheap wood, then it will be soft) this part is super easy. Load up any wire brush into the chuck of your drill and move the brush over the wood along the grain.
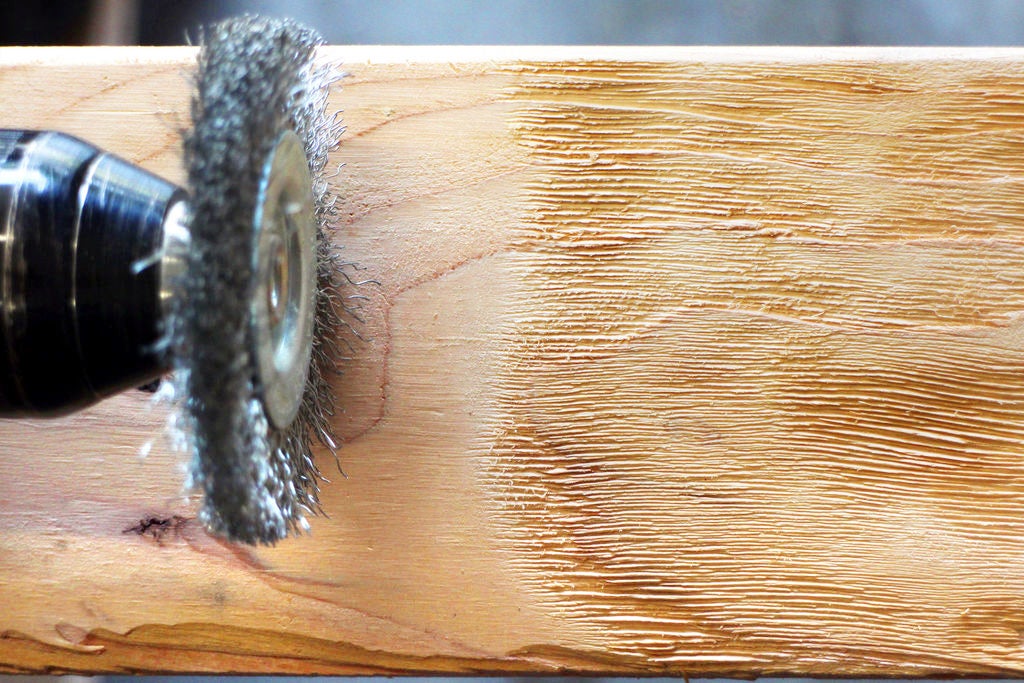
The brush will easily dig out the soft wood fibers and leave behind some of the denser grains, etching in the texture of the brush along the way. Depending on how much pressure is applied to the brush against the wood there are varying levels of texture you can achieve.
Make sure to wear a dust mask, this process can get a little messy.
Step 4: Wood Staining
Any surface imperfections from the previous steps will stand out when you apply a stain to wood. The stain collects in the divots and makes these areas much darker, and more visually appealing.
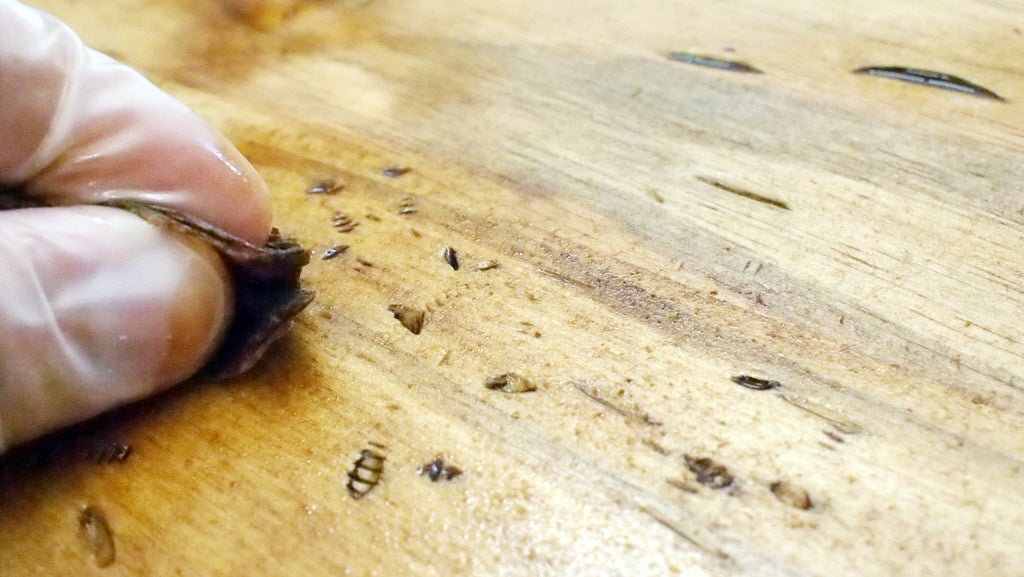
To really get the effect to look dramatic I've had success spending a little extra time over the divots to ensure a good amount of stain has been deposited, and allow it longer to soak into the wood.
Step 5: Tea Staining (With Vinegar + Steel Wool)
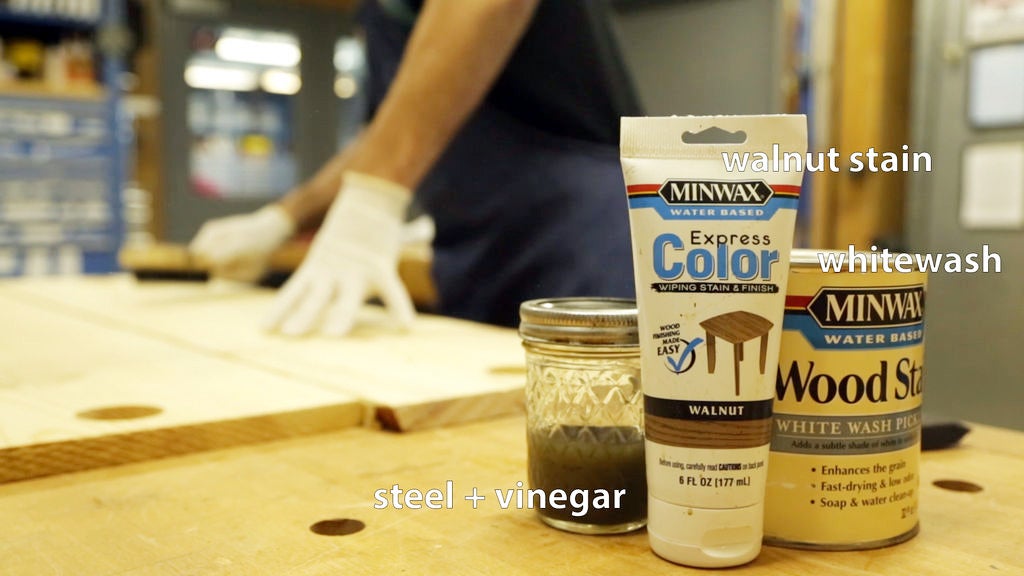
Tea staining is a chemical reaction between the bitter tannin from steeped tea and a mixture of iron acetate from the steel wool and vinegar to turn the wood a dark color.
Black tea is steeped and left to cool to room temperature. In a separate container, steel wool is submerged in vinegar and left for about 10 hours. When steel wool is combined with an acedic acid (vinegar) it causes the steel to oxidize (rust), making iron acetate.
When both solutions are ready, brush the tea onto the wood and allow it to soak in. Next, brush on the iron acetate solution and watch as the wood slowly begins to darken.

CAUTION:
- Making iron acetate produces hydrogen gas, do not seal containers and keep in a ventilated area.
- Staining will occur mostly on wood surface, be careful if you need to sand afterwards.
The tannin content of the wood is the predominate factor in the darkness of the stain. The best part about this technique is the close substitutes work! Don't have white vinegar? Use any other type of vinegar. Don't have steel wool? Use any other steel bits (staples, nails, shavings, etc.)
Step 6: Paint + Sand
To go along with additive methods of distressing, like making divots and staining, you can also distress wood by subtractive methods, like sanding.
Maybe your salvaged wood already has some paint, if not add a quick coat of whatever color you like and then sand it off using a rough grit sandpaper.

I used a 80 grit sandpaper on my random orbital sander to remove some of the paint from the surface of this piece of wood. If you work aggressively and try not to spend too long in one spot you'll end up with texture from the sandpaper and do a haphazard job of sanding - both desirable for the end product.
Step 7: Scraping
Using cabinet scrapers is a great way to get a faded look to painted wood without much effort.
These straight edged flat scrapers are used in woodwork to scrape and smooth the surface of wood, a common tool for cabinetmakers. However, they are put to good use for scraping off a painted wood panel to get a fatigued appearance without having to wait for the wood to naturally weather and remove the paint.

Cabinet scrapers come in a few different shapes, and are usually able to get into any spot you might need.

This set of 3 was under $20 and take up no room in my tool cabinet.
Step 8: White Wash Pickling
a white wash pickling solution is similar to a stain, but instead of turning the wood a darker color it lightens it with a subtle white color while allowing the grain to show through.
The stain can be applied in multiple coats, or allowed to sit on the wood longer for a deeper white appearance. Alternatively, you can apply and then wipe the white wash off the wood for a faint effect, which looks more like aged wood than if you left it for longer.
Step 9: Build Up Layers
Applying any of the above methods will achieve good results to make new wood look weathered, but the real secret to making your fatigued wood look amazing is to build up the layers by combining different methods.
This makes sense if you think about how naturally aged wood got to looking the way it is: It's probably been painted a few times, has had some damage over the years, and been baked in the sun resulting in a faded appearance. Think of this when you're applying treatments to your wood. The more layers of distressing your wood has, the better it will appear.
Do you have a favorite method to distress wood? I want to see it!
Happy making :)

Participated in the
Before and After Contest 2017


