

Introduction: Abstract Gimp Line Photographs


How to make a quick, simple piece of abstract art, from nothing but a photograph.
All instructions are intended for The Gimp 2.6, but other programs, such as paint.NET and Photoshop should both be able to do these tasks.
Step 1: Pick Your Picture

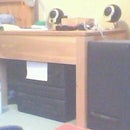
Find a photograph with interesting colours from the top to the bottom, not huge lumps of one or very similar colours close together.
A quick example is shown below:
Step 2: The Nitty-Gritty!

Open the GIMP, (Gimp.org) and open the image you have chosen, (File>>Open), Find the part you want to stretch, and use the select tool to select it, from the very top of the picture to the bottom.
The widest I would select would be about 70-100 pixels wide.
Once you have a nice selection, crop the image to the selection (Image>>Crop to selection)
This still isn't very stretched, so resize it to its original size (probably 2560x1920) by going to Image>>Resize.
Step 3: Fin. Wait, Not Quite!

This should look sufficiently abstract, if you are not pleased, try a different selection, (wider, thinner, in a different place, etc) or a different picture.
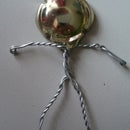
If this is not enough for you, Open the Gimp IWARP (Filters>>Distort>>IWarp) set the distort amount and radius to maximum, and click and drag on the centre of the image with the 'shrink' tool. This will make all the colours from the edge taper into the centre, like in the picture below:


