

Introduction: Barbie Cake


In this Instructable, I will show you how to make a Barbie Cake. This doll cake tutorial is fairly straightforward, but it may take some practice in order to make it look really good. Cake design is actually not really my forte, but I know enough to get the job done. This style of barbie doll cake has been around for quite some time. It isn't anything new. With a little patience, you can pull it off just like me. My friend asked me to make a Barbie Cake for her daughter's 6th Birthday, and this is the style I chose. If I can do it, you can do it. Let's get started!
Don't forget to follow me and check out my other Instructables.
Follow the steps below or watch the video tutorial or do both! :)
Step 1: Ingredients and Tools

Ingredients:
- 2 to 3 full cake recipes (like 2 to 3 cake box mixes) plus the right amount of eggs, oil, and water to go along with it.
- 96 oz of white frosting (some will be used for different colors)
- Food coloring
- Sugar pearl sprinkles (optional)
- Barbie Doll (Not really an ingredient)
Tools:
- 8-inch cake pans
- 6-inch cake pan
- Plastic wrap
- Piping bags (or use zip lock bags)
- 1M Wilton Star Tip or 2D Wilton Tip
- Wilton 21 small star tip
- Round Biscuit cutter
- Tweezers
- Parchment paper
- Cake board
- Cake pedestal, rotating (optional)
- You could get this cake decorating kit which has several of these items together.
The above link is an Affiliate link. As an Amazon Affiliate, I earn on qualifying purchases.
Step 2: Bake the Cakes

Begin by baking the cakes. You can use whatever cake recipe that you want. I have several here on Instructables that you can use. Or just use your favorite cake mixes, along with the required ingredients of course.
You will need double maybe even triple the amount depending on how tall your Barbie is. For this style and this size barbie, you need 2.5 Cake Mix boxes. I just keep the one cake layer that I don't use and use it for something else, like cake pops or cakesicles.
Bake the cakes in 4 8-inch rounds and 1 6-inch round. I only own 2 8-inch rounds so I just bake them after each other. Bake the first set, then after they cool, bake the next.
Make sure to grease and flour the pans and it is a good idea to put parchment paper on the bottom as well.
Once the cakes have been baked allow them to cool completely.
TIP: Cold cakes are easier to decorate. Once they have cooled, wrap them tightly with plastic wrap and store them in the fridge for a few hours before decorating. This is entirely optional but makes frosting easier.
Step 3: Wrap Barbie

Take your Barbie and remove here dress if she has one. Then wrap her in plastic wrap from the waist down. She will be going into the cake, so we want to keep her protected.
Step 4: Make the Holes


Next, take your cake layers and you will need to use a round biscuit cutter or a knife and cut out a hole in the center big enough for your Barbie or doll to fit in.
Take a cake board and add some frosting to the middle then place the first layer down on it. The frosting will act as glue to hold the layer in place.
A rotating cake pedestal is so helpful for decorating this style of Barbie cake. But it isn't required.
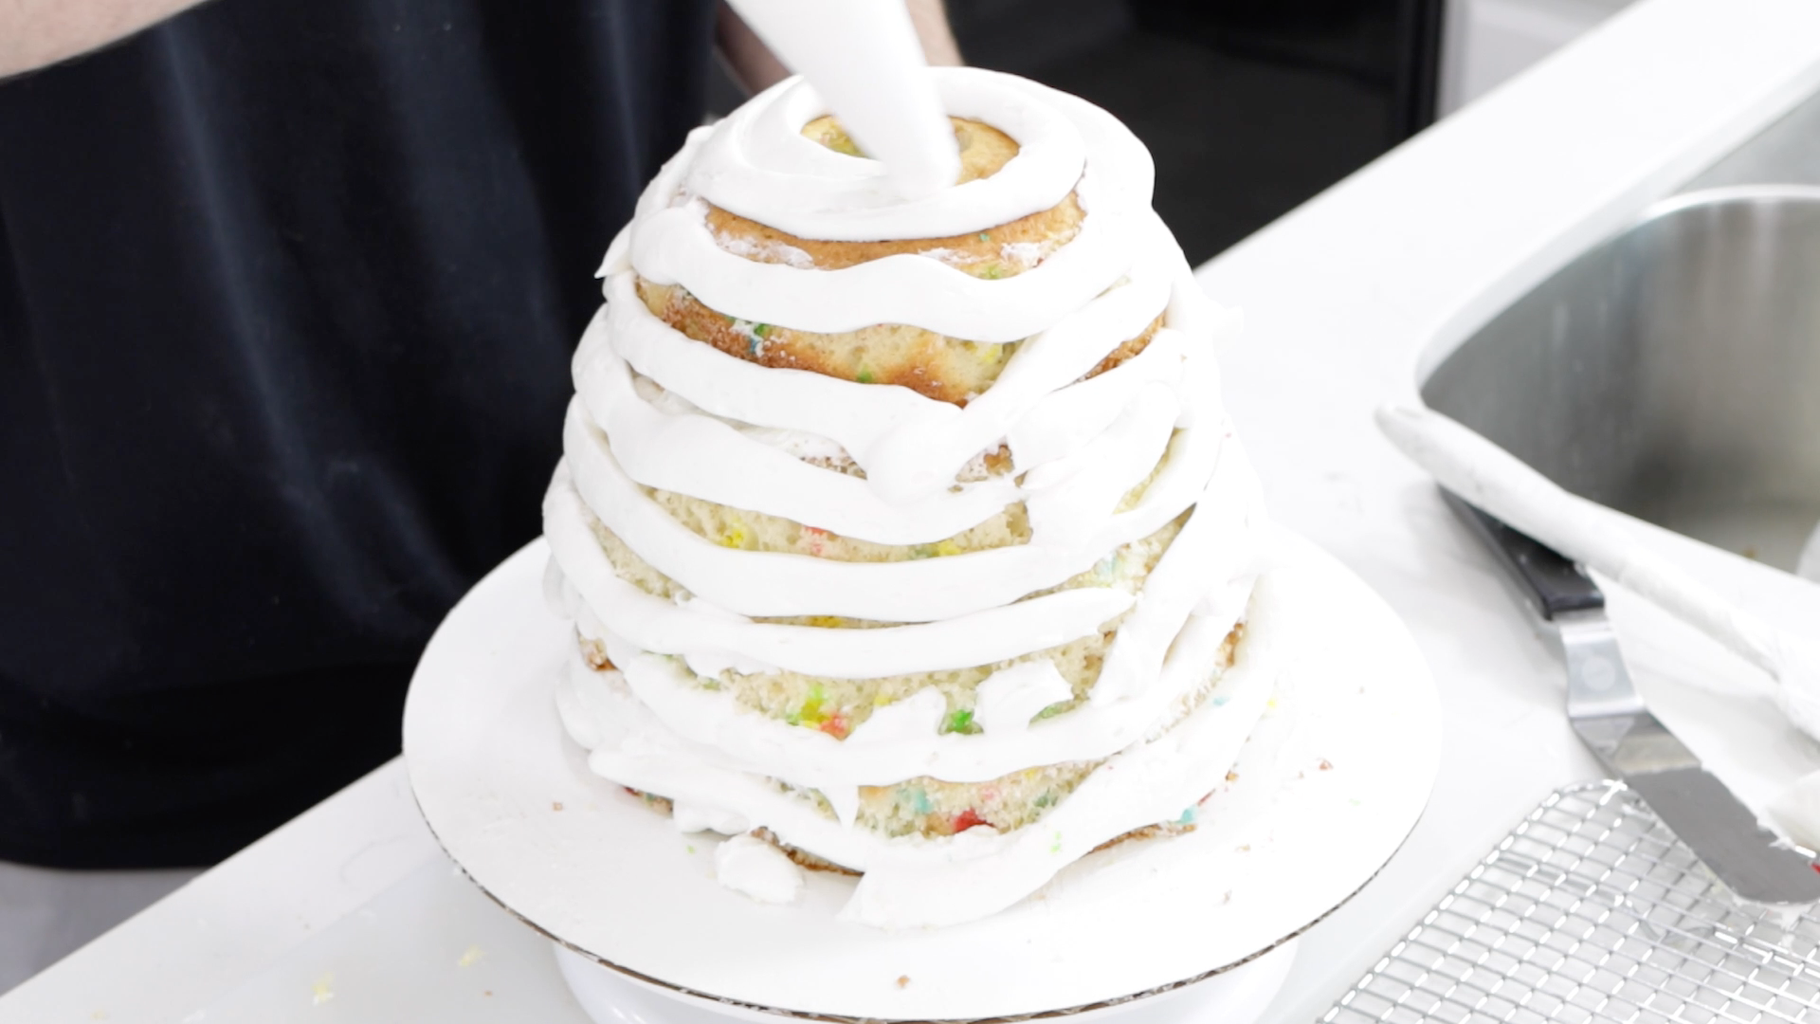
Step 5: Frost and Repeat


Now add a generous amount of frosting on top of the cake layer and smooth it out. Repeat the process with the other layers. The top layer will be the 6-inch round, or you can use another 8 inch round.
NOTE: If you have any cake layers that are particularly mounded, you will want to level them off with a knife, a bread knife works great for this.
It is okay and almost wanted to have the very top layer be mounded, it helps with the design of the "cake dress."
Stand the Barbie next to the cake and make sure you have enough layers.
Step 6: Trim and Shape


Time to trim and shape the Barbie cake. Use a trimmer knife or a bread knife, and start trimming the cake to create a "bell" or "dress" shape. You can shape it however you like though. It may take a little practice to get it completely even all around. Don't worry about that too much.
For this style I wanted it to have more of an angle on the back of the dress and more straight down on the front of the dress.
Once you have trimmed the cake, remove all the cake pieces and you can save those for cake pops or cakesicles as well. Clean the bottom of the board as necessary with a slightly damp paper towel.
Then using clean hands, or wear gloves, pat the sides of the cake, and press any cake crumbs in it. This also allows you to shape it a little bit too.
Step 7: Frost That Cake


Now you need to frost the whole cake. Yes, you will be using lots of frosting for this layered Barbie cake.
You can frost it with whatever technique that you want. I like to pipe a bunch of frosting all around and then smooth it out. There are several little tools to help with this. But you don't have to buy all kinds of cake decorating tools. Use a normal cake spatula, or just a regular spatula if that is all that you have.
Once done, again clean off the cake board as necessary with a slightly damp paper towel.
Then set the Barbie in her cake. If your Barbie has really long hair you may want to tie it up with a twisty or something, so it doesn't get in the way when you are decorating it.
Step 8: Decorate That Barbie Cake


Time to finally decorate the Barbie Cake dress. There are so many different styles and designs that you can do. For this particular one, I went with the popular "flower" dress design. I chose to use three colors a nice purple, pink, and neon pink.
Add some purple food coloring gel to a bunch of frosting. Then mix until well colored. Add more food coloring as necessary.
I like to use the double bag technique because it allows me to switch out frosting colors but use the same tip. Take one decorating bag and add the star tip to it. I use the Wilton 1M or 2D tips.
Take a different bag and add the purple frosting. Snip off the corner and then put that back in the bag with the tip.
Pipe on those flowers. To make the flower, hold the tip perpendicular to the cake. Press the tip to the cake, then pull up, squeeze and do a circle motion, which will create the small flower. Repeat next to that flower, etc.
After two purple lines of flowers, I switched to a strawberry frosting which is already colored. I pulled the purple bag out and added the bag of strawberry frosting to my star tip bag. Easy switching of frosting with the two bag technique. Then pipe on more flowers.
Next, I switched back to purple. I followed that up with a small star tip and a new bag. I mixed some neon pink frosting up and piped on smaller flowers at the top and up next to the Barbie's waste. This will help cover any plastic wrap that may be showing.
Then if you like, you can pipe little stars in the gaps between the flowers, if any. I used neon pink and normal white frosting, with a small tip, to make the stars.
Now the Barbie cake could be done if you like. Or add a finishing touch.
Step 9: Finish That Barbie Cake


There is a type of sprinkle called a sugar pearl that looks really cool on cakes and cupcakes. Using tweezers, grab the pearls and place them on the cake to finish her off.
Now she is done. Enjoy!
Print the recipe here if you like.
Step 10: Video Tutorial
Now watch those steps in action with this video tutorial.

Participated in the
Home Cooked Speed Challenge


