

Introduction: Circular Maze Generator (basic)


Most of us at some time or the other will have played with ball maze puzzles.
Those small puzzles with the transparent top, encased maze and a ball bearing.
Well this is a generator of said puzzle that uses Tinkercad Codeblocks to generate random mazes.
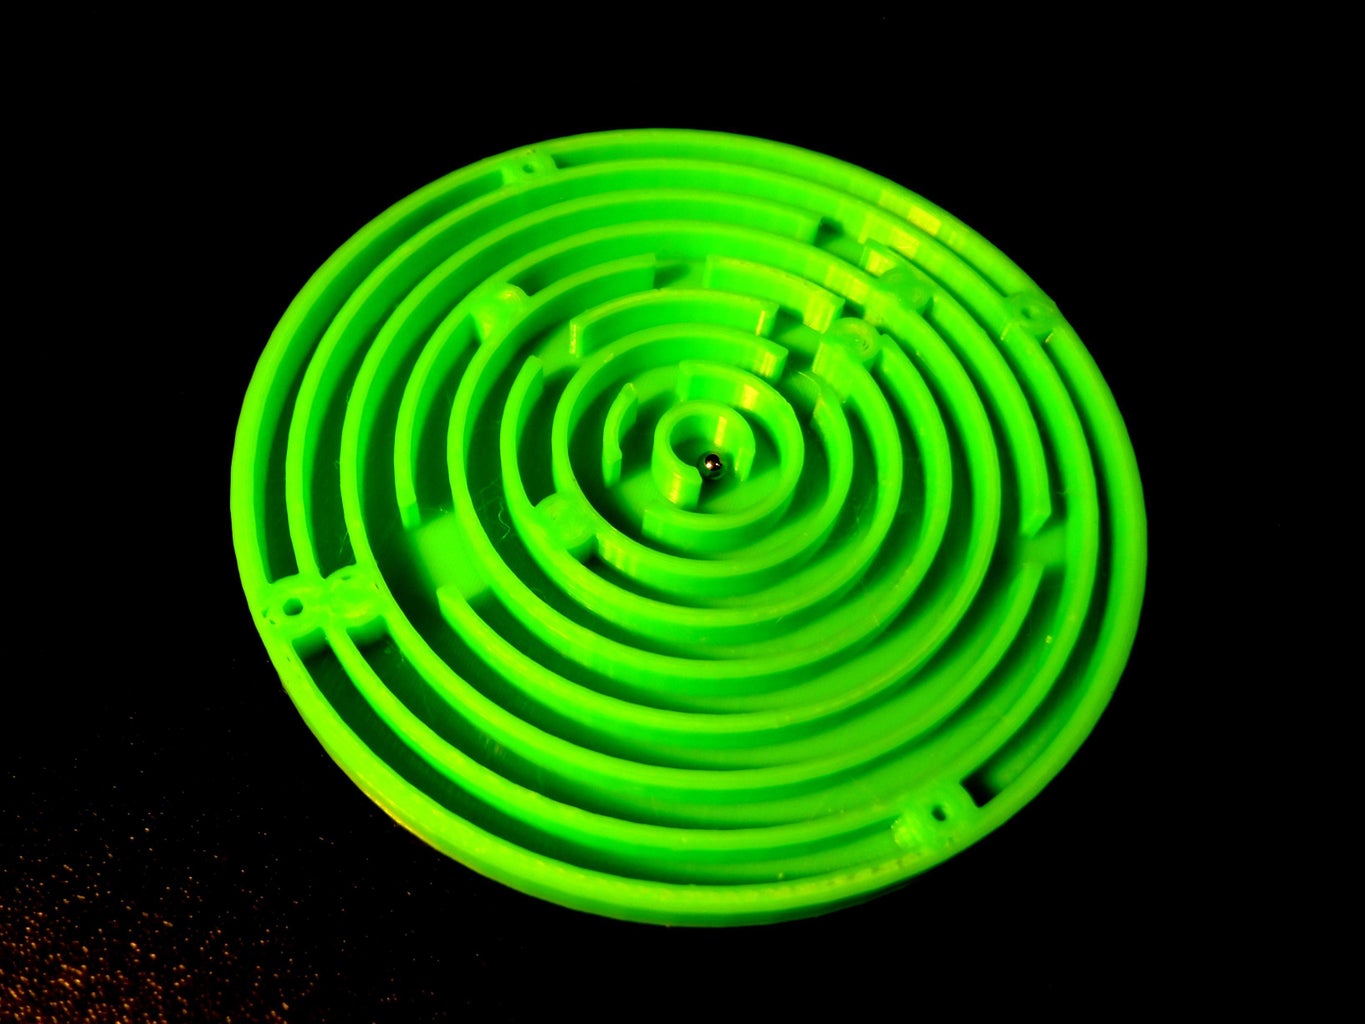
The generated mazes will be of the circular type complete with barriers and gaps to suit a 3mm ball bearing.
Size: 90 mm (dia) x 6 mm (H).
Supplies
3D printer filament (In this case Green PLA), although colour and material type are subject to user preference.
Clear Acrylic Disk 90 (dia) x 2(H) mm
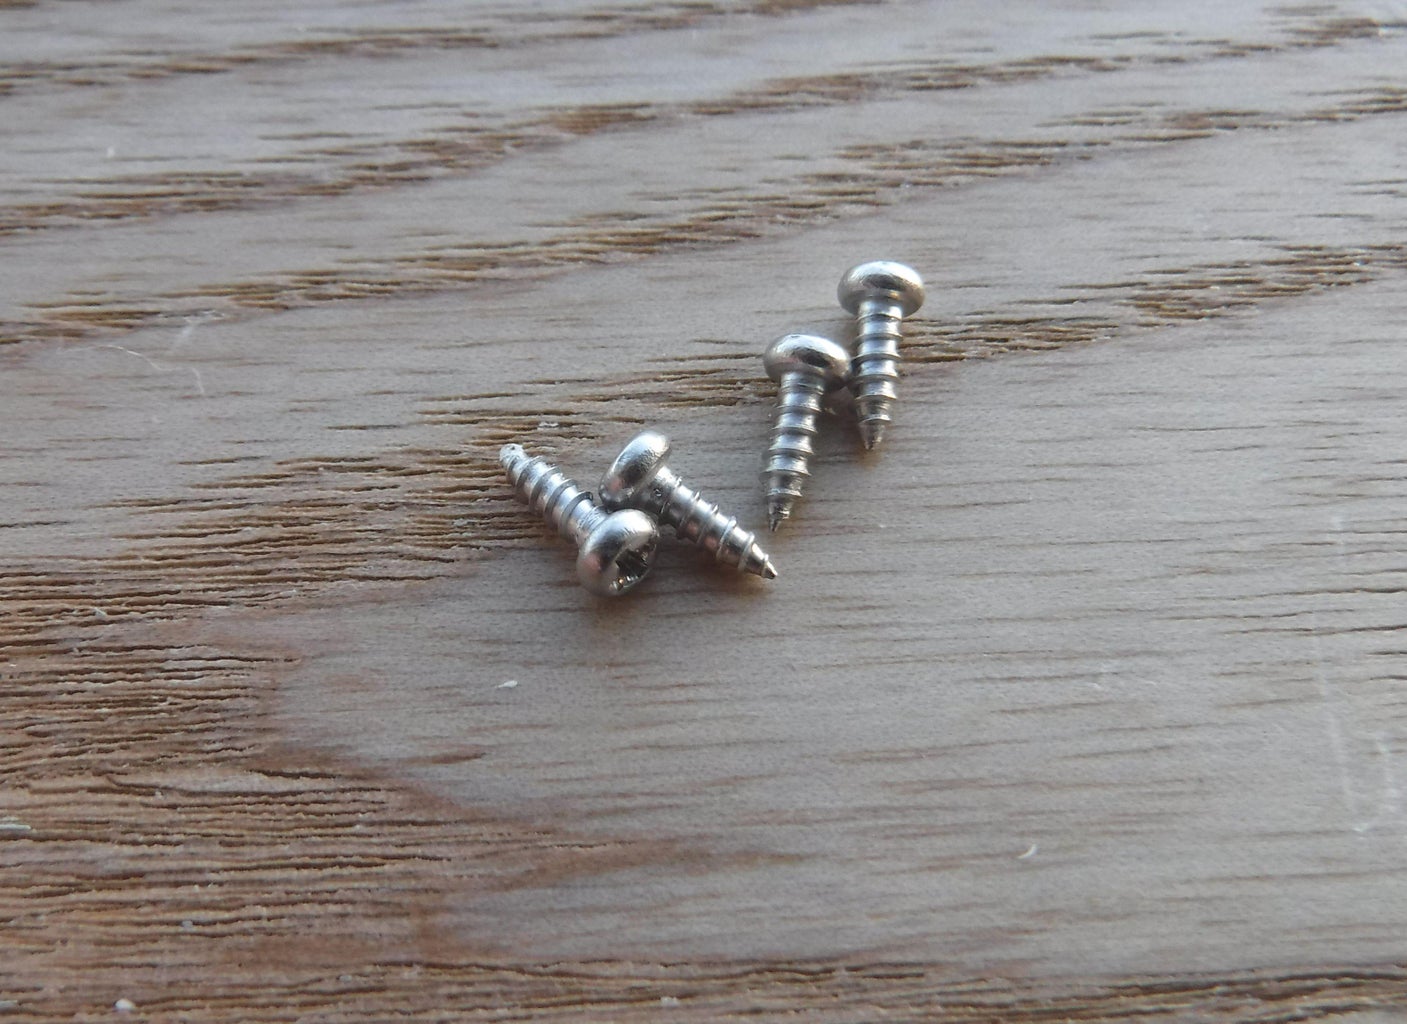
Self Tapping screws M2 x 6 mm
Ball bearing 3mm diameter.
May prove more cost effective to buy a range of items rather than individually, unless you already have them available. Some parts may also have a MOL greater than the quantity specified in the supplies list.
No affiliation to any of the suppliers, feel free to obtain the items from your preferred supplier if applicatble.
Links valid at the time of publication.
Tools
3D Printer
Cura or other similar slicing software.
Drill
2mm drill bit
Scalpel
Needle files
Sandpaper
Screwdriver
Clear tape
Know your tools and follow the recommended operational procedures and be sure to wear the appropriate PPE.
Step 1: Design Considerations
1: Channels to suit a bearing neither too large or small as this affects channel width and overall size. Chose 3mm ball.
2: Overall size to enable it to be manipulated with two hands without obscuring the maze and not too large to enable manipulation with one hand. Settled on 90mm diameter as this accomodates existing acrylic discs negating cutting.
Step 2: Code


The code is created using TinkerCAD CodeBlocks.
Its broken down into the four main blocks to illustrate the actual process.
A series of 9 circles of increasing radius are generated centred around the same reference point (X0,y0).
The walls of the circles are 1mm thick with a step increment of 5mm creating a 4mm channel width.
Gaps
First: If the current circle is less than the ninth circle in the series randomly[1] create a gap.
[1] Randomly generate an integer number from 0 to 360 degrees.
Secondly: If the current circle is greater than the first and less than the ninth randomly[2] create another gap.
[2] Randomly generate a non integer number from (0 to 1130)/3.142 creating numbers from 0 to 359.6435
Even if the same seed is used to generate the random numbers the gaps will be in different positions, this greatly minimises the likelyhood of dead ends.
E.g. If the first random number is 360, (gap=360) and the second is 360, (gap_alt=(360/3.142)=114.5767), creating gaps in two different locations, increasing the possibility of exits.
Barriers
A similar methodology is applied to the Gaps as is applied to the Barriers but only one barrier per iteration, which on the whole creates fewer random[3] barriers than gaps, minimising the likelyhood of unsolvable puzzles.
[3] If the current circle is greater than the first and less than the eighth randomly[1] create a barrier.
Screw Holes
Place a hollow cylinder at 90 degree intervals around the outer edge of the eighth circle.
Base
Create a flat base that ties all the circular channels, gaps and barriers to a solid object.
The basic generator does not check for a solution although it's designed to maximise the probability of a solvable puzzle. Therefore, verify the mazes can be solved prior to use.
Each time you run the code a different maze will be generated.
The CodeBlocks can be executed and the resulting file(s), can be found here: Maze_Generator(basic)
Step 3: Printing

Print Details:
Layer height: 0.15 mm
Infill Density: 100%
Base Adhesion: Skirt
No supports
Size: 90(W) x 90(D) x 6(H) mm
Print Time: ~3Hrs
Weight: ~23g
An example STL file for a solvable maze is included see (round_maze.stl), below.
Attachments

Step 4: Post Processing
Check for aberrations in the channels and clear with fine sandpaper, scalpel or needle files as is appropriate to ensure that the ball bearing runs smoothly.
Step 5: Cover

The puzzle is designed to accept a circular transparent cover with 4 fixing points at the cardinal points for M2 screws. This will ensure that the ball bearing is not easily lost.
Align the transparent cover with the puzzle and hold it in place with clear tape overlapping the location of the holes.
Mark the location of the holes with a fine tip marker.
Carefully drill out the holes using a 2mm drill bit.
Remove the tape and any swarf from the holes and channels.
Before fitting the cover be sure to place the ball bearing into the maze.
Using 4 x M2 x 6mm self tapping screws secure the cover in place.
Step 6: Finally
Happy puzzling and that's all for now, until the next time.


