

Introduction: Concrete Youtube Diamond Play Button Paperweight


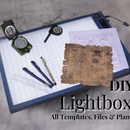

Hello Instructable... And my viewers... Today I'm going to make a project on the occasion of this concrete competition and also as I recently surpassed 500 subscribers on my channel "Infinity Workshop" on youtube... As we all know that after completing some milestones, youtube basically gives us 3 awards... Silver award for 100k, gold award for 1M & Diamond play button for 10M subscribers..... But as I'm still a small creator and my channel is taking way time to even reach 500 subs (1 year and 2 months)... I decided to give an award to myself... So I decided to make this project.....
In this project, I made a mini Diamond play button replica with cement... Which can also be used as a paperweight in my daily work...
So without wasting any more time... Let's get started...
Step 1: Things We Gonna Need...


For making this kinda awesome looking project just from scratch... We will be using just a few items...
- Templates for printing
A4 hard cardboard paper
Craft glue.
Clear lacquer
Clear tape
Cement(Good quality one)
Chisel set
Exacto knife/hobby knife
Sandpaper
Resin
Files
Step 2: Making the Templates...


For making this project easily, we Firstly have to make our own templates for the diamond play button... One thing to notice here that if you have a 3d printer then you can easily make the 3d model into that format... But as a maximum of us don't have a 3d printer... So I decided to make paper templates which will be later used as the mold... If you want to make the plain and simple play button then the process is very easy... But as I am making this as a diamond button replica... It must have those designs.....
But don't worry... I made the templates for you guys and give you all totally free...
Link~ https://infinityworkshop.in/product/diy-diamond-play-button-paper-templates
my channel- https://www.youtube.com/channel/UCySf3QlXc-e5E20JE...
Pls, give me a subscribe on my channel as that will help me to continue making this kind of things...
Just take the templates and scale according to your need... Feel free to contact me for any help...
Step 3: Printing and Assembling the Mould


For this step, we gonna have to print the given templates on a hard a4 sheet... It's better if you can find a partially waterproof paper(full waterproof is best)...
Here I'm using my laser printer on an A4 cardboard stock paper... Be sure for the scaling..... Because every printer does scale every page my their own ratio...
After the templates are printed, it's time to cut out all the parts and assembling them... I made the templates in such a way... So everyone can do this job...
For assembling the templates we have to firstly fold the templates according to the lines given and the hints given. If a line has 2 crossing line then the fold will be mountain fold, and if the line has 1 line then the fold will be valley fold... follow these and fold all the pieces
Use craft glue and stick the flaps to attach the pieces ...as this will be the mold, so the flaps are needed to stick from outside...
similarly, make the inner crystal piece... and fix it in the open hole...
Be aware of any open space of holes...
Step 4: Sealing the Mould


After the mould is made..its time to seal the mould with something...as the paper is not a very good material for pouring cement, so we are going to make the mould more water-resistant...
for this job I used clear lacquer as I only had that...you can use spray colour if you have, to make a protective waterproof layer from inside...
make sure to cover all the surface from both inside and outside...
I almost used 3 coats for the job...
Step 5: Mixing the Concrete

Its time to mix the concrete mixture... But make sure beforehand that the mold is dried well... otherwise, it will be a messy job...
Take a good quality cement in a small mixing cup and mix with some water... it is suggested to use less water as the more you add water the more the mixture will be hard to mold into...
The quality of the cement is important because that will help to case good pieces...
Step 6: Pouring the Concrete...


Now take time and fill a very bottom layer of the mould ....and shake that well to remove any bubble trapped inside...
repeat this process several times to fill the mould with cement... Here I want to tell you guys something that I made the mould in a way that you can easily vary the height of the casting with just pouring less concrete...so keep that in mind Now if you wanna strengthen the mould further you can use clear tape from outside to make the walls more water repellent...
Step 7: Let It Set...

After filling the mould with cement, the cement has to leave for about 12 hours at least ...so the cement sets properly...
Otherwise, the casting will be nothing other than a big mess...
the suggested time is 24 hours...
Step 8: Demoulding the Piece


After the casting is dried well, its time to demould the piece...
For the job it's only a matter of peeling off the mould, which was made from p=only paper or cardboard... after demolding the piece keep the casting in the water for 1 minute and let it soak water well... after that take the casting out of the water and leave it for drying by itself...
These steps seem to be very easy but these are the most essential steps...
Step 9: Fixing the Casting


After the casting is done, You can see some minor or major issues with the design as the cement does not play a very good role in the molding process.... there are plenty reasons of that case...
So if you also found some imperfections in your casting, don't worry about that, as we can fix those with very minimal effort... For the overcast areas, we can simply use a hobby knife and some chisel to remove excess material and make the edges crisp and tidy
and for the low or under casted areas, we can simply add some more cement and make some positive space in those areas... and that can be later fixed with some sandpaper and chisel...
The job is very easy to do.. just some time-consuming...
Step 10: Making Resin Slab


Dor making the crystal part we are going to make a resin slab that can be fitted inside the cavity formed earlier.
For making the resin slab... we just have to mix some clear resin and let it set in a container...(from which it can be taken out easily...)
Make sure to make the slab well thick for the process.. as extra material can be easily removed afterward...
Let the resin cure as much time it takes...
Step 11: Making the Crystal


After the resin is cured...its time to complete the crystal...
firstly demold the resin slab from its casting container...
stick the template piece printed earlier...
cut out the triangle shape from the resin with a coping saw...
Use sandpaper and make the corners and the sides smooth and nicer...
Use files and sandpaper to add the taper on the crystal just as the original crystal...
** Here I left the crystal with the frosted look because as I used a different material for the play button body, its better to make some changes on the crystal part also...its just my preference... you can polish the crystal and can make it clear
Step 12: Shaping the Casting


In this step finish any left overwork of finishing the casting...or the crystal...any left overwork have to do now as the crystal is set, it's hard to do the work....so finish the work...
One thing to notice here that I made a groove at the backside of the casting as it will be used for sticking my channel log...You can stick anything as you want...or leave that as it is...
I also rounded and smoothed the lower corners to make the casing more durable over time...
Step 13: Placing the Crystal and Sealing the Concrete...


After all the previous steps are completed, its time to seal up the concrete...because as we all know that concrete is not a good friend with moister... also if we leave the piece without sealing it properly..it may fall apart and lose its detailings after some months...
So for sealing the concrete there are several ways but I am using the only way I have right now... I simply sprayed the clear lacquer over the casting and made 2 coats.... this not only sealed up the concrete but also gave the cement a vibrant finish .. contrasting the color...
similarly, I applied some clear lacquer on the crystal and let everything sir for some time...
After all, things are dried...I simply used some hot glue to attach the crystal into the cavity...
Step 14: We Are Done....


And we are done...Congratulation on making your own youtube award which can also be used as a paperweight on your desk... Yes, the result might be not up to the mark as many of your tase... But for a project like this in the budget... I think that this turned out great... especially this is completely made without any power tools...
After all these madness with cement and concrete,
our puzzle is finally done and ready to share with others...
Notice one thing...
as the whole process is done manually and with zero power tools, the final piece is not perfect as 3d printers or any other similar methods... I think this is a good opportunity to learn some new skills and making my own award is a great achievement...
For more details and a full video tutorial you may also go to my youtube channel where I will upload the whole process from start to end with more details...(as soon as I can finish the editing...)
Thanks for having a look at this project...
Pls vote this Instructable and also subscribe to my channel for more upcoming content...
** For any other step details and help ..Feel free to comment down...with your thoughts, questions, and suggestions...
Also if you want to see more of my creations.. subscribe to my youtube channel "Infinity workshop". *
*Follow Infinity Workshop
Facebook: https://www.facebook.com/InfinityWork...
Twitter: https://www.facebook.com/InfinityWork...
Pinterest: https://www.facebook.com/InfinityWork...
Instagram : https://www.facebook.com/InfinityWork...
Instructables: https://www.facebook.com/InfinityWork...
-----------------------------------------
## Consider supporting my channel by giving like, share, comment & Subscribing #Infinity_Workshop Thanks for supporting...
Runner Up in the
Stone, Concrete, Cement Challenge


