

Introduction: Controlling an Arduino Based Rover With IR Remote


Want a quick, inexpensive way to control a robotic rover wirelessly? In this Instructable, we will be adding Infrared Remote Control to a RobotGeek Geekbot, though you can use the code we provide to control any rover using continuous rotation servos as the wheel drive system. Just press a direction on your remote, and your robot will roll out!
Step 1: Project Parts List
This is the project parts list, assuming you will be adding this control scheme to a RobotGeek Geekbot. If you already have your own rover, you can skip picking up the Geekbot and integrate the IR receiver into your rover.
- 1 x RobotGeek Geekbot V2
- 1 x RobotGeek IR Receiver
- 1 x Infrared Remote, such as a TV Remote from Goodwill, or something like the Mini IR Remote Control
If you are making your rover from scratch, we recommend picking up the following parts:
- 1 x RobotGeek Sensor Shield: This simplifies wiring dramatically, saving you from wire snags that come with the territory of putting a breadboard on a rover. It will be assumed in the wiring section that you are using this shield.
- 1 x RobotGeek IR Receiver: There are plenty of IR Receivers on the market, but we recommend this one to cut down on wiring mess, and because it functions very well
- 2 x RobotGeek Continuous Rotation Servo: You will need continuous rotation servos for the wheels. These are the same as those included in the Geekbot Kit.
- 1 x Infrared Remote, such as a TV Remote from Goodwill, or something like the Mini IR Remote Control
- 1 x Lithium Ion Battery: We recommend this battery because of its reasonable weight to energy storage ratio and stability. This is the same battery as is included in the Geekbot Kit.
If you have an Arduino already and you like the design of the Geekbot chassis, you could instead get the V2 Core Kit, a Sensor Shield, and an IR Receiver to cover the components.
Step 2: Assembly

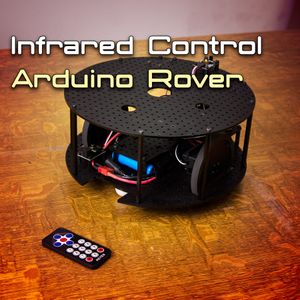
If you are building this using the Geekbot, follow the Getting Started and Assembly Guides on the RobotGeek Learning Site. Once you have completed that, return here to finish this project. The IR Receiver is simply bolted to the top deck of the Geekbot as shown in the picture above. We placed it with the sensor aimed off the back of the rover, as most of your commands will be coming from this angle under normal circumstances.
If you are building a rover from scratch, here are a few things to keep in mind so that it works well with the code we will provide you:
- The drive system should be made of two Continuous Rotation Servos, one for the left wheel, and one for the right. Continuous Rotation Servos respond to the servo library, enabling us to control the rover quickly and accurately. Our code is written to control this type of servo.
- Your continuous rotation servos should be mounted with the drive horn facing outward. If your drive horn faces in toward the center of your robot, it will move in the opposite direction you were expecting.
- Mount your IR Receiver at the top of your rover, with as little to no obstruction as possible. Infrared relies on line of sight between the emitter and the receiver, and obscuring the receiver in any way will make your rover miss commands. Runaway rovers, while occasionally fun to chase down, can be dangerous.
Step 3: Programming Your Remote

We will be using the same libraries as we used in the Using an IR Receiver with Arduino lesson.
Once you have installed the libraries, follow along in the lesson for Using an IR Receiver with Arduino to set up your remotes.h file. We will be dropping the code from this into the remotes.h file for the Rover.
It's a good idea to go through the lesson now to understand the concepts of determining the remote's protocol and grabbing the proper hex code for each key press that we will be using to operate the turret with your remote. If you would rather not, we'll quickly go over using the wizard to grab the code for the remotes.h file.
Load is the IR Remote Wizard. You can find it under:
File → Examples → IRLib → IRremoteWizard
Load the sketch on to your board, open the serial monitor, set it to No line ending in the new line / carriage return dropdown, and follow the prompts.
The first prompt will ask you to press buttons on your remote. This step automatically finds the protocol of your remote on receipt of a signal. Type 1 in the bar at the top and press Enter on your keyboard or click Send in the top right corner.
The next lines that will show up say:
Protocol Section Finished. Start Button reading.
Press the button for RIGHT_BUTTON
Follow the instruction and press the corresponding button on your remote. Upon receipt of the button press, the serial monitor should now read:
Button Found:3EB92 Send any character on the serial monitor to continue
Follow the instruction, repeating the process of typing a character into the top bar and sending it, followed by pressing the corresponding button on your remote. This will continue through asking you for directional buttons, a select button, numerals 0-9, and two buttons of your choosing.
Once you have completed this process, it will spit out a block of code that looks like this:
IR Code Block:

const unsigned long MY_PROTOCOL = SONY;
const unsigned long RIGHT_BUTTON = 0x9EB92;
const unsigned long LEFT_BUTTON = 0xDEB92;
const unsigned long UP_BUTTON = 0x9EB92;
const unsigned long DOWN_BUTTON = 0x5EB92;
const unsigned long SELECT_BUTTON = 0xD0B92;
const unsigned long ONE_BUTTON = 0xB92;
const unsigned long TWO_BUTTON = 0x80B92;
const unsigned long THREE_BUTTON = 0x40B92;
const unsigned long FOUR_BUTTON = 0xC0B92;
const unsigned long FIVE_BUTTON = 0x20B92;
const unsigned long SIX_BUTTON = 0xA0B92;
const unsigned long SEVEN_BUTTON = 0x60B92;
const unsigned long EIGHT_BUTTON = 0xE0B92;
const unsigned long NINE_BUTTON = 0x10B92;
const unsigned long ZERO_BUTTON = 0x90B92;
const unsigned long SPECIAL_1_BUTTON = 0x481;
const unsigned long SPECIAL_2_BUTTON = 0xC81;
Copy this code from your serial monitor, you will need it.
We will now download the Geekbot Demo code from Github, extract it to your Arduino folder, open the sketch under:
File → Sketchbook → Geekbot → IRgeekbotV2
You'll see at the top two tabs, one marked IRgeekbotV2, and one marked remotes.h. Click on remotes.h and you should see a list of remote definitions, followed by code that looks very similar to the code you just made. You can replace the similar code of one of the remotes or add a definition and #elif statement. The main things to consider are:
1.) The definition of the remote you're using. On line 1, you will see:
#define REMOTE_TYPE MINI_REMOTE_1
Change MINI_REMOTE_1 to the name of the remote you would like to use.
2.) The #elif statement. Before the #endif statement, you can add your remote with a line like the following:
#elif REMOTE_TYPE == MY_REMOTE_NAME_HERE
followed by the list of const unsigned longs you got from the wizard.
3.) The const unsigned long integers. You can add any number of buttons that exist on your remote by adding definitions to this list with names corresponding to the hex values you received in the earlier steps preceded by 0x, to indicate that it is a hex value.
Now you can upload the sketch to your board, and everything should be working!
Step 4: Wiring

| Device | Sensor Shield Port |
|---|---|
| Servos: | |
Left Drive Servo RobotGeek Continuous Turn Servo | Digital Pin 10 |
Right Drive Servo RobotGeek Continuous Turn Servo | Digital Pin 11 |
| Input: | |
IR Receiver RobotGeek IR Receiver | Digital Pin 2 |
| Output: | |
Right LED RobotGeek LED Driver | Digital Pin 4 |
Left LED RobotGeek LED Driver | Digital Pin 7 |
(Optional) Buzzer RobotGeek Buzzer | Digital Pin 8 |
Hook up your Rover as shown in the diagram above. Mind your jumpers, making sure that the jumper for pins 9, 10, and 11 is set to VIN.
Step 5: Try It Out!
You should now be able to switch on your rover and start moving! With a single directional button press, your rover will take off! Pressing an unassigned button, or hitting the Enter/Select button will stop the rover. Pressing a number will change the speed of the rover.
There's plenty to do with your IR controlled rover! You could mount a Pan/Tilt turret on it with a camera to get awesome chasing shots, or mount a foam dart gun and sneak up on opponents in a nerf battle. If you want to get two of them going, you can use two different brands of remotes. With two rovers, you could have a robot soccer match, a race, or pit them against each other in a sumo match! There are so many things you can do with a robotic rover, we'd love to hear about what you come up with!


![Tim's Mechanical Spider Leg [LU9685-20CU]](https://content.instructables.com/FFB/5R4I/LVKZ6G6R/FFB5R4ILVKZ6G6R.png?auto=webp&crop=1.2%3A1&frame=1&width=306)


