

Introduction: Custom Canvas Sneakers


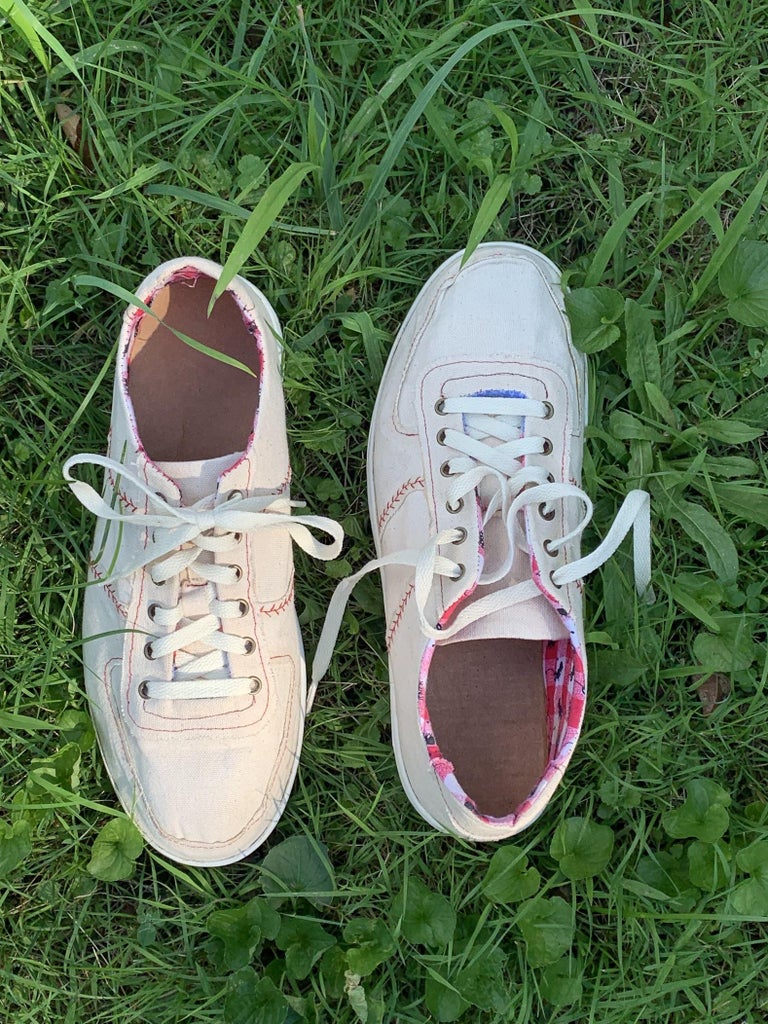
Here is the pair of sneakers I designed and made. They were inspired by Nike's Airforce 1's, and baseball. In this Instructable I will go over the steps I used to create these sneakers, so that you too will be able to design and make your own custom sneakers!
Supplies
- Canvas
- Fabric for lining (I used thin cotton because I liked the pattern on it, but I am sure anything would be fine)
- Corrugated cardboard
- Grommets (I used a kit that came with a punch)
- Thin sheet of foam (for structure and padding in the tongue and heel)
- Sneaker rubber outsoles (I purchased mine from Etsy)
- Laces
- Homasote (for the lasts, possibly optional but it did stiffen them up a bit making it easier to poke pins in)
- Contact cement and a brush to apply it (make sure to use in a well-ventilated place and wear a mask)
- Duct tape
- Masking tape
- Sewing machine with heavy duty needle
- Scissors
- Pins
Step 1: Making the Lasts


To make the "molds" (lasts) that I will eventually wrap my shoe around, I glued sheets of cardboard together to create the basic form of my foot. The bottom layer is made from Homasote, which stiffened up the last. Use the rubber outsole as a guide for the bottom layer of the last. I took measurements of my feet (see diagram) and the lasts as I went along, but they weren't perfect, so I taped on some extra material. The duct tape actually strengthened the lasts and held them together nicely, so even if your lasts are a good size, I would still recommend adding the tape. It is important to cut the lasts into two pieces, so that they can easily be removed from the sneakers at the end. I cut a puzzle piece shape in the Homasote so that the two pieces would stay together a bit better.
Step 2: Making the Pattern
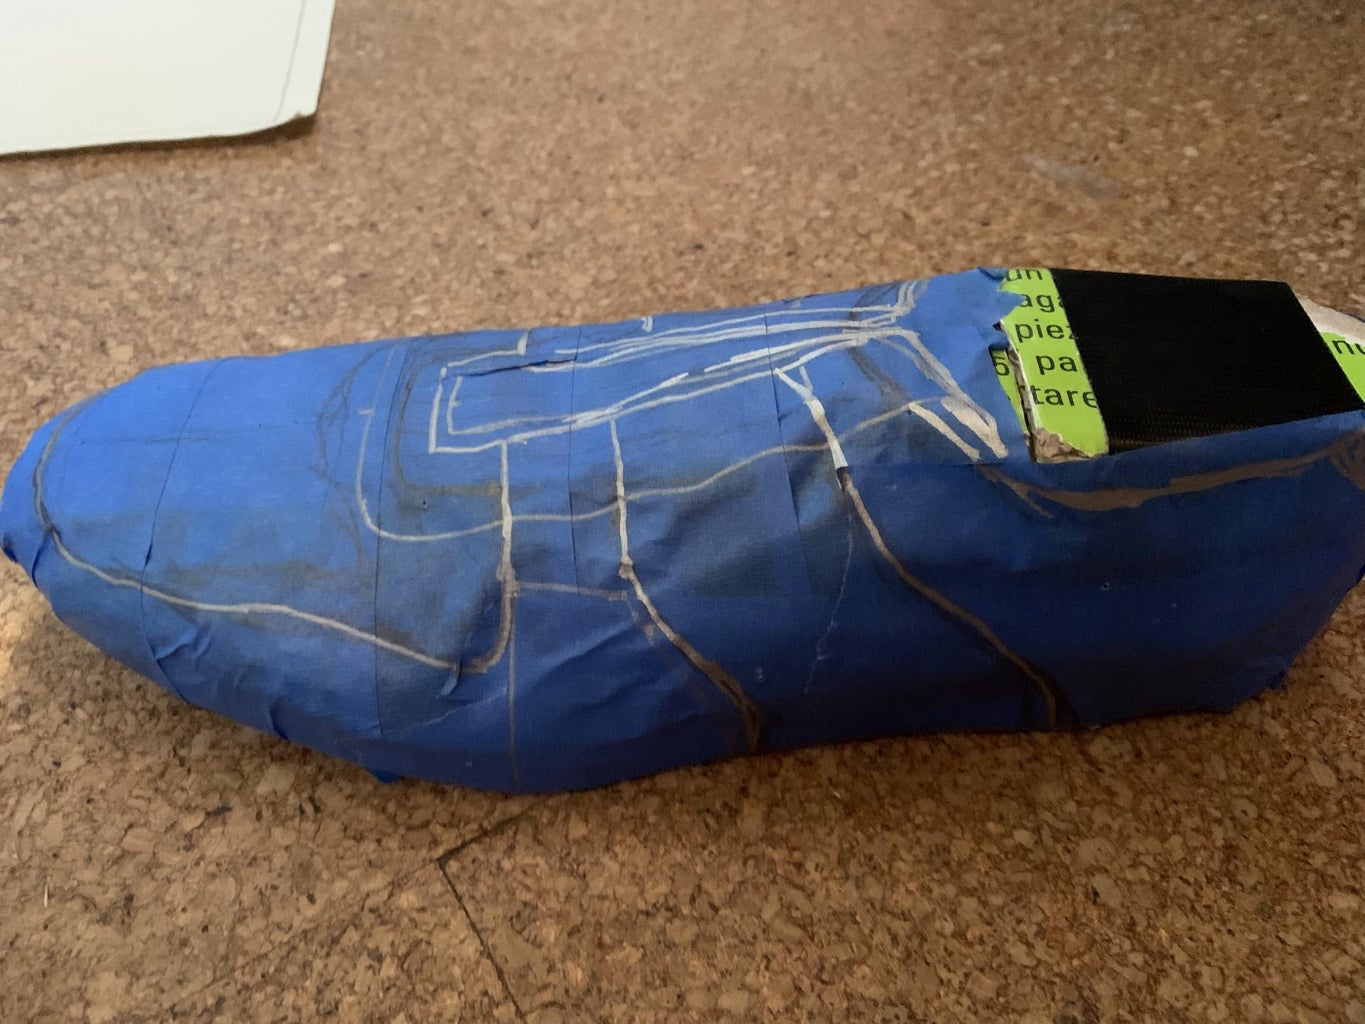


Once I was happy with the shape and size of my last, it was time to start thinking about the pattern of the sneaker. To do this, wrap your last in a layer of masking tape and draw on your desired pattern. Now, cut the tape at the heel and peel it off. Stretch out this layer of tape onto a flat piece of paper. Now trace out each individual piece onto separate paper, making sure to leave room for seam allowance and overlaps. This process took some trial and error to get a nice pattern. I would recommend quickly making a mockup sneaker out of some scrap fabric to make sure you like the design before spending too much effort.
Step 3: Cutting the Fabric


Once happy with the pattern, trace out all the pieces onto the canvas and start cutting (be very careful to leave room for overlap if your design calls for them). The lining material will also need to be cut out. the liner doesn't need all the individual shapes that are on the outside since it won't be seen.
Step 4: Gluing/Sewing the Upper


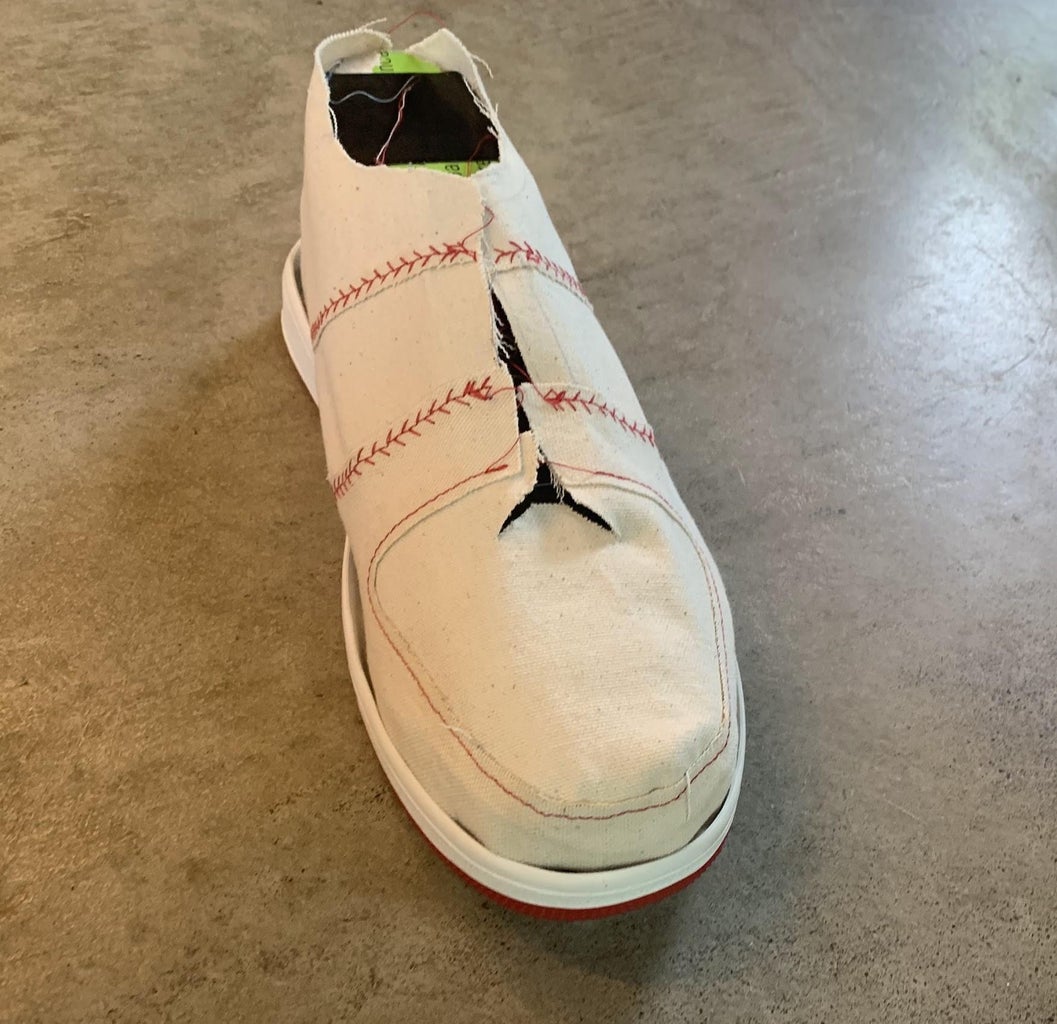


Now it is time to start sewing the upper! Instead of pinning each piece together, I found that using contact cement to tack the pieces together and then stitching over worked best. This was especially helpful for some of the more 3d sew lines (like the one around the toe). Once they are all sewed up, it is a good time to check how they fit on the lasts. It is ok if they are a bit tight because we will be stretching them over the lasts, but if they are very tight or loose, I would suggest that you restitch the heel seam.
Step 5: Adding the Lining

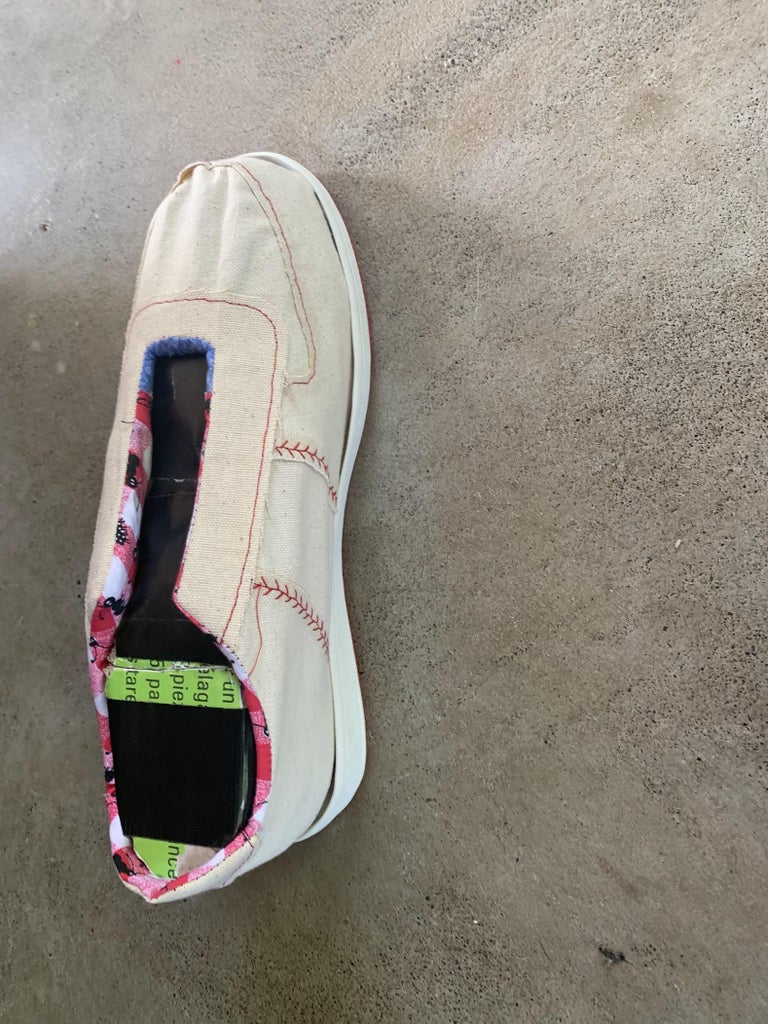
Place the lining inside out on the outside of the canvas. Stitch around the top, where the ankle and tongue will go. Once done stitching, pull the lining through the foot opening so that the canvas is on the outside and the lining is inside. I had to cut off some of the extra seam allowance so that it wasn't too lumpy.
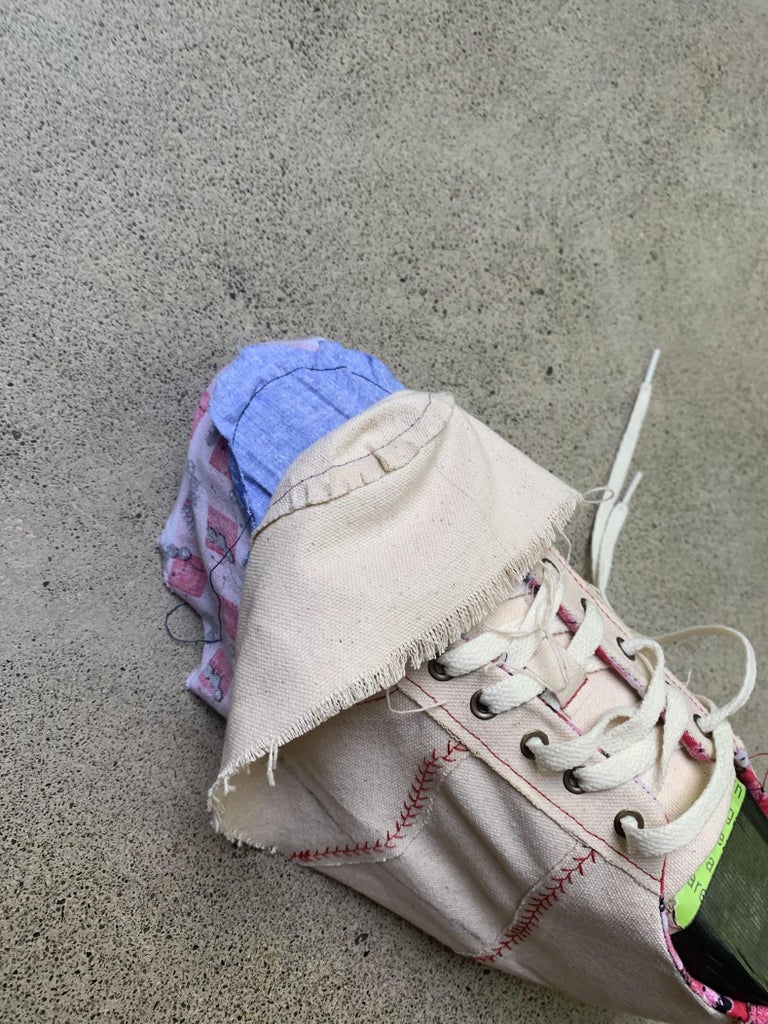
Step 6: Grommets and Tongue


The tongue was just a layer of canvas, and a layer of liner sewn up on three sides, and then turned inside out. I then added a thin piece of foam to give the tongue a bit of padding. I added 6 grommets on each side, spaced 3/4" apart.
Step 7: Wrapping the Upper Around the Last


I started this process by pinning a piece of corrugated cardboard (that fit snuggly into the sneaker soles) to the bottom of my last. If I were to make another pair, I would use a piece of leather since it would be more durable, but in terms of comfort, I was happily surprised by the cardboard. I glued in a small piece of foam to the heel to add padding as well as a bit of structure (similar to the tongue). I then used contact cement to glue the lining to the piece of cardboard on the bottom. It is important to stretch the lining taut to avoid wrinkles on the finished shoe. Next, glue the canvas to the lining and stretch it tightly around the bottom as well. I found that the contact cement gave the fabrics a bit of structure and helped to keep the form of the toe box in a similar way that a stiffer material such as leather would do. Try to avoid any wrinkles, and trim off excess fabric around the bottom, making sure to leave about an inch of overlap. Remember, when using contact cement, make sure to be in a well-ventilated place and wear a mask.
Step 8: Attaching the Rubber Outsole


Before adding any glue, put the sole onto the sneaker. Lightly trace around the edge to mark for gluing. Now add contact cement to the inside of the outsole, as well as the bottom of the upper, making sure not to get any glue above the traced line. Now press the outsole on! Once everything has dried (and stopped reeking of contact cement:) it is time to remove the last. This can be difficult, and you'll be happy that it was cut into two pieces.
Step 9: Enjoy


The sneakers are done! Now just add an insole and try them on! Hope you enjoyed this Instructable:)

Second Prize in the
Wear It Contest


