

Introduction: DIY Wooden Sunglasses With Veneer


In my previous post I explain how I made a pair of glasses with the CNC.
This time I will show you how you can achieve them without any special equipment, but only with tools everyday.
Here's what you need:
- Sheets of veneer
- PVA glue for wood
- Jigsaw
- Manual milling type Dremel (I bought a Dexter at Brico)
- Drill
- Dand paper
- A bit of manual dexterity
Some time ago I had a couple of sunglasses of Armani that I never changed but after 10 years they had loose, the lenses were rifled and the hinges did not take more so I decided to groped to make a replica to wear them again.
I describe the various phases of work for those who want groped in this enterprise.
You can see my original post on my blog
Step 1: Define a Shape


First you need to design a shape , in my case I started by placing a sheet of paper on the frame and tracing shapes that then photographed with the phone, imported in a CAD and splines I rehearsed lines.
After developing the shapes I exported in DXF and reworked with a CAD/CAM to engrave with laser on the veneer that will help me later to have a clear line path.
if you don't have a laser cutter you can drawing the shapes with pencil or printing them on the paper.
To facilitate them a little work I have built a small benchwhere I mounted a jig saw and a mill manual.
Step 2: Choose the Wood Essence

The great thing about using the veneer is that you can paste layers of different materials and colors to create a pattern on the thickness, for example by inserting between the inner layers of a material darker or lighter.
In this project I used a single type of material but I already have other models made with different woods.
The most important recommendation I can give is that the various layers can expect when glued must have the veins crossed or they will become brittle and tend to embark
Step 3: Support for Bonding


If your front frame is bended so you must build a support for bonding.
If you don't have a cnc is not a problem, you can cut with the jig saw the two shape (see the images).
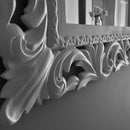
As you can see in the picture below I milled about 2 blocks a silhouette female and one male inside of which will be pressed wood veneered .
Step 4: Bonding


Now just sprinkle the layers of glue and press them into the mold just created.
I slightly stretched the glue with water for two reasons: it is easier to roll out being more liquid penetrates better into the wood fibers more firmly tying the layers.
Another important tip is to put the plastic between the sheets of veneer and the mold otherwise if it were to come out of the glue will become a single block.
Step 5: Shape the Profile


With a drill I removed two insides of the lenses and then I finished with the jig saw.
For convenience I mounted the jig saw under a plan to use it with much more precision as if it were a band saw.
I used a blade for iron because the wood has teeth too aggressive and could tear the fibers.
To shape the contours better I mounted the drill (Dremel type) instead as if it were a moulder and using the cylinder with sand paper I have defined all the contours.
The incision made by laser on the first sheet of veneer helped me to follow the contours.
Subsequently with sandpaper I softened all forms.
Step 6: The Arms


With the same technique of bending I also glued the temples which then cut with the jig saw and finished with sandpaper drum.
Step 7: The Bevel


The bevel groove is where fit the lenses and it is quite complicated to implement (for me).
In my first pair of glasses it I made this myself and it was a real pain...
I found the Brico a tool for a Dremel with which I could make the two bevels with much more ease.
Still using the manual mill mounted upside on I realized the two grooves that then I rehearsed it with a hand cutter round head.
The front is almost ready and I can not wait to see them finished.
Step 8: Hinges


I made the hinges directly from the temples and the front milling of the joints.
To mill the front I built a support to be able to keep still and squarely.
If you don't have a cnc you can cut the hinges with the jig saw (is not complicated) ...
Step 9: Finish


To make it more glossy and protected the wood I rubbed with oil wooden Tung (much better than linseed oil) that has a tendency to polymerize and thus to make more impervious the fibers.
For this pilot project it took nine hours of work for more than a few sleepless night thinking about how to assemble the various components.
Step 10: Union of Different Materials


I have realized 3 prototypes using different materials to create a pattern on the thickness:
- burl wood and rosewood
- birch and wenge
only birch
I'm Italian, sorry if some sentences were not accurate.
Thanks for reading, I hope you enjoyed...


