

Introduction: Flock a Figurine With Spray Adhesive


Remember those tacky velvet statues from the 60s and 70s? Well, they weren't technically velvet, they were flocked! (And in my opinion, tacky in the best way :D) Flocking refers to the process of depositing teeny tiny fibers on to a surface to create smooth matte texture.
In this project we'll be using all-purpose spray adhesive, to transform a dingey figurine from the past into modern decor. A quick coat of paint and spray adhesive makes this project perfect for the weekend or weekday evening.
Spray glue is awesome because it dries so quickly and can be substituted for white glue, hot glue, tape, and other adhesives, just be sure that the adhesive you are using can be bonded to your project materials. Spray glue tacks quickly and forms strong bonds in very little time. Because you are spritzing a high-tack adhesive onto a surface, it has very little surface penetration. This characteristic makes it ideal for forming bonds with everything from paper, cardboard, fabric, and foam to plastic, metal, wood and much more. Some are fabric specific, rubber specific, or even temporary.
If you're ready to learn more awesome adhesive tips and tricks, be sure to check out my free Glue Class and while your learning new things, be sure to check all the awesome classes on Instructables.
Step 1: Materials
This can work with any figurine, or really anything I suppose, so use your imagination. I found this particular figurine in a box of things my mom had given me a few years ago - I had painted the dog at one of those Glaze-your-own ceramic shops in 1997, I was 10. It didn't really work in my current apartment, but I thought it would be fun to dress up this piece of history and turn it into a keepsake I still want to hold on to.

Materials Needed
Step 2: Flocking the Figure
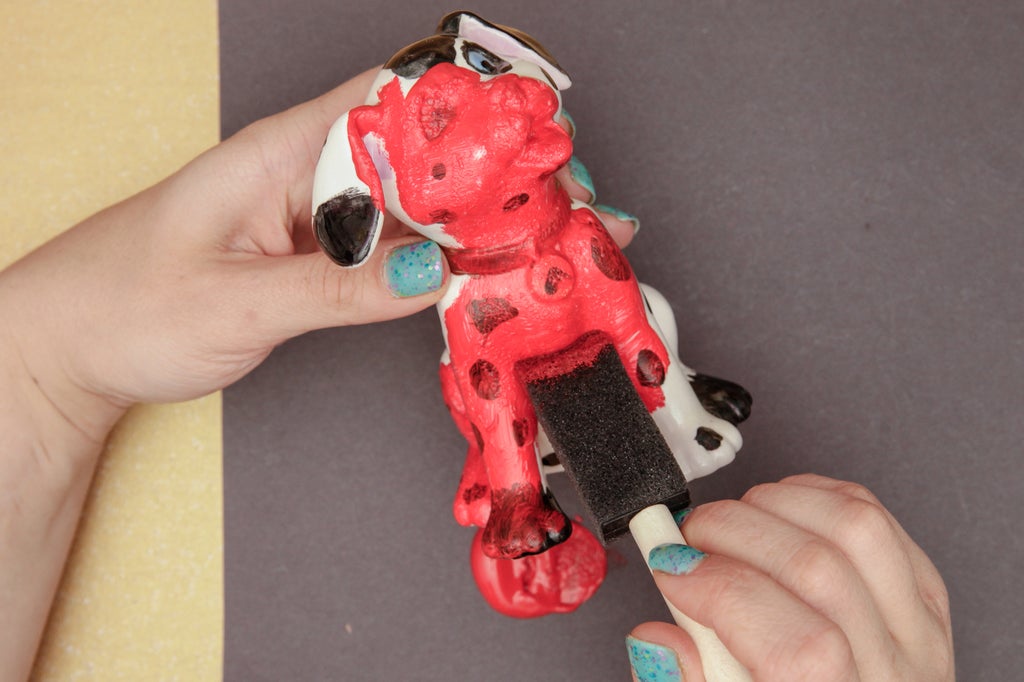
Start by painting the figurine with acrylic paint. Depending on the surface material you are painting, you may need multiple coats of paint. Acrylic paint bonds really well to most surfaces, but especially clothes, so be sure to wear an apron or things you don't care too much about, just in case. Give the paint a full day to cure.

To prevent overspray going all over the place, it is smart to place the figurine in a box. I like to wear gloves while handling and moving pieces coated in spray adhesive, once it coats skin it can be really tricky to handle the project.

To avoid the flocking dust from sticking in awkward clumps, the mini strainer works like a flour sifter to distribute the flocking powder evenly across the surface of the figurine. Shake out a little bit at a time, and gently turn the figurine to coat the surface in velvety powder.
The spray adhesive you choose will specify how long it remains tacky for, in this case, the adhesive I was using would remain sticky for 30 minutes before it began to cure. The flocking dust is a little tricky to get into all the nooks and crannies of figurines, so the period of the cure time is actually very helpful.
Repeat until the figurine is flocked to your heart's content. Some figurines I've made needed just one coat, others needed two to three.

Let cure overnight and voila! I turned a relic from my personal history into some 60s inspired throwback decor. This technique works great with glitter too, but I recommend spraying a few coats of clear coat after you apply glitter to a surface with spray adhesive. This will prevent it flaking off when it comes into contact with other surfaces.
Enjoy your new fuzzy friend! Be sure to explore the Glue Class for oodles more inspiring easy DIY projects and tips.


