

Introduction: From Digital Terrain Data to 3D Printing


This is a simple tutorial where I will show how to convert digital terrain data (DEM) into a 3D printing model. The final result will be a country (Portugal) subdivided by district, each district will be 3D printed separately.
There are some free services that can do this work, but unfortunately they have some limitations (small areas, resolutions…). So if you want to work with big areas and take control of some parameters, the better way to do it is by yourself.
Recently I found a database with countries’ boundaries that allows us to do this job more efficiently, precisely and quickly. When I started to explore how to do this entire work, I felt desperate because I thought that I would need to design the boundaries of each district. Fortunately I found this website that led me to the GADM - the success key of this tutorial.
The basic steps are:
1 - Choose your Country’s Boundaries - GADM
2 - Generate the Digital Terrain Data - Global Mapper
3 - Do some Magic - Meshmixer
4 - Bring it to Life - 3D Printing
Step 1: GADM - Global Administrative Boundaries


GADM is a spatial database of the location of the world's administrative areas (or adminstrative boundaries) for use in GIS and similar software. Administrative areas in this database are countries and lower level subdivisions such as provinces, departments..)
_______________________________________________________________
- In GADM download section choose the Country, and the File Format
- Country - Portugal
- File Format - Google Earth .kmz
- Now choose the level of administrative subdivisions
- level 1
Step 2: Global Mapper - GIS Software


Global Mapper is an affordable and easy-to-use GIS application that offers access to an unparalleled variety of spatial datasets and provides just the right level of functionality to satisfy both experienced GIS professionals and beginning users.
_______________________________________________________________
- Open Your Own Data Files
- select the .kmz file from the GADM
- The .kmz file in the Global Mapper workspace
- Now let's download online data of the digital terrain into the workspace, by clicking on the left top corner in the Globe Icon.
- Select Online Data Source to Download
- ASTER GDEM v2
- In Select Area to Download click in Draw Box
- Drag a Box to Select Export Bounds
- OK
- Connect
- The Online Data and the GADM .kmz file in the workspace
- Click on the Control Center icon on the left top corner and a window with the 2 layers will open
- Put the .kmz layer underneath the Elevation Data (ASTER GDEM)
- Now you can see the two layers
- Digitizer Tool
- With the Digitizer Tool you will be able to select the different areas.
- Click on the icon on the top left corner
- Select any area to export
- File - Export - Export Elevation Grid Format
- Select the STL File format
- STL Export Settings - General Tab
- Sample Spacing - defines the resolution of the grid, I suggest to decrease it by 10 times, which will also decrease the size of the STL file. The maximum resolution of ASTER GDEM grid is 38m, insert 380m.
- Check or uncheck the bellow settings as in the image.
- STL Export Settings - Coordinate Offset/Scale Tab
- Let's convert m to mm, so 1 passes to 0.001 (with a point!)
- I scaled the Z axis by 10 times to highlight the ground elevation (try this scale as you whish)
- STL Export Settings - Export Bounds Tab
- Check: Crop to Selected Area Feature(s)
- OK
Repeat this procedure for all desired areas. And don't forget to save the Global Mapper project. File - Save Workspace
Step 3: Meshmixer - Mesh Edit


Meshmixer is state-of-the-art software for working with triangle meshes. Do you need to clean up a 3D scan, do some 3D printing, or design an object that "fits" something else? Meshmixer can help. Think of it as a sort of "Swiss Army Knife" for 3D meshes.
_______________________________________________________________
After generating and exporting the elevation data we need to do some edits in the STL files.
Because I want to 3D print each district in a single print, and not to cut a bigger one in several parts, I need to find the biggest district areas in X and Y axis. The 3D printer that I will use it's a BEETHEFIRST from BEEVERYCREATIVE and the printer bed has 190 mm in X, and 135 in Y axis, so I need to reduce the size of the biggest district area to fit in the bed. After you find the biggest area and scale it, you will need this scale value to apply to the rest of the areas.
We also need to smooth the boundaries of each area in order to easily fit each other.
Lastly, and because the west side of my country ends in the Atlantic ocean, ie, the elevation is zero, we need to extrude some mm in order to give some thickness to the parts.
- Import STL files
- Import Settings
- First import window: Append
- Second import window: Shift Position: No
- Import all:
- Simply drag and drop the STL files into Meshmixer. I suggest to drag and drop one at a time to see if everything is okay with the export settings from Global Mapper.
- Find the biggest area, the longest (x axis) and the widest (y axis). If it's not evident which is the bigger one I suggest to import the STL individually in Meshmixer and see the dimensions of each part as you can see in the next picture.
- Meshmixer Units/Dimentions
- Actions - Configure Units
- Now that you know the biggest part, let´s scale it. I suggest to open on another Meshmixer window with this area.
- Edit - Transform
- Let´s decrease the X and Z dimensions (Y in Meshmixer is the vertical axis) to guarantee that it will fit in the 3D printer bed.
- Note the scale value, and apply it to all the STL files.
- Fits perfectly in the BEETHEFIRST bed.
- Smooth Boundaries
- Select - double click in the model - Modify - Smooth Boundary (default values)
- Watertight the STL file
- Analysis - Inspector - Auto Repair All - Done
- Extrude ground of the model
- Select - double click at the bottom of the model - Edit - Extrude (Offset - 3mm)
Repeat 8 to 10 for the rest of the parts.
Step 4: 3D Printing - BEETHEFIRST


The 3D Printer used was a BEETHEFIRST by BEEVERYCREATIVE.
BEETHEFIRST is a professional, easy-to-use and portable 3D printer.It’s ideal for professionals, like architects and designers, and has a unique transportable pack, called BEEPACK, where you can find everything you need.
_______________________________________________________________
- BEEsoft Workspace
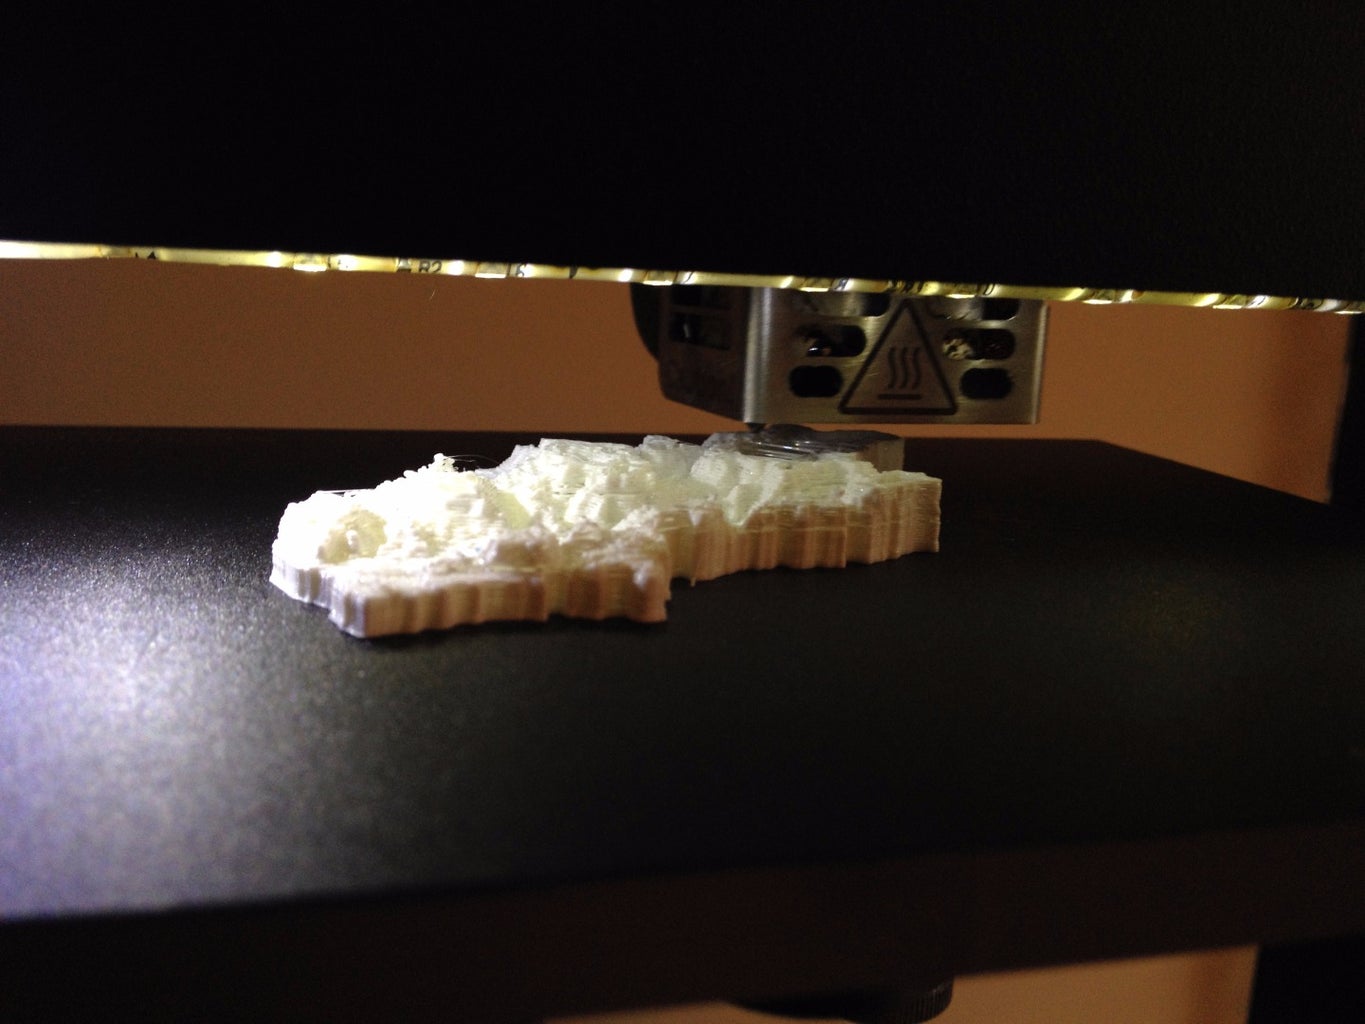
- Some pictures of the print
- The last one is my beautiful island, Madeira
Step 5: Final Considerations
This tutorial comes up through a challenge proposed to me. I knew that this could be possible based on some knowledge that I acquired in another project, but I also knew that this could be really hard-working. Fortunately I found GADB database that was the success key of this entire project, and with the right tools, Global Mapper and Meshmixer, the job became easier.
In the end I think this work could be really valuable in several areas:
- Schools:
- New interactive ways to teach geography/countries
- Investigation Labs:
- Reduced physical model studies
- Civil Engineering and Architecture
- Scale models integrated with constructions
- Fluvial and topography studies
- New Art forms
Good Work! ;)


