

Introduction: How to PERMANENTLY Fix a Drawstring; Also, How to Fix a Drawstring Using a Bad Underwire.


Okay, in all fairness, this probably should be titled "How to fix a drawstring using a bad underwire/also, how to PERMANENTLY fix a drawstring," but, I went with what I thought would provide the best search results. :)
The point is, I will show you well endowed ladies one ingenious use for your 'dead' underwires; and I will show ALL of the rest of you one ingenious way to make sure you never need those discarded underwires!
Step 1:


You will need:
One exposed underwire. (Cup size does not matter, the general "U Shape" of the underwire is what makes this work.)
Tape (optional)
An escaped drawstring
The garment from which the drawstring escaped
Thread
A Needle (OR)
A Sewing Machine
Scissors for trimming stray threads
Step 2: For the "Rethreading/Underwire" Portion


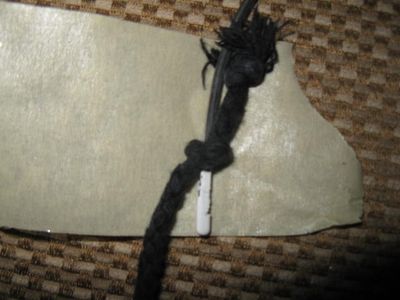
Thread/tie your loose drawstring end to the underwire; feel free to tape the drawsting to the underwire to keep it from slipping off.
Thread the free end of the underwire through the open drawstring seam and pull it all the way through. That's it!
Step 3: Now, to Make Sure It Never Happens Again...

You will need to stitch the drawstring in place. You can do this by hand or with a sewing machine.
Step 4: Center the Drawstring.


Find the exact center (or somewhere close to the exact center) of the back of the garment at the drawstring loop/pocket. (Often, you will find a seam at the center of the loop/pocket, that makes it easier.)
Make sure that the drawstring is showing a roughly equal length on both sides. (This is relatively permanent unless you plan to employ a seam ripper, so make sure the drawstring is where you want it to be!)
Step 5: Sew by Hand (OR)


It's just like sewing on a button. I'm assuming that y'all know how to thread a needle, tie a knot at the end of the thread, and sew "back and forth;" if not, this should help. (If you use the referenced Instructible, you won't need the toothpicks.)
The point is to sew THROUGH the drawstring to anchor it into place in its pocket, so that it will no longer be able to escape.
Step 6: Sew With a Sewing Machine (Isn't Technology Amazing?)


Place the center portion of the back of the drawstring loop/pocket (with the drawstring equally distributed on each side of your garment) on the sewing machine.
If you have a sewing machine, I'm hoping that you understand how feed dogs work and what the reverse button does.
So, stitch the first seam over the loop/pocket with the drawstring in it, backtack BACK over the drawstring, release the reverse and you're done!
You've anchored the drawstring inside the pocket, it can no longer escape.
Step 7: Annnnnd, Done!


Now that you have sewn your drawstring into place, it will no longer pull out in the wash, get sucked into horrible random drawstring voids, or any number of other equally unamusing scenarios.
Questions? Ask away, I have a tendency to assume that I explain myself well, when that is not always the case!


