

Introduction: How to Render Fat


I remember when I was a kid there was a campaign against the consumption of animal fat (including butter) in favor of margarine. Then it turned out that margarine contains hydrogenated oil, so we should just forget about it.
And this was not the only U-turn I experienced regarding what’s healthy and what’s not.
I try to stick to natural products (I know toadstool is also natural :-)) so I vote for butter and occasionally, other fats. Now I am going to show you the simple way of rendering fats at home. Duck fat in this case as it is the key ingredient of - the starting point so to say - one of my favorite meat prep method. Can’t wait to get there.
Before we start I would like to assure you that you don’t have to be afraid of using fats. I am not saying that you should eat loads of it, but it is definitely useful. If you are interested in the details you can check out Health Benefits of a Low-Carbohydrate, High-Saturated Fat Diet by Donald W. Miller, Jr., MD.
Step 1: You Will Need

I bought roughly one kilo duck fat with the skin on, it came in about 25-30 pieces some had bits of meat on but that's no problem. You need a sharp knife, a cutting board,a saucepan,a slotted spoon, a wooden spoon, jars, a tweezer.
Step 2: Prepping


Wash your fatty bits in cold water, clean them by removing any small feathers left there by accident and cut them into small pieces with a sharp knife.
Step 3: Cooking


Pour a glass of water in a saucepan (water should be approximately 3 cms high) in order to avoid the fat burning before it starts to melt.
Add the fat and start cooking at medium heat.
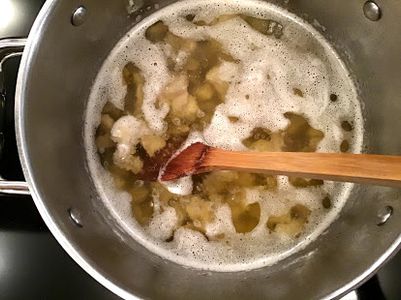
The fat will begin to render out immediately into the water, after a few minutes the water will start to evaporate.
Once it boils, drop the temperature to low. The fat will be yellow and milky.
Step 4: Ready

About 30 to 45 minutes later, the fat will turn clear, the fat bits will be crispy and golden brown. Now you’re ready.
Step 5: Finishing Touches


Remove the fried bits of duck fat. Press them slightly between two spoons and put them on a paper towel. It is a lovely crispy snack with a little salt sprinkled on top.
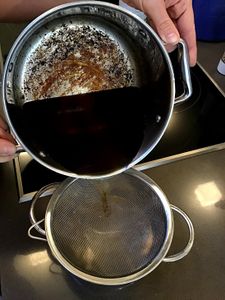
Set up a strainer over another pan container and pour the contents of the first pan.
All the impurities will stay with the strainer. When the fat is done dripping, pour the liquid into a jar cover it and keep it in the fridge. You may use it for at least half a year, or you might as well store it in the freezer cut into cubes of your choice, for ever, practically.
Once you have your fat, use it to cook with. It’s great with potatoes, deep fried stuff, fried eggs, and it is indispensable when making duck confit. The best thing ever that could happen to duck legs.

Participated in the
Fat Challenge


