

Introduction: LinkIt One Tutorials - #8 DS18B20 One Wire Water Temperature Monitor


For this tutorial I am going to add a water temperature monitor using a DS18B20.
The DS18B20 is a one wire device. One Wire means that it gets commands from the controlling device (in this case our LinkIt One board) and sends them back using the same wire.
One wire devices can either be fed a voltage through a dedicated wire (they actually have 3 wires!) or they can actually steal their electricity from the device that they are receiving messages from. The device charges itself when you send it a message, and uses that charge to send the response to you.
I have chosen to permanently mount my wires to an Arduino shield which makes connecting it a breeze and prevents the wires from falling out of the LinkIt One board.
Step 1: Materials Required


LinkIt One board
DS18B20 sensor in waterproof housing
I purchased mine from an online auction site, you can also get them from sites like Adafruit.
Grove LCD RGB Backlight
Li-Ion Battery
Micro USB cable
4.7KOhm resistor
Anywhere that sells electronics components
(optional but recommended) Arduino Proto Shield
I got mine from Numato.com http://numato.com/arduino/arduino-shields/protoscr... and it has proved very useful.
Breadboard if you don't have an Arduino Proto Shield
Container that holds water
Use a cup if you want, I use a tropical fish aquarium.
Water
Do a rain dance if you have no other way of getting some water. The rain dance may not work the first time so try every day until it does. If it rains overnight the rain dance performed the day before did the trick. Don't listen to the naysayer meteorologists that claim it was a pressure front that caused it, you did it with your dancing skills.
Arduino IDE
LinkIt One Arduino One Wire library
Get the library from https://github.com/leouzz/Linkit-One-OneWire/archi... and install it as described in https://www.instructables.com/id/LinkIt-One-Tutoria...
Step 2: Program the LinkIt One Board With the DS18B20 Sketch

Start the Arduino IDE.
Download the file attached above and load it into the IDE.
Depending on your particular setup you may wish to use a different pin than 5. Change the line that reads
OneWire ds(5); // on pin 5 (a 4.7K resistor is necessary)
replacing ds(5) with your pin eg
OneWire ds(10); // on pin 10 (a 4.7K resistor is necessary)
Do not connect the LCD display, battery or DS18B20 yet.
Connect the USB cable to the LinkIt One board and upload the sketch.
Once uploaded, disconnect the USB cable.
Attachments

Step 3: Connect the Parts to the LinkIt One


Ensure the BAT/USB switch is set to USB.
Connect the battery and the LCD display as described in my previous tutorials.
If you are breadboarding this, you need 3 jumper wires red, yellow and black.
Put the wires from the DS18B20 in two separate columns, black and red in column 5 and yellow in column 10.
Put one end of the black jumper wire in column 5.
Put one end of the yellow jumper wire in column 10.
Put one end of the red jumper wire in column 15.
Connect the 4.7KOhm resistor between columns 10 and 15.
Connect the jumper wires to the LinkIt One board:
Red to 5V
Black to GND
Yellow to D5
Double check your connections and switch the BAT/USB switch to BAT.
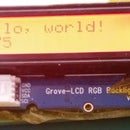
If all has gone well and your wires are correct the LCD display should display the temperature in Celsius and Fahrenheit.
Depending on where you live ambient room temperature could be anywhere between 10 and 25 Celsius.
If you hold the silver end of the sensor in your hand the temperature displayed on the LCD should rise.
Be extremely careful not to let the water anywhere near the battery, LCD display, USB cable or LinkIt One.
Water and electricity are a BAD combination.
Finally, place the silver end of the sensor in the water container to check the temperature. Vary the temperature by adding warm or cold water, or putting the container in the freezer or sunlight.
Step 4: Where Next?


Talking to external sensors opens a massive field for experimentation. Arduino compatible boards such as the LinkIt one make talking to sensors easy and fast to prototype.
Look around your home and think what you could possibly add sensors to. Doors and windows can have magnetic switches, kitchens can have carbon monoxide sensors, bathrooms can have humidity or methane sensors.
A microphone combined with a light sensor near a baby's cot could trigger a light show if the baby wakes up during the night.
There are endless possibilities so take a while to think and do a search for arduino compatible sensors.
SparkFun (and lots of other places) sell sensors compatible with Arduino https://www.sparkfun.com/categories/23?sort_by=pop...


