

Introduction: MTA OMNY Reader Costume


"Welcome to OMNY", NYC's contactless fare payment system. The NYC MTA will soon be phasing out the Metro Card in favor of their new "tap-and-go" devices that are now available in all Subway Stations and buses.
This year for Halloween, I decided to go as an OMNY Reader complete with Credit Card and iPhone Wallet App earrings. As far as MTA related costumes go, I had not seen an OMNY one before so thought I'd make my own!
This project was featured in some pretty cool places for Halloween 2023. Check out the following links:
- Subway Creatures, Instagram
- MTA, Instagram
- 9 awesome only-in-NYC Halloween costumes that will make you laugh, Time Out New York.
Supplies


OMNY Costume
Supplies:
- 2 black t-shirts (or 1 black t-shirt + extra black fabric)
- 2 sheets of iron-on paper
- velcro (with sticky back for fabric)
- 4 blue glow sticks + 4 green glow sticks + a few extra glow sticks, any color (I bought this pack)
- black thread
- pencil (for marking fabric)
Tools:
- printer
- iron
- sewing needle OR sewing machine
- pins
- scissors
Credit Card & iPhone Wallet App Earrings
Supplies:
- thick cardstock (I used the back of and old notebook)
- printer paper
- double sided tape
- earring hooks
Tools:
- printer
- scissors
- pin
- pliers
Step 1: Print OMNY Screen Iron-Ons


First download the images for the OMNY screen from the omny.info website. I chose to go with the main OMNY and GO screens, but the webpage linked has images of all screens if you want to get creative.
Load a printer with iron on paper and print out your desired screens. Be careful to read the instructions for your specific brand of iron-on-paper as some will want you to print out the images in reverse.
Once you print out your OMNY screens, be sure to cut off any extra white space.
Step 2: Iron-On OMNY Screens


Determine which OMNY screen belongs as the bottom layer. For me, this was the GO screen. Lay your t-shirt on a flat surface. Center your iron-on print out center on the t-shirt, leaving enough extra room to sew on glow sticks and velcro above. For me, this was about 7" from the neck line.
Following the specific instructions for your iron-on paper, iron your print out onto the t-shirt. For me, I had to cover the print out with parchment paper while ironing.
Turn your second t-shirt upside down and orient your to OMNY layer on the t-shirt leaving enough room to sew on glow sticks and velcro. For me, this was about 4" from the edge of the t-shirt.
Iron the second print out onto your t-shirt.
Step 3: Cut Out Glow Stick Pockets


Grab a glow stick of any color and attach the ends with a connector so it forms a circle.
Using the spare fabric from your second t-shirt (I used the back side), draw an outline about 2/3 of the way around your glow stick circle. Be sure to leave about a half inch gap between where you mark the fabric and the glow stick.
Mirror your outline to form a peanut like shape, and cut out the shape. You will need 8 of these.
After the shape is cut out, fold each piece of fabric in half and pin the straight edge. These pieces of fabric will form the glow stick pockets. A double layer of fabric is needed or else the glow stick will shine through the pocket instead of having the light blocked off to create the illusion of the OMNY Reader corners.
Step 4: Sew on Glow Stick Pockets


This step can be completed with a sewing machine or by hand.
Begin by stitching across the top of the pocket. Next, place a glow stick pocket at the corner of one of your OMNY screens and position at a 45 degree angle. Using a spare glow stick, pin the pocket in place. Remove the spare glow stick and stitch on the pocket.
Repeat for all 8 pockets until each of the OMNY screens has a pocket sewn to each corner.
Step 5: Secure Pockets With Velcro


Stick a spare glow stick in one of your pockets, and line up a piece of fabric with the edge of the pocket. Mark where you want to cut the velcro. It should be slightly smaller than the width of the pocket.
Peel of the sticky backing on your velcro and attach it to the inside of the pocket so that the glow stick will be held in place. Repeat for all 8 pockets.
Step 6: Cut Out OMNY Layer


Cut the extra fabric off of the OMNY layer so that it is shaped like a rectangle. If you placed the iron-on on the correct position, you can include the edge of the t-shirt which is already hemmed. Be sure to leave an extra couple of inches around the edges of the pockets.
Next, fold the un-hemmed edges on the right and left sides of the OMNY screen under and iron them so the raw edges are hidden. Pin the fabric in place, and stitch up the sides to hem the edges.
Step 7: Attach OMNY Layer


Iron the bottom side of your rectangle with the OMNY layer so the raw edge is folded under. Lay the rectangle on top of your t-shirt so that the 2 screens line up. Pin the bottom edge of the fabric to the t-shirt.
Cut two pieces of velcro about an inch and a half long each. Peel the paper backing off of the velcro and attach them to each of the top corners of the fabric with the OMNY screen on it. Press the other side of the sticky velcro to your t-shirt so it lays flat.
Stitch the bottom edge of the fabric that you pinned to attach the OMNY layer to your t-shirt.
Step 8: Attach Glow Sticks


Save this step for right before you're about to wear your costume!
Bend 4 green and 4 blue glow sticks so they light up, and form them into circles with glow stick connectors. Place the green glow sticks around the corners of the GO screen and the blue glow sticks around the OMNY screen.
Your OMNY costume is done! If you want to take your costume a step further, you can follow the remaining steps to create iPhone Wallet App and Credit Card earrings.
Step 9: Print Out Earrings


On a sheet of 8.5" x 11" paper, print out the iPhone Wallet App and Credit Card earrings. You can download the images here.
Once you've printed out your images, carefully cut them out.
Step 10: Back Your Earrings With Cardstock


Begin by covering the entire back side of one of your iPhone print outs with double sided tape. Stick your print out onto a piece of cardstock or thin cardboard, being sure to lay it as flat as possible. Using scissors, neatly cut the cardstock as close to the border of the iPhone print out as possible.
Cover the other iPhone print out with double sided tape and stick on the opposite side. Using scissors, trim any parts that are uneven. Repeat for the credit card print outs.
Step 11: Attach Earring Hooks


Using a pin, poke a hole in the center of the top of your iPhone and credit card earring. The loop on earring hooks are small, so be sure the hole is very close to the top.
Using pliers, open up the loop on the bottom of the earring hook and pull it through the hole you just poked in one of your earrings. Close the loop on the earring hook with pliers. Repeat for the second pair of earrings.
Step 12: Have a Spooky Night!


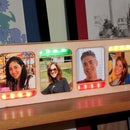
Here are some photos from my Halloween night out! The costume was a hit at the Halloween party I attended, and I had a blast making people "tap to pay" to reveal the GO screen. Maybe by next year I can add an enhancement to actually charge people $2.90.
If you do end up making this costume, please share your pictures here. I would love to see them!

Participated in the
Halloween Contest


