

Introduction: Making Imaginary Drinking Hydrants


Imaginary Drinking Hydrants is a mapping and fabrication project, which is part of a larger project, called Water Works.
Water Works is a data-visualization and mapping of the San Francisco water infrastructure: the pipes, hydrants and treatment plants that comprise the circulatory network for this city.
This short Instructable will cover the making of a 3D printed artwork of my Imaginary Drinking Hydrant — a vision of a city which provides recycled drinking water for public use.
The Water Works project is part of a larger Creative Code Fellowship, supported by Gray Area, Stamen Design and Autodesk.
Step 1: Background Story

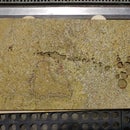
In 2006, the San Francisco Public Utilities Commission (SFPUC) introduced 67 Emergency Drinking Hydrants, for use in case of a city-wide disaster.
I mapped these and after the map was publicized, the SFPUC issued a statement that the program was now discontinued. I redubbed these “Imaginary Drinking Hydrants” in order to imagine a cityscape where you can get drinking water from your local hydrant.
The story on the Mapping Imaginary Drinking Hydrants is here, in this Instructable.
Step 2: Make 3D Model

I modeled this in Fusion 360, with the initial help of Taylor Stein. This project was also the one where I finally got a handle on using Fusion 360 as I've been moving to this 3D modeling package from others.
I won't cover the details on creating the model since there are plenty of tutorials on Fusion 360. It wasn't super-tricky except for the faucet, which we redid several times.
Step 3: Export As 2 Separate STL Files


I printed the 3D model using two materials: VeroClear and VeroWhite on the Objet500 3D printers.
These require two separate STL files that share the same coordinate system, which you import as an assembly.
The hydrant itself was one material, while the drop icon and the faucet was another.
Step 4: 3D Prints in Dual Material


I printed four Imaginary Drinking Hydrants. Each is about 3 inches high.
The drinking faucet itself is kind of delicate but won't break off too easily. I did several iterations to get to a point of stability with the faucet handles.
Step 5: Cut Wood Into Small Sections


I planned to mount each on a small piece of wood as a sculptural art object and chose walnut as the hardwood-of-choice.
Without being totally sure of the best size for the wood, I cut several samples. A square base with dimensions of 5"x5" looked the best.
Using the table saw, I made several of these, including some extras, just in case.
Step 6: Clean Edges

With some 120 grit sandpaper, I did some quick cleaning of the wood burrs.
Step 7: Center Punch a Drill Holes


The hydrants were to be mounted on a 1/16" stainless steel rod. I drilled a center hole in each piece of walnut about 3/8" deep.
Step 8: Drill Hydrants

At the base of the printed hydrant, in the 3D model itself, I made a 1/16" hole that is 3/8" deep. It needed some extra drilling to dig out the support material. Easily done on with a cordless drill on a low torque setting.
Step 9: Finish With Danish Oil


Using a rag, gloves and danish oil, I applied a medium-light coat of oil and let it soak in overnight.
Step 10: Cut 1/16" Rod

With heavy duty pliers, I cut several lengths of 1/16" stainless wire at 1 1/2" per wire.
Step 11: Mount on the Wood and Done!


It was easy to mount this on the wire just by hand, no tools needed.
They came out great!
Here is the full project documentation for Water Works, which includes the Imaginary Drinking Hydrants.
I hope this was helpful!
Scott Kildall
For more on the my projects, you can find me here: @kildall or www.kildall.com/blog


