

Introduction: Program Any ESP8266 Board/module With AT Commands Firmware


Every ESP8266 module and board can be programmed in many ways:
- Arduino,
- python,
- Lua,
- AT commands,
- many more probably...
First three of them are best for standalone operation, AT firmware is for using ESP8266 as module or for quick testing with TTL RS232 communication.
BTW programming ESP (e.g. with Arduino, python or Lua) will erase all memory. So if you want to go back to AT commands you have to reflash firmware.
I'll show you how to do it correctly with Espriff's tools and documentation.
Step 1: Required Software and Documents
- ESP8266 NON-OS SDK - contains AT commands firmware in ..\ESP8266_NONOS_SDK-2.2.0\bin\at
- Flash Download Tools (ESP8266 & ESP32 & ESP32-S2) - program for flashing new firmware
- ESP8266 SDK Getting Started Guide - contains memory maps which you have to follow to program chip
- ESP8266 AT Instruction Set - optional AT commands guide
"
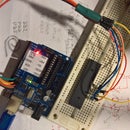
Step 2: Hardware and Connections

You'll need:
- any ESP8266 module or board,
- any USB<>Serial 3.3V converter (ESP is not 5V tolerant) (some boards have one e.g. NodeMCU),
- optionally 3.3V PSU (not every serial converter has enough power to power ESP8266 up).
For programming you'll have to:
pull GPIO15 down (default state for most modules),
pull GPIO2 up (default state for most modules),
- pull GPIO0 down (always have to be done, leave it alone or pull up for normal operation),
- pull CH_PD up.
Sometimes not all GPIO pins are accessible (e.g. ESP-01 module), in that way they are connected as they should be, sometimes there are flash buttons, which have to be pressed while resetting/powering up for entering flash mode (e.g. NodeMCU) and no additional connection has to be made.
Step 3: Checking Flash Size

In most cases you don't know flash size. Simplest way is checking it in ESP download tool:
- Connect module and boot it in flash mode.
- Check COM port number in device manager.
- Open ESP download tool and select ESP8266.
- Uncheck every option in upper window part.
- Provide COM port number and 115200 baud rate.
- Press START button.
- Flash size will be shown in DETECTED INFO window.
Step 4: Programming With AT Commands Firmware


Check memory map in table 4-4 Download Addresses for OTA Firmware in ESP8266 SDK Getting Started Guide. You have to copy exact same pattern for your module.
For example mine has 32Mbit memory so I used 4096KB column and then It was 32Mb not 32Mb-C1, so I used 512+512 column. 1024+1024 is for XXMb-C1 modules.
Remember that 32Mb=4MB and 8XMb=XMB. Table was made for KB which are 8192 times smaller than Mb.
Addresses have to be consistent with files and flash size. Files are located in SDK: ..\ESP8266_NONOS_SDK-2.2.0\bin and ..\ESP8266_NONOS_SDK-2.2.0\bin\at use newest versions.
You can always flash again (with different addresses) if anything went wrong.
Flashing is similar to checking memory size:
- Connect module and boot it in flash mode.
- Check COM port number in device manager.
- Open ESP download tool and select ESP8266.
- Browse for files and provide correct addresses and check boxes.
- Provide COM port number and 115200 baud rate.
- Press START button.
- Wait until it shows FINISH.
Step 5: Test It!


You can use any terminal application. "AT" command is simple test for working, "AT+GMR" will tell you firmware version. Every command have to be terminated with CR+LF. You'll find more in ESP8266 AT Instruction Set.
"AT+CWAP" lists all nearby access points, but module have to be in station mode: "AT+CWMODE_CUR=1"
I attached screenshots from my favorite terminal Tera Term and its configuration (CR+LF for new lines and proper baud rate).

Participated in the
Microcontroller Contest


