

Introduction: Ripping Wood


Ripping wood on the table saw is probably the action you'll be doing the most. The table saw makes quick and accurate work of milling wood down to workable sizes. Ripping wood means feeding the material along the grain of the wood through the blade to make a cut along the length of the wood.
These types of cuts are easy enough to make, but there's a few things you should be looking for each and every time you make a cut that will keep you safe and your cuts accurate. In this lesson we'll look at grain orientation, how to angle the blade to make a bevel, and how some common mistakes to avoid.

The table saw is a powerful machine and safety should be taken very seriously: Kickback or accidentally losing a finger to the blade can happen so fast that not even Neo from The Matrix could get out of the way fast enough. Always use eye protection, always roll up loose clothing and tie back long hair, and always use push sticks to feed material through the blade.
Step 1: Blade Selection

Before making any cuts with a table saw you'll need to determine which blade to use. Not all blades cut the same, and different materials will require different saw blades.
As covered in the Saw Blades section Tools + Materials Lesson, the easiest way to think about saw blades is the number of teeth they have. Saw blades with a low tooth count are great for rough cuts, making quick work for large volumes of work. The aggressive teeth are great for construction cuts that aren't meant to be of finish quality. Fine tooth saw blades make slower cuts, but the finish quality of the cut is much nicer. Great for cuts that will be the finish of your project. Higher tooth count blades are able to cut harder materials, like hardwood. With the right blade your table saw can even cut thin metals.
A very common blade is the combination saw blade, which has 40-60 teeth and is a great all around blade. This is the blade specified in the Tools + Materials list since it's versatile and I almost never change it out of my saw unless I'm doing a special cut. If you need to change out your saw blade, here's how to do it.
Step 2: Set Fence

Ripping wood requires the fence to be set the desired distance from the blade. Before setting your fence you should ensure that it's been properly calibrated to the saw blade you are using, measuring from the blade side of the fence to the saw blade teeth (not the blade face).
Step 3: Set Bevel Angle

Table saws not only make 90° cuts, but most saws are able to bevel the blade and create an angled cut along the length of your rip cut. As with all parts of the table saw, the bevel angle needs to be calibrated to ensure you're making square cuts.

If your table saw has a bevel function then there will be an angle scale somewhere conspicuous. Most saws have the bevel scale on the same face as the blade height wheel.

Step 4: Set Blade Height

Set your blade height no higher than ⅛" proud of the material you are cutting. If you are making cuts on any stock thicker than 2" I suggest making multiple shallow passes and incrementally raising the blade height, rather than trying to achieve one tall cut.
We talk about making rip cuts on thicker pieces of wood a little later on.
Step 5: Set Featherboard

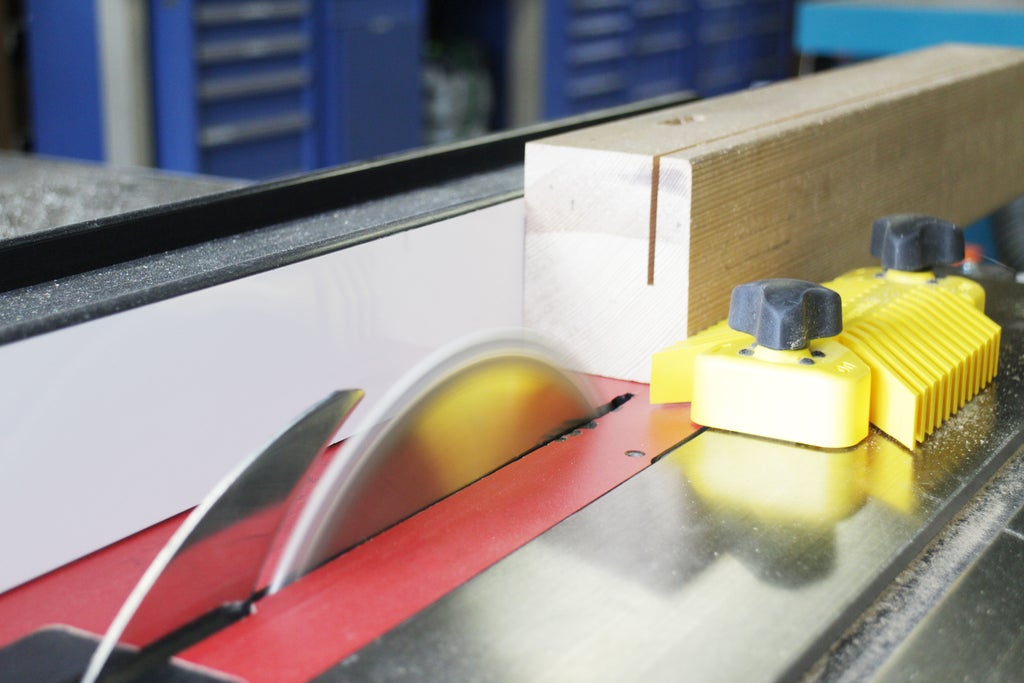
Featherboards apply pressure towards the fence and guide your material into the saw blade. Whether magnetic or the type that slide in the mitre track, featherboards need to be set between you and the cutting blade and close enough to apply adequate pressure to the wood.

With the saw powered off, set the fence distance and place your wood against the fence and abutting the blade. Move the featherboard near the blade with the angled feathers pointing in the direction you will be pushing, and push it up against the wood. The feathers should bend slightly from the pressure you are applying.

When you've got good pressure, lock down the featherboard and remove the wood. Turn on the saw and guide the wood through the featherboard and into the blade. This additional pressure will keep the material steady during the cut and will prevent any wandering that could occur from pushing the wood into the blade.

Step 6: Rip Board

When ripping boards you want to have the bulk of the material against the fence with the cutoff falling away from the blade. If you attempt to cut thin strips with the cutoff between the fence and the blade you introduce a high possibility of kickback.

With the saw all set up you're ready to make a cut. Using push sticks and standing just to the side of the wood, push the wood through the saw blade completely to make a cut.
With a little practice you'll be able to read the cut as it's happening, adjusting your speed and pressure on the push sticks to accommodate different woods, or woods with knots in them.

Make sure to turn the saw off between cuts.
Step 7: Cuts on Thick Wood

Ripping thick wood is also possible on the table saw; no need to use the bandsaw! You can even cut wood that is thicker than the maximum height of your blade, too.
The trick with any thick pieces of wood is to do multiple small passes to achieve the cut. Set your fence to the desired scale and position the featherboard, like all other ripping operations. Start with the blade height no more than 1" high and pass the piece through the blade to start the cut.


After the first pass raise the blade up in increments until you cut through the wood, or you reach the maximum height of your blade. For most 10" saws this will be around 3" maximum height.

When you've reached the maximum blade height, keep the fence and featherboard where they are and just flip the wood over and align the cut channel with the blade. Repeat the same process of starting with a shallow up and raise the blade after each successive cut.

Here's a helpful animation that shows the process I used to cut this 3½" post. After getting to the maximum height of 3" I flipped the post over and finished the cut on the other side. There was no need to drop the blade lower on the flipped cut, since I was only cutting through the remaining ½" of wood.

Step 8:
Pop quiz, Maker!
{
    "id": "quiz-1",
    "question": "Featherboard pressure on the material being cut should be as light as a feather.",
    "answers": [
        {
            "title": "True",
            "correct": false
        },
 {
            "title": "False",
            "correct": true
        }
    ],
    "correctNotice": "That's right! Featherboards should apply enough pressure to hold the material being cut in place.",
    "incorrectNotice": "Are you sure?"
}
{
    "id": "quiz-2",
    "question": "All saw blades cut the same",
    "answers": [
        {
            "title": "True, all blades provide the same cut",
            "correct": false
        },
{
            "title": "False, all blades cut differently",
            "correct": true
        },
        {
            "title": "Only if they are left-hand blades",
            "correct": false
        }
    ],
    "correctNotice": "That's right! There are different blades for a reason, and blades with a high tooth count will cut differently than blades with a low tooth count.",
    "incorrectNotice": "Really?"
}
Ripping wood is likely the most used function of a table saw, and for good reason. Ripping wood on a table saw is fast, precise, and consistent.
Ready to try your hand at ripping wood? A great project to apply the skill of ripping wood is a butcher block table.

These tables looks great, are really easy to make, and uses the skill of ripping wood into consistent width to achieve a beautiful result. Try it yourself, write up an Instructable about your build and share the results!


