

Introduction: Rocket Lamp


Introduction:
In this instructable I’ll be making a Rocket Lamp for a boy’s bedroom. Similar lamps can be bought in stores for prizes ranging from 50 to over a 100 dollars. My goal was to make a lamp with stuff I already have to reduce costs and to make it KIS (Keep It Simple!) so anybody could make one.
Parts list:
- Cone shaped desk lamp: For the upper part of the rocket I used an old tin desk lamp I had in my parts bin. You can also use a plastic / tin vase or something with a cone shape.
- Plastic or tin flowerpot: For the lower part of the rocket I used a tin flowerpot I stole from my wife. (sshh!) Again: you can use any kind of material for this. Use your imagination!
- A lamp socket: mine came with the desk lamp so I could skip this part. When you use something without a lamp socket you need to salvage or buy one.
- Lightbulb: I experimented with different lightbulb and settled with a 10Watt LED lightbulb. The output is 52Watt (620 lumen) which is just enough to light an entire bedroom.
- Electrical cable: The cable needs to be sturdy enough to handle the weight of the lamp since the lamp is hanging from it.
- Electrical hole cover: I had to buy this part for a dollar. It will conceal the electrical box in my ceiling.
- Thin scrap wood: A rocket needs fins! I made them out of wood. Plastic or just cart box will do just fine.
- A few washers: To make a few windows.
Tools list:
- Hot glue gun or an adhesive
- Cordless drill & drill bits
- Jigsaw
- Philips screwdriver
- Siccors en pencil
- Pocketknife or crimping tool for electrical cables
- Primer spray for wood/plastic/tin surfaces
- Colored spray to decorate your rocket (I used red and silver)
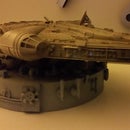
Step 1: Gathering the Essentials


As mentioned in the parts list you’ll need some sort of Rocket shaped object which you can use as a lamp. I happened to have an old desk lamp that fit the bill together with a used tin flower pot. You can use anything as long if it’s light enough to hang from an electrical cable. I had a lot of ideas what this object could be like empty plastic soda bottles (PET, HDPE etc), plastic vases, buckets and so on. Use your imagination!
Step 2: Making the Base


Firstly I test fitted the desk lampshade on top of the flowerpot. They fit together pretty good and with a drop of hot glue I could fix them together later on in the build.
Then I cut out the bottom of the tin flowerpot with my jigsaw and filed down the sharp edges.
After that I cut out a few sample fins (or wings) to test fit on the rocket out of some card box. I settled down with a nice fat and long looking wing which I drew over on some thin scrap plywood I had.
With a jigsaw I had all 4 of them cut out in no time. I quick sanding made them ready for paint but not before a final test fit on the flower pot!
I also drilled 4 small holes on all 4 sides of the flowerpot through which a small screw can be screwed right into the wooden fins. (yes the fins are fastened with only 1 small screw. You could put a dab of hot glue on there as well but I didn’t bother since the whole thing hangs high up in the air anyway)
On the last moment I thought it would be nice to have windows in the rocket. This ads detail and scatters the light throughout the bedroom better. So I drilled 4 larger holes in the top part of the desk lampshade.
A final test fit later and voila! Ready for primer&paint!
Step 3: Primer & Paint


This step is pretty spot on. Slab some primer and paint on your creation!
Since the (white) primer was pretty fast drying I managed to coat it a few times in one afternoon. Just make sure you give the whole rocket a little sanding before putting on the primer. If you don’t the primer may peel off. After the primer is dry you can sand the rocket again for the color coat. I chose red and sliver.
I also painted a few washers to act as windows. This gives the rocket a little more detail and it (hopefully) will scatter the light throughout the bedroom.
Step 4: Build It Up!


Alright let’s put this puppy together again! Simply put all the components together and if necessary fasten it down with some hot glue.
In this step I also attached the electrical cable and glued on the red window trims.
Lastly I tried a few different types of LED lightbulbs. I finally settled down with a 10Watt LED lightbulb. The output is 52Watt (620 lumen) which is enough to light an entire bedroom.
Step 5: Hanging the Rocket Lamp


When hanging the lamp be sure to fasten the cable snugly because you don’t want your lamp dropping on your kids head. My ceiling fixture or electrical box has a hook. With a ziptie and knot in the cable this lamp is going nowhere!
To conceal the electrical box I bought an electrical box cover. This decorative cap fits on a screw and is still capable of rotating on and of the box. I drilled a hole in the middle to fit my cable through.
Done! As you can see my son already gave his approval! :D


