

Introduction: Sweets & Creativity! Craft Your Own 3D Modeled 'Trick-or-Treat' Magic


Get ready to carve out your very own, one-of-a-kind Halloween magic! Our project, "Sweets & Creativity! Craft Your Unique 3D-Printed Pumpkin," is all about empowering you to create a personalized pumpkin design that's as special and unique as your imagination.
This project revolves around a parametric 3D model that's incredibly versatile. It lets you mold your pumpkin into whatever shape or style your heart desires. Say farewell to ordinary, store-bought jack-o'-lanterns, and say hello to an extraordinary world of custom creations.
In this project, we'll guide you through the simple steps of using our parametric file to transform your pumpkin dreams into reality. Whether you want a whimsical, spooky, or entirely unconventional design, this project will give you the creative freedom to make it happen.
Join us on this creative journey, and in no time, you'll be the proud owner of a pumpkin that's not only special but also a true reflection of your creativity and individuality. Let your imagination run wild, and let's start crafting your unique pumpkin masterpiece!
Supplies
- Fusion 360 Software: You'll need Fusion 360, a powerful 3D modeling software, to create your unique pumpkin design.
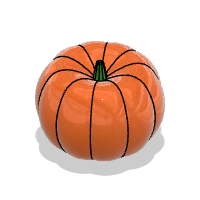
- F3D File: The essential F3D file containing the parametric pumpkin design template. You'll find 'em at the very bottom of this section.
- 3D Printer (Optional): If you decide to bring your virtual pumpkin to life, you'll require a 3D printer and appropriate printing materials.
- Paints and Brushes (Optional): Add a personal touch to your 3D-printed pumpkin with paints and brushes in various colors.

Step 1: Preparations

Before diving into the creative fun, let's make sure everything is set up and ready to go. To simplify this project, download the file "ParametricPumpkin.f3d". However, if you want to customize the face and parameters of the pumpkin, we recommend downloading "ParametricPumpkinWithoutFace.f3d". Next, follow steps 10 and 11 in "The Parametric Pumpkin: Your Halloween, Your Way," which you can find on our profile.
These files and resources will provide you with a solid foundation to bring your uniquely designed pumpkin to life. Once you have them ready, you're all set to delve into creating your personalized pumpkin. Let's begin bringing your unique Halloween vision to life!
My pumpkin is 150mm MaxSize
Step 2: Hollow Pumpkin


Once you've opened the file or have your own custom pumpkin design ready, let's start by going back in the "Design History" 10 steps, right after the loft operation that gives the pumpkin its solid form.
- At this point, we'll copy the body of the pumpkin by selecting it in the "browser" and using Ctrl + C. In the same browser, use Ctrl + V to paste the newly copied pumpkin. A menu will appear, and you can simply press Enter. We'll name this new body "HollowPumpkin."
- Go back in the Design History, next we'll proceed to scale it. Hide the original pumpkin and show the origin.
- Now, let's add a parameter called "WallThickness" and one called "Result." In "WallThickness," simply enter double the thickness you want for the pumpkin. Consider how far you've extruded the face – in my case, it was only one millimeter, so I'll use a value of 6. This gives me a 2mm margin for any potential issues.
- For "Result," use the following expression: "( ( ( ( MAX_SIZE - WallThickness ) * 100 ) / MAX_SIZE ) / 100 ) * 1 mm." Copy the value that this expression provides, and we'll use it when scaling the body. This way, it will have a value that's close to what you want and easy to change if you decide to alter the pumpkin's size.
- Next, deselect everything and use the 'S' key to search for 'scale.' Select "HollowPumpkin" and delete the selected point. Choose the origin point where all the planes intersect, input the "Result" value in the "Scale Factor," and press Enter.
- Using the "Combine" tool, select the original pumpkin as the "Target Body" and "HollowPumpkin" as the "Tool Bodies." Choose the "Cut" operation and disable "Keep Tools."This operation will create a hollow interior in the pumpkin, allowing you to store objects within it.
Step 3: Lid (Optional)


There are various ways to create the lid for this pumpkin, and you can even opt not to create one, leaving an opening for your treats. I advise that if you haven't calibrated your 3D printer or haven't performed tests like the clearance test, it's better to skip creating the lid and stick with the opening. Without experience in 3D printing, you might end up with parts that don't fit together.
- First, let's start by creating a sketch from the top view. Within the sketch, create a circle with a diameter of "MaxSize." Extrude it upwards using the expression "MaxSize." Use an offset as the starting point. In my case, the expression for the offset is "MaxSize/5." You can use the same expression or simply set an offset to the height where you want the lid to be. Conclude the extrusion with the creation of a new body.
- If you're opting not to create a lid, simply change the operation from "New Body" to "Cut."
- Next, use the "Combine" tool on the cylinder we just created, selecting the original pumpkin as the "Tool Body" with the "Keep Tools" option enabled.
- We'll once again utilize the "Combine" tool, this time with the original pumpkin as the "Target Body" and the body we created earlier with "Combine" as the "Tool Body." Ensure "Keep Tools" is active. This will leave space for the pumpkin's lid. You can name the upper object "Lid" if you prefer.
- Now, create a sketch at the bottom of the lid. Use the offset tool to create two offsets: one will be the clearance for your printer. In my case, I set it to 0.2mm. The other offset will determine the width of the tab that will go inside the pumpkin. In my case, it's 2mm. Complete the sketch.
- Now, use the "Extrude" tool. Select both offsets and extrude them upward towards the lid of the pumpkin. In this case, I used 30mm, and the operation is set to "New Body."
- Next, use the "Combine" tool with the new body you just created to cut into the lid as the "Tool Body." In the "Browser," select the upper body that's separated from the pumpkin lid and right-click to choose "Remove" (not to be confused with "Delete" as they are distinct).
- Now, use the last sketch where we created the offsets. Select the 2mm offset (or the value you specified) and extrude it downward by 2mm (or your chosen value). The operation should be "Join."
- Finally, use the "Combine" tool between the last body and the lid, disable "Keep Tools," and use "Join" as the operation. With these steps, your lid is now complete.
Step 4: Handle


- Let's create a sketch on the front view of the pumpkin. Now, create two lines with this expression as the size: "MAX_SIZE / 2 + 10 mm." One should be a construction line extending from the origin upwards at a right angle, and the other a regular line extending from the origin to the right of our sketch at a right angle.
- Next, use the "3 Point Arc" tool. Select the endpoints of the two lines you just created. You can also use the "Center Circle" tool and apply "Trim" to remove the part of the circle that you don't need. Finish the sketch.
- Now, create a sketch from the "Right View." Use a central rectangle with the following dimensions: 15mm in width and 5mm in height. Feel free to adjust these values to your preference, but these work with my printer.
- Complete the sketch and use the "Sweep" tool. Select the rectangle as the profile and the arc we created as the path. Use "New Body" as the operation and click "OK."
- Now, use "Press/Pull" with the inner face. In my case, the distance is "-MAX_SIZE / 2 + 10 mm."
- Next, use the "Mirror" tool to create the second half of the handle.
- Delete the faces on the outer side of the arc.
- Use the "Combine" tool with the original pumpkin as the "Target Body" and the arc as the "Tool Body," ensuring "Keep Tools" is active to retain the arc.
- Use the "Offset" tool for the inner faces of the cut in the pumpkin. It's recommended to use the value of your clearance, but if you're unsure, you can use 1mm for added reliability.
- With these steps, you'll have successfully created a handle for your pumpkin, making it easier to carry and handle.
Step 5: Final Touches


- Use the "Fillet" tool for the inner faces of the cut we made in the pumpkin with the handle. Also, apply a 0.3mm fillet to all faces of the handle.
- I also made a cut in the handle to ensure it fits snugly against the walls of the pumpkin and doesn't slip off. I simply extruded a rectangle that's 5mm wide and 4.4mm in height. Just remember not to cut too much, as it can weaken your 3D model when printing.
- Add a fillet to the cut in the handle.
And there you have it, with these final touches, we complete the 3D modeling of your very own unique pumpkin candy bucket. I know it may seem like a lot of explanation, but in practice, it's a breeze. So don't be daunted by the amount of text. I'll provide the .f3d files for reference, offering both versions with and without a lid.
With your 3D pumpkin model ready, you're all set to embrace the spirit of creativity and celebrate Halloween in style. Until next time, happy creating! 🎃🍬

Participated in the
Halloween Contest


