

Introduction: Transfer Circuit to Fabric


You have your final circuit working with the sketch and you've finished sewing your fabric pattern. Now is the time to combine the two and put the circuit onto the fabric. This process comes with valuable challenges while also making use of learned techniques.
You will learn:
+ how to design a circuit on fabric
+ the uneven running stitch
Step 1: Materials

+ sewable LED
+ microcontroller
+ USB cord
+ conductive thread
+ 3 x snaps (socket side)
+ LiPo battery
+ final pattern with switch made in Make a Simple Pattern lesson
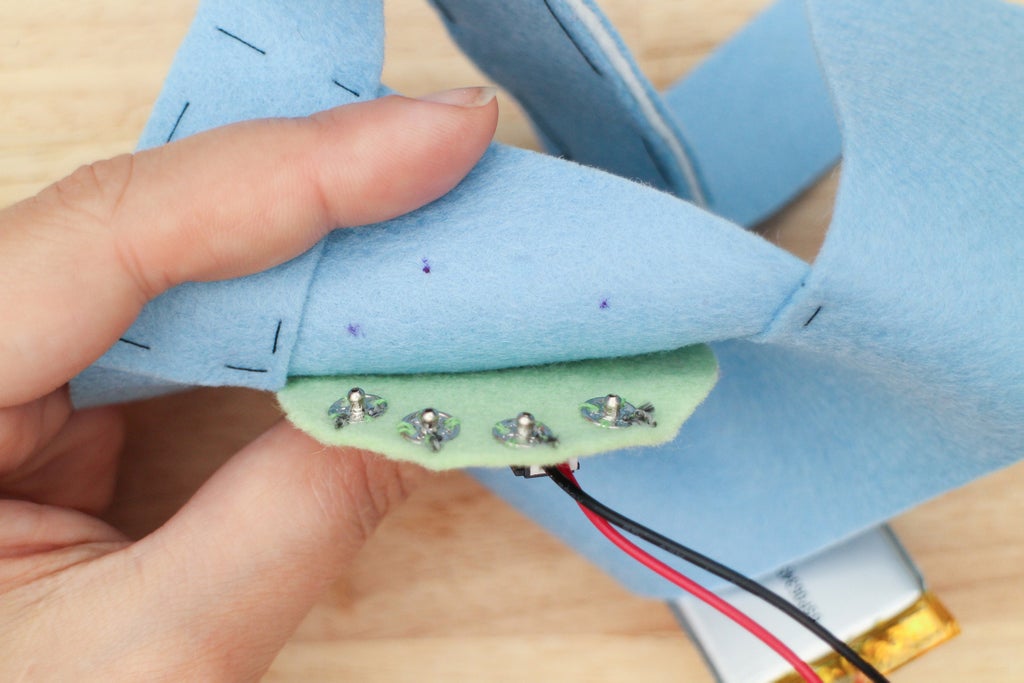
Step 2: Place Components

Component list for Hi-5 Collector:
1 x LilyPad USB
1 x sewable LED
1 x LiPo battery
1 x soft switch
The switch is already embedded in the pattern, so you don't have to worry about placing it. Clip the battery into the JST connector on the LilyPad USB. Place the components on top of the trapezoid to see how they all lay in relation to one another. Take this moment to finalize where the components and microcontroller will be.
Things to take into consideration when placing your components:
1) Visualize your conductive paths. When possible, do not put a component in a place that will create paths that cross one another.
2) Leave room to sew down and around components
3) Are any components polarized?
Follow the attached diagram or experiment with the placement. The marking tool isn't permanent, so you can draw the placement and circuit as many times as you like!
Step 3: Trace

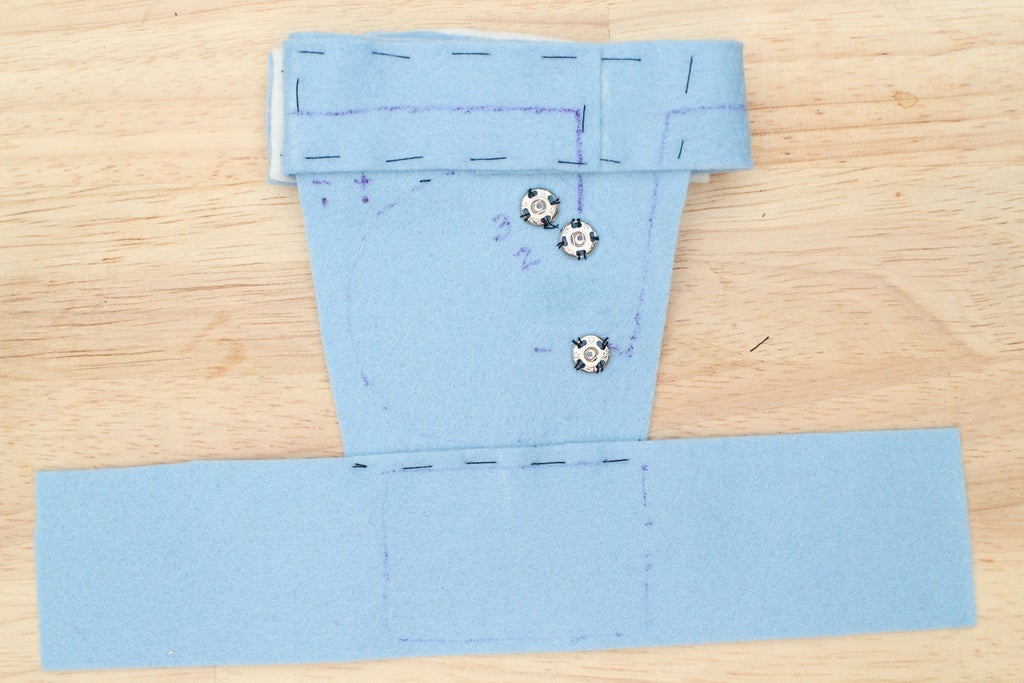
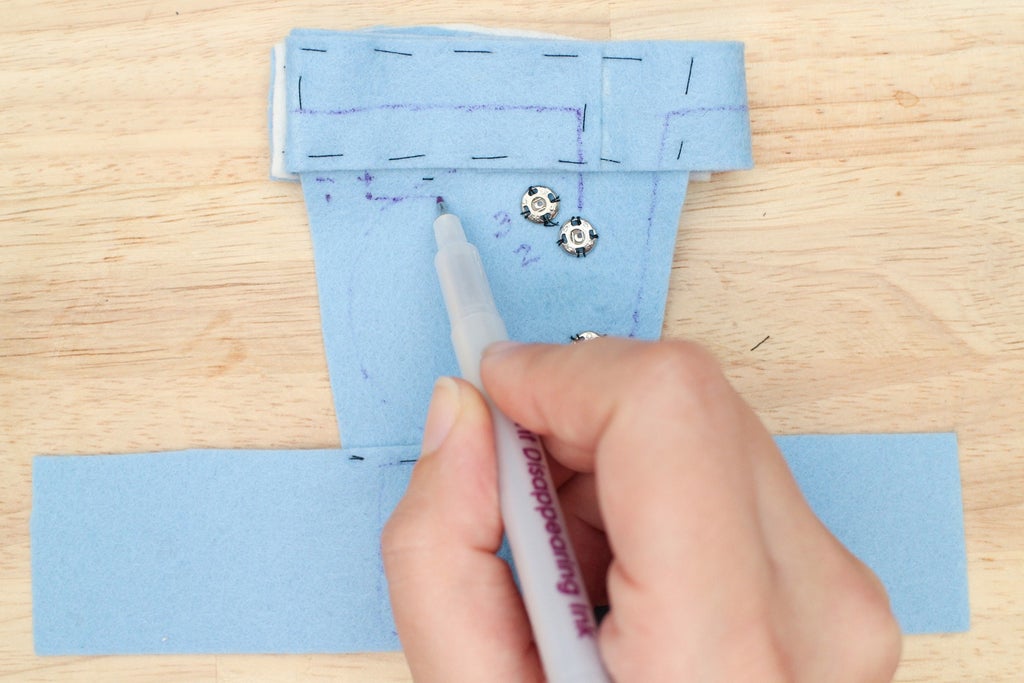
Use the fabric pen to trace around the battery, LilyPad USB and LED. Make a dot through each hole of the LED and mark the ground (-) and power (+) side.
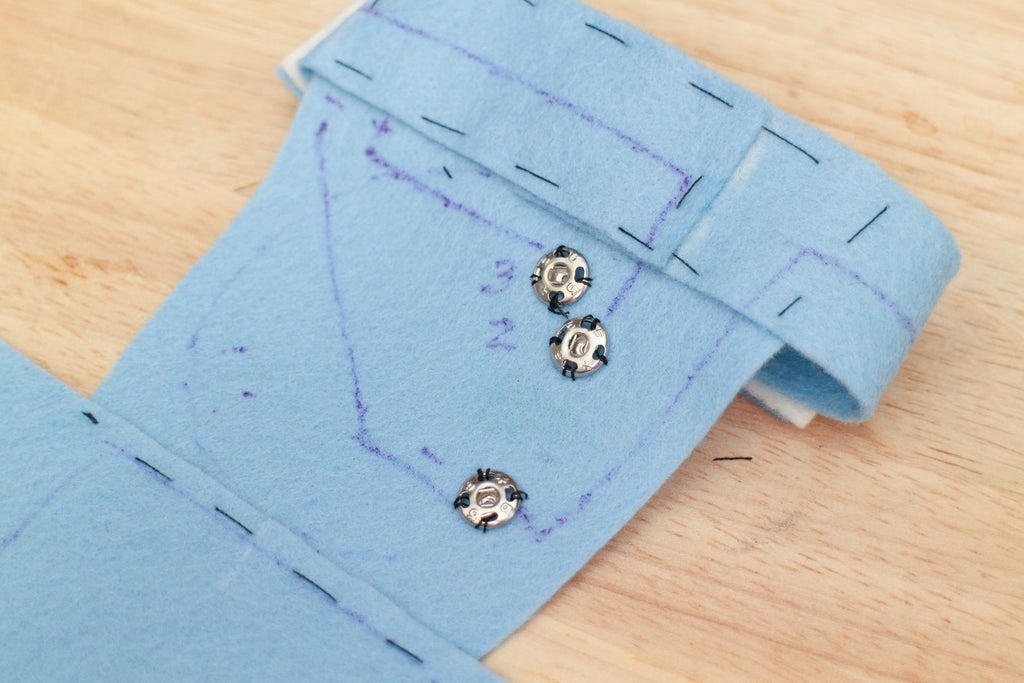
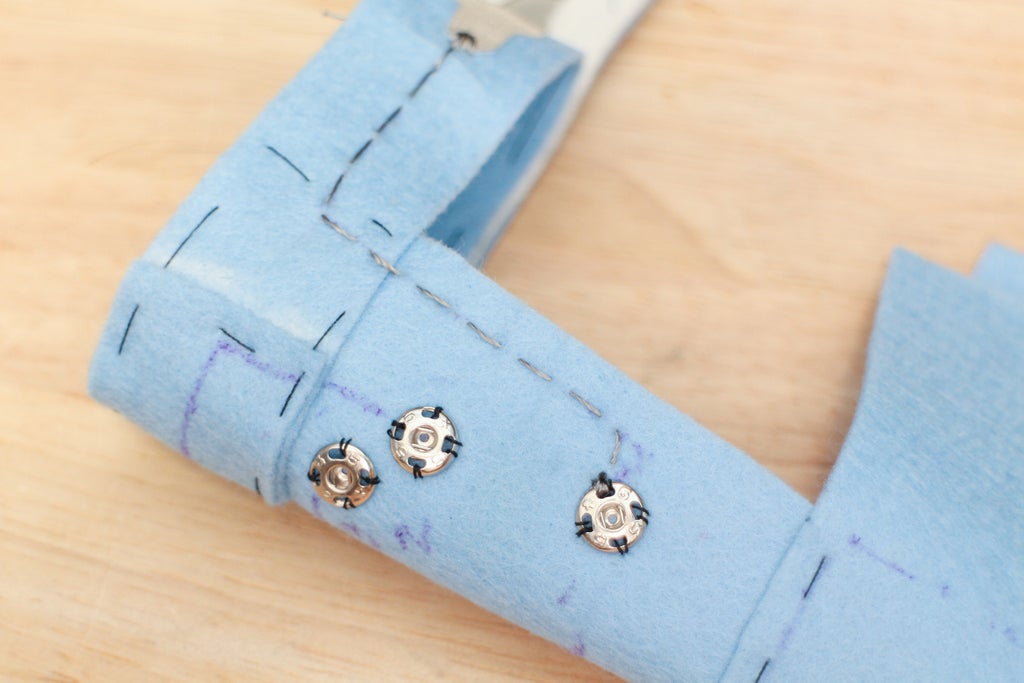
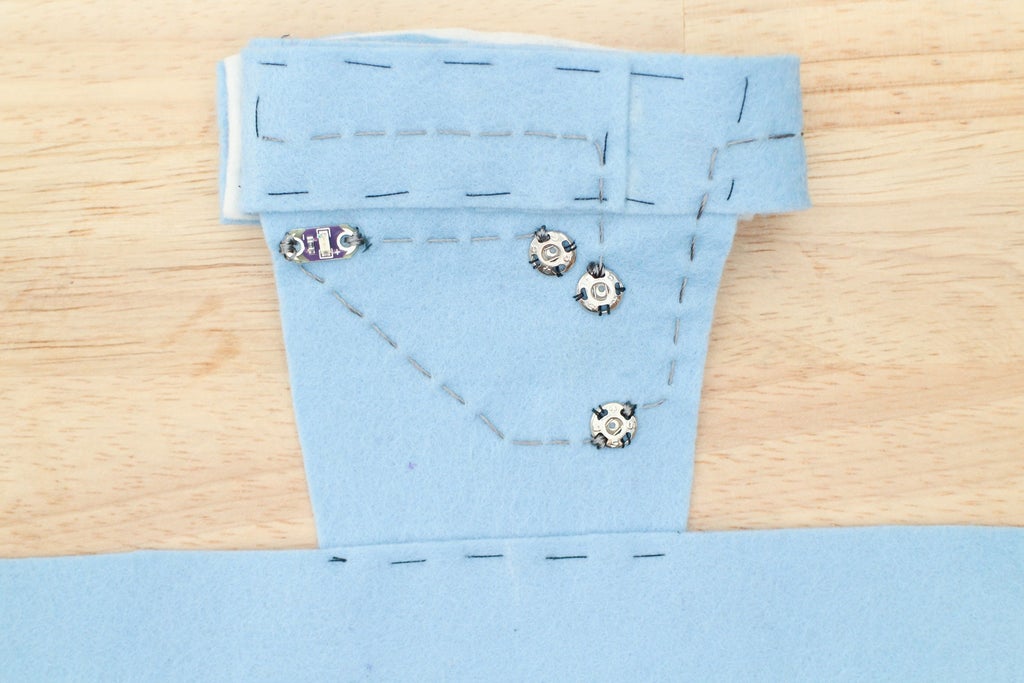
Step 4: Mark Snaps

In the Making Things Modular lesson, you sewed snaps onto the back of your microcontroller so it could be removed from projects later on. Now is when you sew the other half of those snaps to your project. You do this before drawing in the traces because you will be connecting the components to them. Remember, connecting components to the snaps are the same as connecting them directly the microcontroller pins.
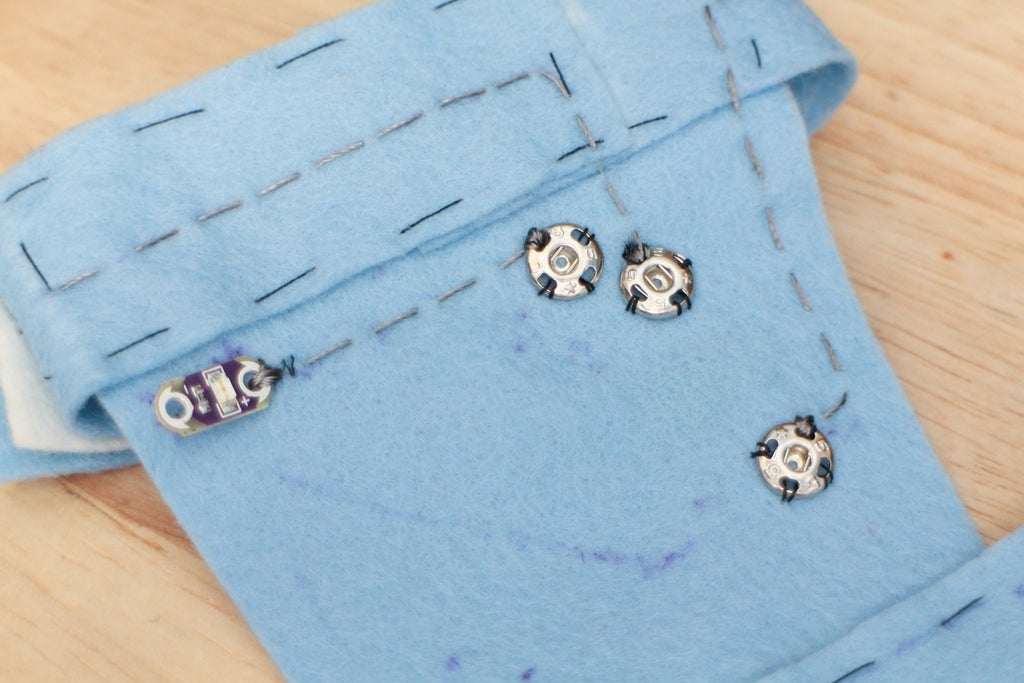
Look at where the center of each snap hits the fabric on pin 2, 3 and ground (-) and make a dot.
Step 5: Sew Snaps

Center each snap over the marks and sew down using regular thread. Label each snap with its corresponding pin so you know which is which.
Step 6: Draw Circuit

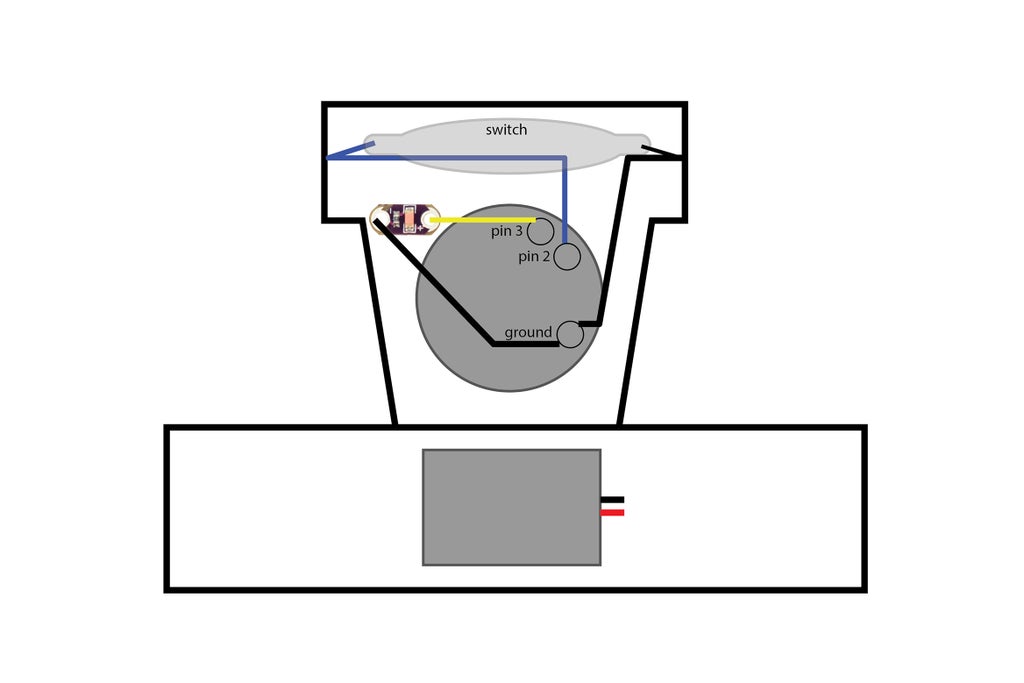
Draw the first trace from the switch lead to a hole on the ground (-) snap. I tend to draw traces straight and create corners when I need to change direction. Feel free to get creative with your lines.
Draw the remaining connections:
Remaining side of switch to pin 2
Power (+) side of LED to pin 3
Ground (-) side of LED to ground (-) snap.
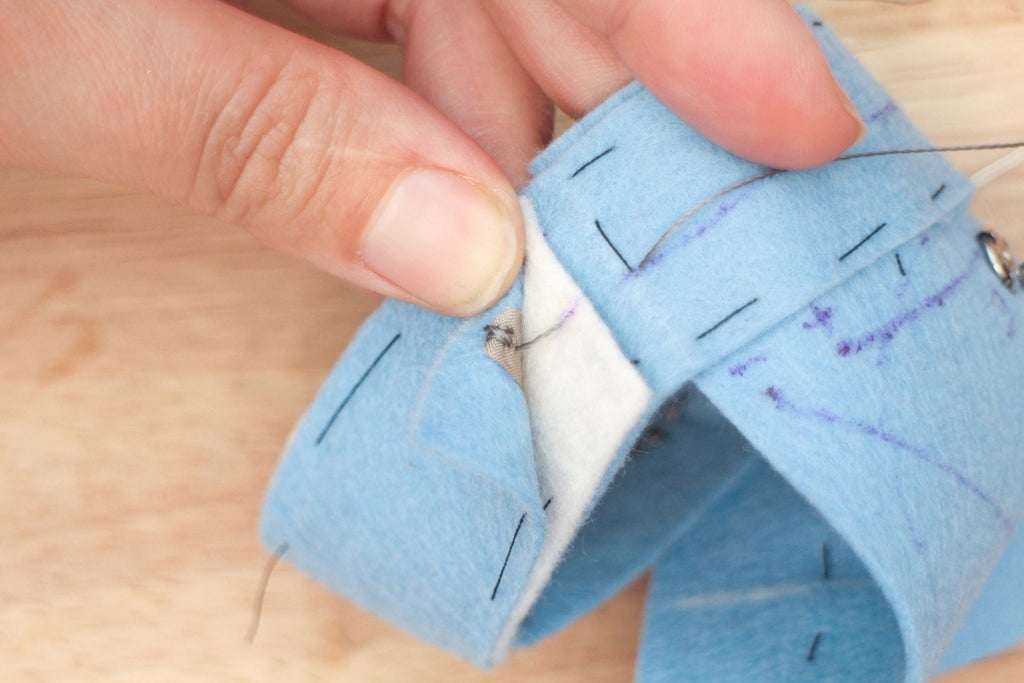
Notice how the trace going from the ground of the LED to the ground snap travels inside the board's outline. The shortest distance between two components may be under another component. That's ok as long as you do not create a short. If the exposed conductive trace touches two exposed metal parts on the bottom of the LilyPad USB, that would create a short. To prevent one, simply look under the component you would like to make a trace under and check for exposed areas and see if the path you create will cross it. If you find that it will, use some electrical tape to cover the exposed parts on the board, or find another path between the two components.
Step 7: The Uneven Running Stitch

This stitch is the same as the running stitch except every other stitch is shorter than the other. I find it useful in wearable electronics when I want to minimize the amount of conductive thread exposed on one side. This side is usually the inside of a garment or accessory that touches the skin.
If you are working with fabric that has some thickness, like the felt, the exposure can be minimized further by only picking up the top of the fabric as you make the shorter stitch.
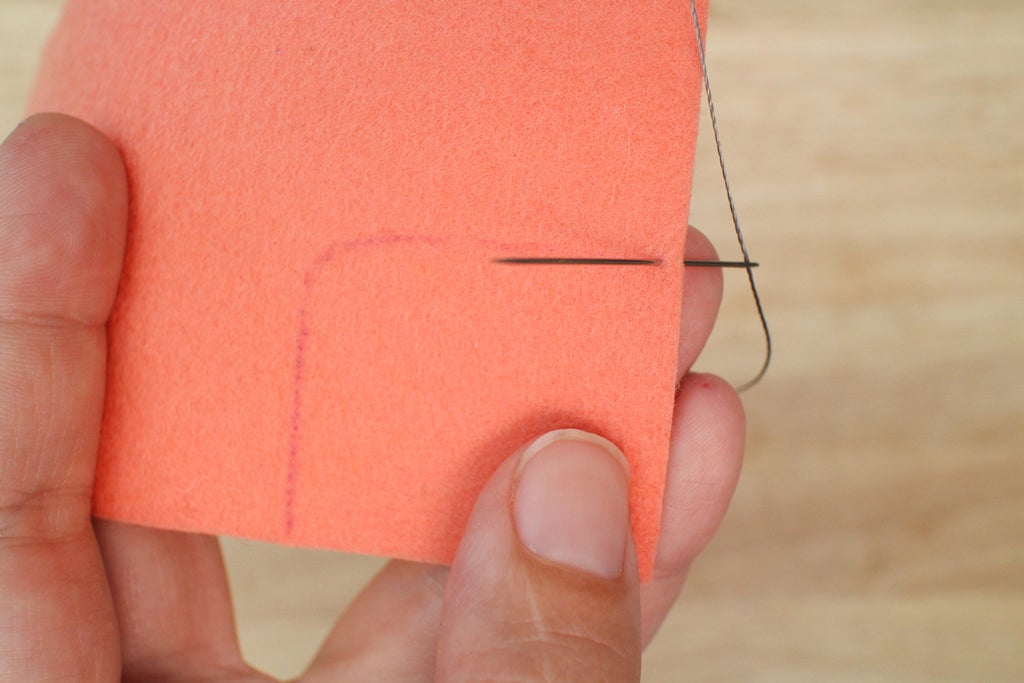
Poke the needle through the front, from the back to start the first stitch.
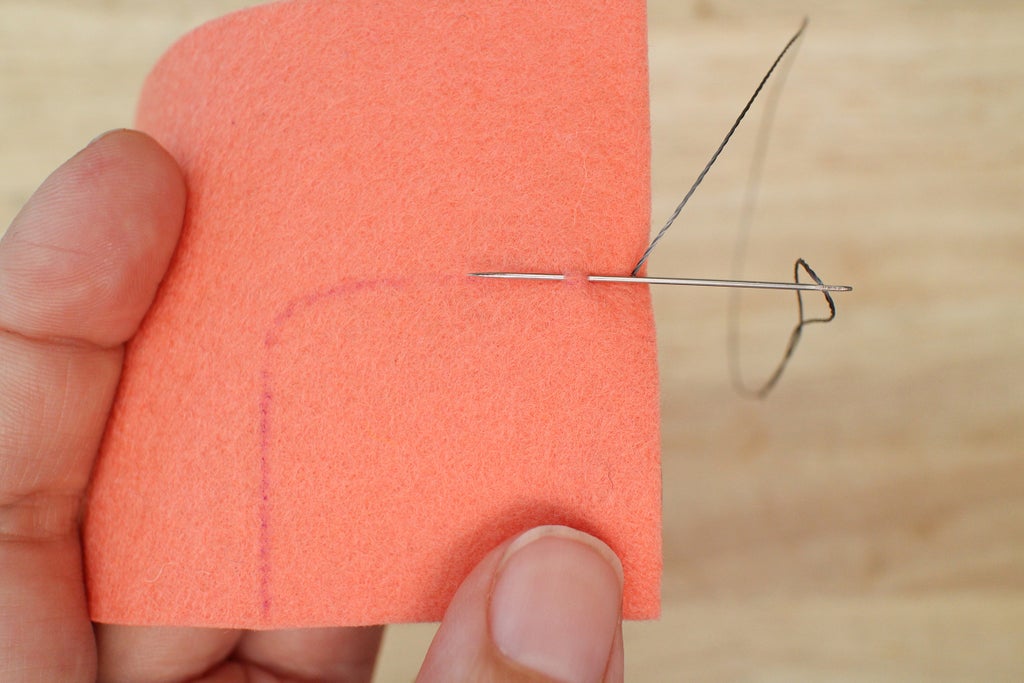
Pierce through the top of the felt to create the shorter stitch.
Pick up just the top if the felt.
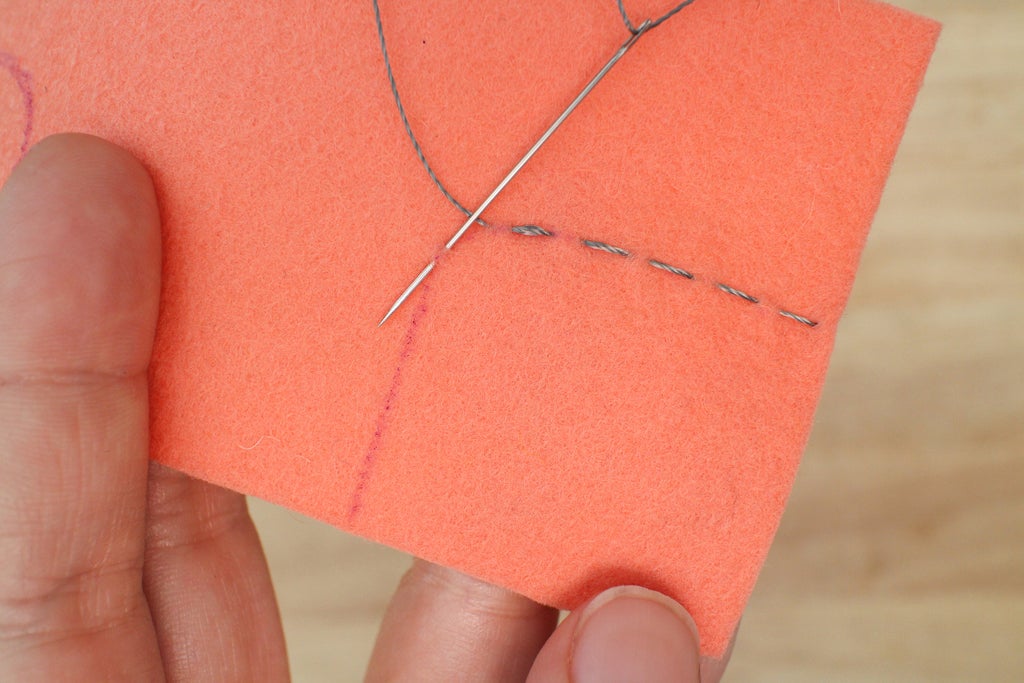
View from the back showing how the thread doesn't pierce through to the back completely.
Step 8: Sew Circuit

Thread the needle with conductive thread and knot the end. Using the uneven running stitch, sew the trace between the ground snap and the switch first. Do this by sewing through the lead of the switch and following the drawn line to the ground snap. Finish with at least 3 stitches going through the hole of the snap. Use the uneven running stitch for the rest of traces. Finish and knot all the traces on the back.
Sew the other side of the switch to the pin 2 snap.
Sew the LED power (+) to pin 3 snap.
Sew LED ground (-) to ground snap.
Step 9: Secure and Trim

Turn the project around. Tighten the knots up, put some glue on them and wait for them to dry. Cut off all the tails and you are done!
Step 10: Test Your Knowledge
{
    "id": "quiz-1",
    "question": "When you design a soft circuit you should do your best to not have your traces overlap",
    "answers": [
        {
            "title": "true",
            "correct": true
        },
        {
            "title": "false",
            "correct": false
        }
    ],
    "correctNotice": "That's correct",
    "incorrectNotice": "That's incorrect"
}
{
    "id": "quiz-2",
    "question": "If you want to minimize the amount of conductive thread that will touch your skin, should you use the running stitch or uneven running stitch?",
    "answers": [
        {
            "title": "Running stitch",
            "correct": false
        },
        {
            "title": "Uneven running stitch",
            "correct": true
        }
    ],
    "correctNotice": "That's correct",
    "incorrectNotice": "That's incorrect"
}
Step 11:
Show off your sewing skills with photos below!


![Tim's Mechanical Spider Leg [LU9685-20CU]](https://content.instructables.com/FFB/5R4I/LVKZ6G6R/FFB5R4ILVKZ6G6R.png?auto=webp&crop=1.2%3A1&frame=1&width=306)


