

Introduction: Using a Real Time Clock With Arduino


Ever wanted to make a project that activated on a schedule? Using a Real Time Clock (RTC) is a great way to do it! RTCs manage the Time and Date for you, maintaining time's constant and enduring march forward with a small battery. Using an RTC is as easy as setting the Time and Date with a simple sketch, and then using the library's functions to activate your device when the RTC meets certain conditions. Let's get started!
Step 1: Project Parts List
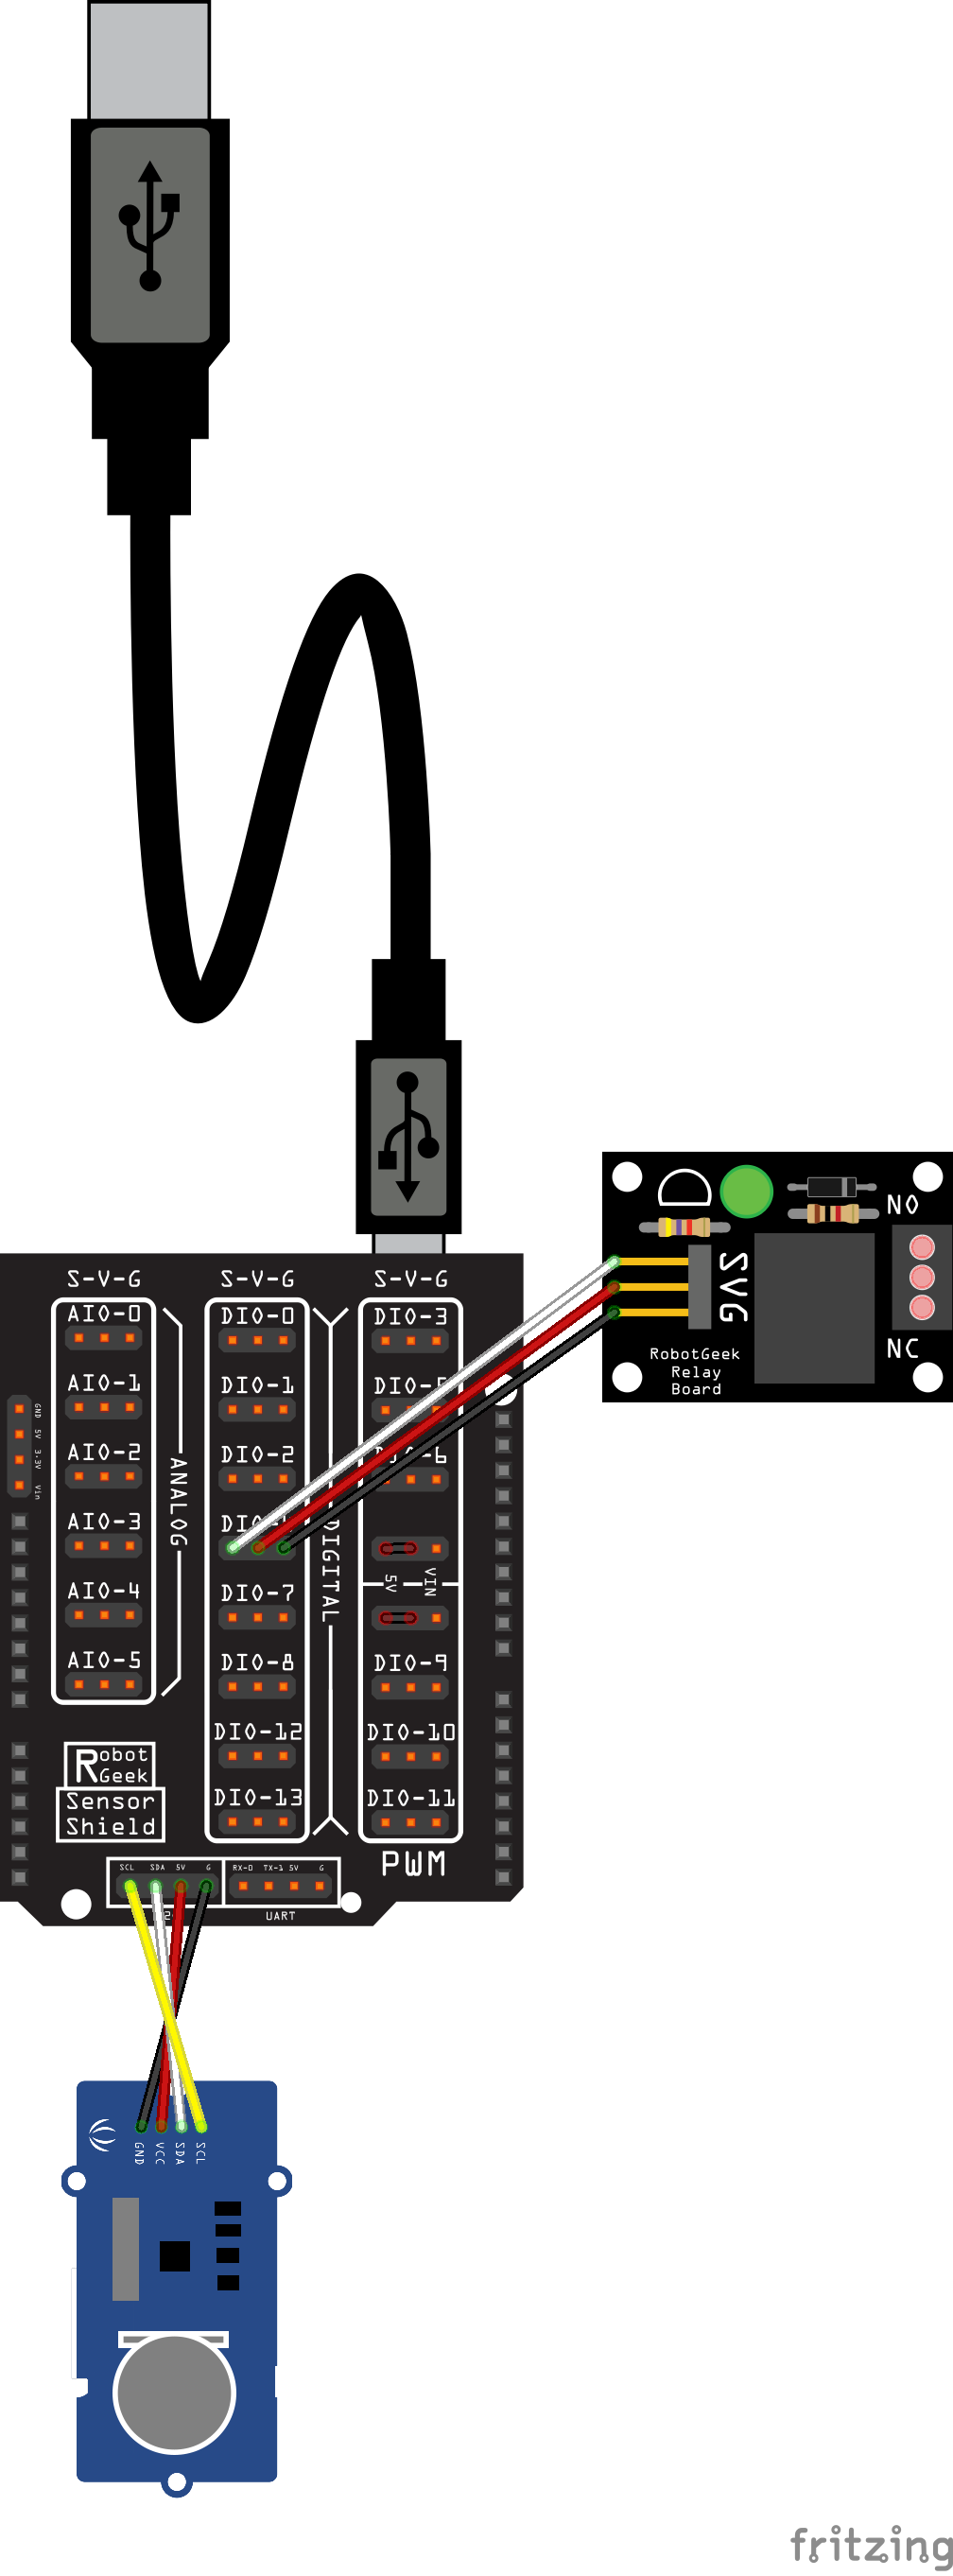
For the sake of simplicity, we're using the Geekduino and Sensor Shield to connect the RTC to I2C. We will have diagrams for wiring without a shield, but this is a quick and easy way to get up and running quickly.
- Geekduino or another Arduino Compatible board
- Sensor Shield
- ~Duino Mount
- Workbench
- Grove RTC
- CR1225 Battery for the RTC
- Grove 4 Pin Connector to Female Jumpers
- If you're not using the sensor shield, you will need Couplers to connect to the arduino
- A sensor you would like to activate. We used a RobotGeek Relay, but this will work with just about anything you can plug into an Arduino!
- An appropriate Power Supply that matches your ~duino
Step 2: Setting the RTC Time and Date
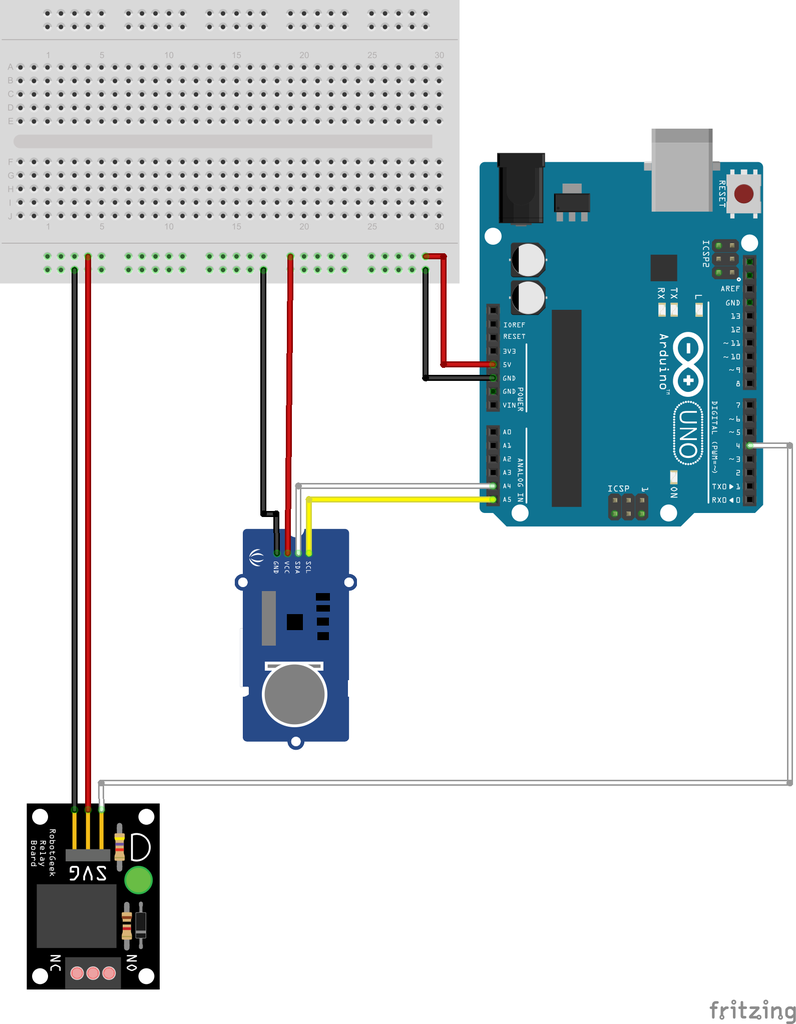
Install the battery in your RTC, and wire the RTC to your ~duino using the appropriate diagram.
Connect your ~duino to your PC.
Download the Library, and put it in your Arduino Libraries folder.
Open the Arduino IDE, and go to:
File > Examples > RTC > SetTimeAndDisplayTake a look at the time and date, then let's look at the setup in lines 30-38
void setup()
{
	Serial.begin(9600);
	clock.begin();
	clock.fillByYMD(2013,1,19);//Jan 19,2013
	clock.fillByHMS(15,28,30);//15:28 30"
	clock.fillDayOfWeek(SAT);//Saturday
	clock.setTime();//write time to the RTC chip
}
This is where you will set the correct date and time. The date is set by clock.fillByYMD, which is formatted with the year first, followed by the month, then the day.
The time set by clock.fillByHMS, which is formatted in 24-hour time, with hours first, minutes, then seconds.
Set the day of the week with the appropriate 3 letter signifier in clock.fillDayOfWeek. The days of the week are shortened as follows:
MON
TUE
WED
THU
FRI
SAT
SUN
When the time is set, upload the code to your board, and open the serial monitor. The proper time and date should show up, letting you know that the RTC is set.
Step 3: Coding
Now that you've got your clock set, we can move on to setting up your project! We'll start by adding a single relay that will turn on for 5 seconds under the condition that it is Monday at 2:30PM, and will run for 1 second every minute otherwise. Grab the RobotGeek Libraries and Tools and in the Arduino IDE, let's open:
File -> Sketchbook -> RTC_Relay
Upload the code to your ~duino, and watch it turn the relay on every minute! Let's take a look at the code while that's clicking away.
We are using Switch and Case to poll the RTC for time, and then handle what to do at specific times accordingly. For example, switch (clock.second)
{
case 30: //when the clock reads 30 seconds (Once a minute at the halfway mark)
digitalWrite(RELAY, HIGH); // turn the Relay on (HIGH is the voltage level)
delay(1000); // wait for 1 second
digitalWrite(RELAY, LOW); // turn the Relay off by making the voltage LOW
delay(1000); // wait for 1 second
}
Our switch is the seconds reading from the RTC. When the seconds reach 30, it sets off the case, turning on the Relay. Now what about that ultra specific time that we wanted to have the Relay turn on for longer? Let's take a look. switch (clock.dayOfWeek)
{
case MON: //on Monday
switch (clock.hour)
{
case 14: //at 2 o'clock
switch (clock.minute)
{
case 30: //at 30 minutes
switch (clock.second)
{
case 1: //at 1 second
digitalWrite(RELAY, HIGH); // turn the Relay on (HIGH is the voltage level)
delay(5000); // wait for 5 seconds
digitalWrite(RELAY, LOW); // turn the Relay off by making the voltage LOW
delay(5000); // wait for 5 seconds
}
}
}
}
More switches, more cases. Starting with the longest amount of time we wish to measure, in this case, the day of the week, We poll the RTC for increasingly more specific times as each condition is met. So on Monday, it will ask for the hour. If the hour is 14 (2 O'clock PM), it will ask for the minutes. If the Minutes are at 30, it will ask for the second, and if the clock is at one second, it will finally turn on the relay for 5 seconds. All of this will be ignored on any day that is not Monday.
You can see how this would be handy for events that you need to repeat at very specific intervals! Play around with the code until you feel like you can tackle your project.
Step 4: That's It!
If you have a project made, simply hook the RTC up to it, code for the cases that you would like it to execute an action, and watch it handle your work load for you!
Don't have a project, but are looking for things that you can use a RTC to run? How about an automatic fish feeder? You could set it to as many feeding times as you'd like per day! What about putting together one of those really snazzy word clocks that tells you the time and date in plain language? Maybe you could hook this up to a pump, and water your plants on a schedule? Time is at your command! Utilize it, and tell us what you came up with, we'd love to hear about it!


![Tim's Mechanical Spider Leg [LU9685-20CU]](https://content.instructables.com/FFB/5R4I/LVKZ6G6R/FFB5R4ILVKZ6G6R.png?auto=webp&crop=1.2%3A1&frame=1&width=306)


