

Introduction: Wood Glue


Wood glue refers to a class of adhesives that are suitable for wood. Wood glue is similar to white glue in that it is water based and contains PVA, but that is the extent of the similarity. It is designed to bond with wood specifically, has a faster tack point and grabs material better in the uncured state. It is also generally more rigid, and easier to sand than white glue.
This lesson will go over some of the working properties of wood glues, and how it differentiates from other PVA glues like white glue.
For a more woodworking-focused view about wood glue, check out this lesson from mikeasuaurs'sWoodworking Class.
Step 1: Tips and Facts

Using wood glue on wooden surfaces is usually quite straightforward, but working with organic materials like wood can cause slight variation from glue up to glue up. The following includes some tips and things to consider when it comes to using wood glue.
Wood glues on average have a set time or closed time of about an hour. This means you have to hold your pieces in a jig or clamp for an hour. This adhesive cures to full strength in 24 hours usually, but give it longer if your environment is particularly chilly or humid.
The relationship of wood to ambient humidity should be considered when selecting which kind of wood glue you may need to use. If a glue repair is necessary to wooden outdoor furniture, it is important to use a wood glue that is suited for outdoor use. Not all wood glues are water resistant, not suited for exterior use, and should only be applied to wood that is used indoors.
Some wood glues have an extended open time and cure time, this kind of glue is appropriate for use in complex operations such as clamping and aligning curved fixtures.

Remember in the white glue class, we discussed a little bit going a long way. This probably rings even truer when it comes to applying and using wood glue. Wood is porous and easily affected by moisture, so when glue is applied to unsealed wooden surfaces, the adhesive saturated wood swells with moisture. Too much glue can cause your pieces to warp, and no longer align correctly.
Wood glues aren't really suitable for gap filling because they soak into the wood and leave the gap empty, or worse, the glue cures in flaky wafers that fill the gap, but have little structural integrity. Tight-fitting joints that push glue in between the fibers is the best way to fortify a bond.

When you clamp wood together, a sure sign of a successful bond when glue begins to bead out of the joint. That thin bead of glue does need to get cleaned up since wood glue can discolor wood, and affect the way stain is absorbed by the wood grain. Removing excess should be done first mechanically, I like using a silicone knife, then wiping it off with a lint-free cloth, then a quick pass with a damp sponge to remove any remaining residue. Glue residue can dry very quickly, so time is of the essence.
Clamping of wooden parts is cause for creativity. It all depends on the scale of the parts you are applying to glue. I work most frequently with spring clamps to make small repairs, but sometimes band clamps or long bar clamps may be necessary. Be sure to clamp parts perpendicular to glue lines so that air is being squeezed out as surfaces are mated without parts slipping.
Step 2: Repair

At home, wood glue gets used the most to prevent delamination of wood furniture, repair split cutting blocks, and fix the wobbly legs & backs of chairs.

Materials needed for this repair
Pry the split open as far as possible using your hands, or a leverage tool if necessary.

Inject glue into the split using the tip of a glue bottle, or an applicator. If you really want to get precise amounts of wood glue in between pieces, you can use one of these nifty squeeze applicators. For this repair, I only needed a brush. Try and get the adhesive as deep into and between your parts as possible.

Place clamps across the wood perpendicular to the split, until glue oozes out. Wipe off the excess glue with a barely damp sponge. Allow the glue to dry overnight and remove the clamps.
Former Instructables Artist-in-Residence Coby Unger has tackled repairing chairs many times while he was collecting pieces for his StumpChairs.
Step 3: Removal

Getting wood glue out of clothes can be a real drag. Since it is water based, you catch it quickly to minimize damage.
Begin by soaking the garment in a hot water bath to see if you can lift the stain. Remove as much uncured adhesive as possible by blotting it with a warm damp rag. If there is remaining glue residue, try soaking in a diluted white vinegar solution. Vinegar can cause colored clothing's dye to run, so always test for colorfastness first.

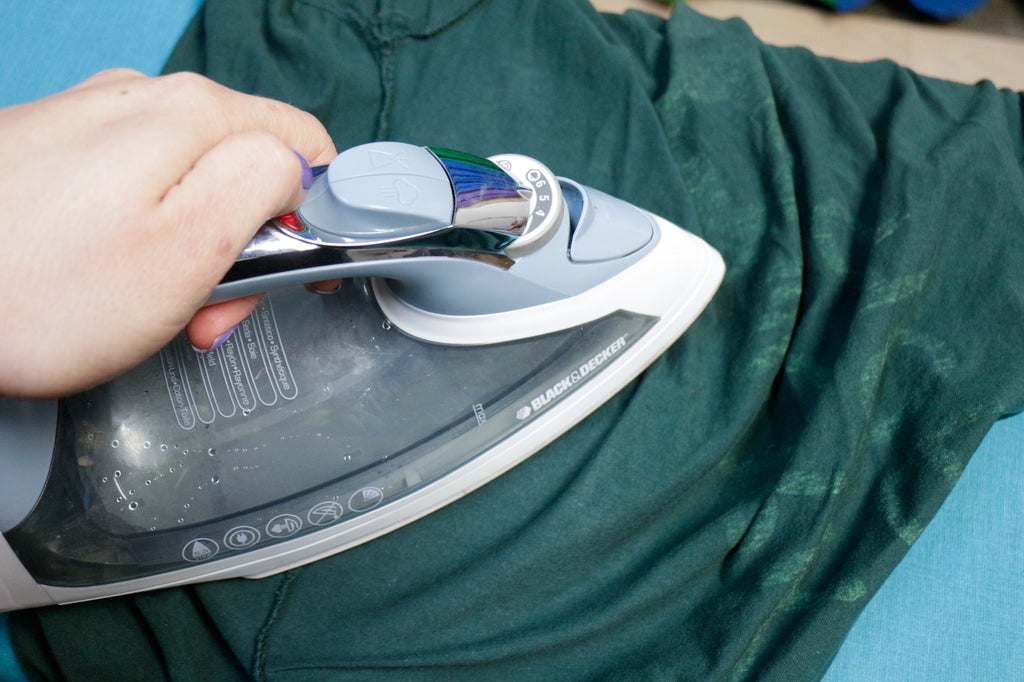
For removing cured adhesive, you'll have to use an iron to melt off the glue residue like we did previously for the fabric glue and hot glue class. (links coming soon) Lay down a sacrificial cloth under your garment, so that the glue stain's face is on the scrap cloth. Heat the dried adhesive with an iron so that the glue melts into the rag. Repeat if necessary.


If the glue stain is really pesky, turn your iron to steam mode - the steam will get in between the fibers and help lift the glue from the garment. Only certain fibers can handle being blasted with steam, so be sure to test in a discreet area first.

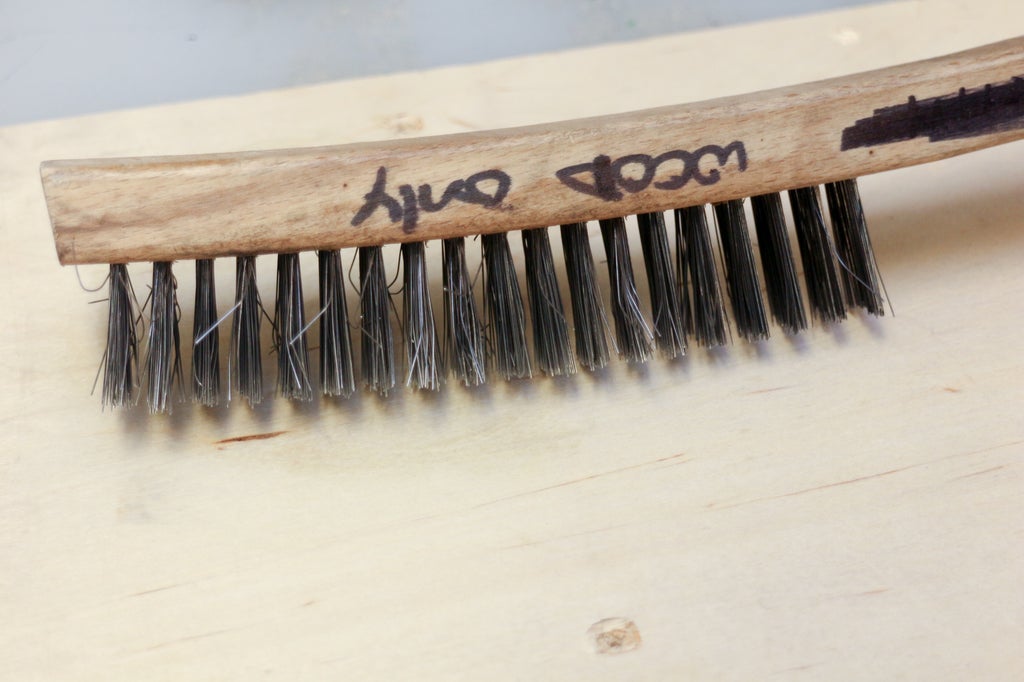
Excess dried wood glue on a project can spoil the way a finished piece looks. Dried wood glue on a project will have to be removed with a solvent, or mechanically with a sander or chisel. Untreated woods can handle solvents in moderation, just be sure not to saturate the wood fibers to the point that they warp.
After the glue has been softened with a solvent, try using a wire brush to scrape up the glue. If that doesn't work, allow the solvent to evaporate completely, then sand off the glue.
Get wood glue on your hands? Mikeasaurus has the answer for that check out this lightning speed solution from his woodworking class to get glue from your skin.
Step 4: Class Exercise

Check out this Instructable that turns an embroidery hoop into a band clamp to create a surprisingly posh lampshade.
In the next section, we will bust out the aerosol cans and learn all about spray adhesives. Handy tips will get you mating surfaces to form bonds faster than ever, and we'll embark upon a fun 70s throwback class project .
Step 5: Quiz
{
    "id": "quiz-1",
    "question": "When do you need to use an extended wood glue",
    "answers":[
        {
            "title": "If you need your glue to set quickly",
            "correct": false
        },
        {
            "title": "If your parts need extra time to align or bend into a closed jig",
            "correct": true
        },
       {
            "title": "If your wood surfaces are too thick and need extra glue",
            "correct": false
        }

    ],
    "correctNotice": "That's correct",
    "incorrectNotice": "That's incorrect"
}
{
    "id": "quiz-2",
    "question": "What is the closed time of wood glue",
    "answers":[
        {
            "title": "One Hour",
            "correct": true
        },
       {
            "title": "Thirty Minutes",
            "correct": false
        },
{
            "title": "Twenty Four Hours",
            "correct": false
        },

    ],
    "correctNotice": "That's correct",
    "incorrectNotice": "That's incorrect"
}
{
    "id": "quiz-3",
    "question": "What ensures the best wood glue bond?",
    "answers":[
        {
            "title": "Using a sparse amount of glue on bonding surfacs",
            "correct": false
        },
        {
            "title": "Pieces are held in tight clamp until cure is complete",
            "correct": true
        },
        {
            "title": "Always applying glue to smooth finished surfaces",
            "correct": false
        }

    ],
    "correctNotice": "That's correct",
    "incorrectNotice": "That's incorrect"
}


