

Introduction: Wooden Vertical Carousel Spice Rack / Alchemy Design


This project features a making of Wooden Vertical Carousel Spice Rack adorned with Alchemic Design decorations, alongside spice boxes embellished with laser-engraved patterns.
Using Oak, Alder, and Walnut, I created a smaller version of the Vertical Carousel I've long envisioned. Along the way, I delved into the intricacies of wooden mechanisms, mastering gears, chains, and transmissions.
All challenges have been tackled, and the project is now available as open source.
Join me in bringing this elegant and practical creation to life.
The video is about the process of making
Wooden Vertical Carousel Spice Rack / Alchemy Design
#carousel #spices #woodworking #lasercutting #laserengraving #alchemy #rack #organizer #gears #chain
Supplies
Tools:
- DIY Laser cutter/engraver 520x520mm, 5.5w
- Disk sander
- Screwdriver
- Hand router 1600 W, V-bit 45 degree, Round bit R=5 mm
- Clamps
- Sandpaper: 120 / 220 / 320 grit
Materials:
- Oak sliced veneer 4.5mm, 2,5 mm
- Alder sliced veneer 4.5 mm
- Walnut sliced veneer 4.5mm, 2,5 mm
- Plywood 4 mm, 6 mm
- Bearings: d=4, D=9, H=4 x 8 pcs
- Bearings: d=8, D=14, H=4 x 10 pcs
- Screws: 2.5x12 mm, 2x10 mm, 2x4 mm
- Glass bottles: D=47, H=80, V=90 ml
- Small metal brush
- Bamboo sticks D=4mm (for BBQ)
- Magnets D=3mm, H=4mm (NdFeB)
- Masking tape
- Glue: Titebond 2, 3M Scotch-Weld Fastbond 30, CA Glue + Activator
- Wood tinting: Vidaron Beica Walnut (B09), Palisander (B10), Mahon (B13)
- Oil: Tundra oil with Carnauba
- Bee Wax
Step 1: Laser Cut -engrave Gears, Holders


All SVGs include the thickness of the materials used.
Before laser cutting, I polished the veneer and plywood with 220-grit sandpaper
For the base of the gears, I used 4mm plywood because it is durable.
Decorative parts - sliced oak veneer 4.5 mm.
Attachments


Step 2: Make Chamfer for Gear Teeth


This turned out to be very useful!
I used a round file to chamfer all sides of each of the teeth.
Step 3: Polish Gears After Laser Cutting


Step 4: Chamfer the Holes for the Screws


A very important step, otherwise the screws will catch during rotation!
Step 5: Tint Gears and Other Parts


Step 6: Screw and Glue Gears and Decorative Parts


Step 7: Making Axle Tubes


- Laser cut the SVG file, the material I used is - sliced oak veneer 4.5 mm.
- Glue parts and hold them with clamps.
- Sand the tube sides
- Round the tube edges (I used 5mm rounded bit and hand router)
- Tint with colour you like

Step 8: Laser Cut -engrave Side Part and Decor


For the base part, I used plywood 4mm.
Decorative elements: Alder 4.5 mm, Walnut 4.5 mm, Oak 2.5 mm, Walnut 2.5 mm
Attachments


Step 9: Tinting the Inner Side of the Side Part

Step 10: Glue Decorative Elements of the Side


I've drawn these elements by hand, so they quite not identical, but it's easy to find the places it need to be.
Step 11: Chamfer the Edges of the Side Part

I just found that it will look more nice :)
Hand router and rounded bit R=5mm
Step 12: Glue Decorative Roots to the Side Part


Step 13: Making Wooden Axis (sticks)


We will need an 8mm diameter axle, so I made a simple tool from two pieces of board and a blade.
- Laser-cut parts from 4.5 mm wood
- Glue with CA glue to get 9 mm thickness
- Round edges by using a screwdriver and disk sander
- Drill the stick through the hole of the blade tool
- We will need 4 x 80 mm, 4 x 33 mm
Attachments

Step 14: Making Gears Holder


I used some wood rings to get the required height of 22.5mm.
2.5mm + 4.5mm + 4.5mm + 4mm + 4.5 mm + 2.5mm = 22.5 mm
Glue the rings together with CA glue + Activator
* Toothpicks are convenient to use to align the rings.
Attachments

Step 15: Glue the Gears Holder to the Side Part


Glue the axis stick to the top holder.
The length of the axis stick was not strict, I used approximately 80 mm.
Step 16: Wax + Oil the Parts


Wax and oil will extend the life of your wooden product.
Step 17: Laser Cut the Chains Details With Axles


We will need 38 chains and two times more axes.
As axles, I used BBQ sticks with 4mm diameter.
Material: sliced of oak veneer 4.5mm
I very accurately selected the diameter of the holes in the chain elements so that it fits perfectly to the BBQ sticks. Just test with +- 0.05 - 0.1mm from the original diameter.
Too small will make it difficult to rotate.
Too big will add backlash, and an error in the length of the entire chain will accumulate.
Step 18: Polish the Sides of Chains and Rings


Laser burning of oak releases a lot of resin, which makes it difficult for the chain elements to rotate normally.
Step 19: Glue Chains


Glue chains is a simple iterative process. Glue the sticks to the bottom, wait, put on the ring and the next element of the chain, look at the photo or video for a better understanding.
We need 38 chains.
Step 20: Glue Tray Holders to the Chain


The tray holder is just two rings from 4.5mm sliced oak veneer :)
I glue them at each 8th - 9th chain.
if you want strength, rotate the rings 90 degrees relative to the wood fibers.
Step 21: Polish and Tint Chains


Step 22: Move Your Chain for Smoothness

Once the chain is ready, you may need to “move” it a bit to make the chains rotation more smooth.
I added a little mineral oil to the joints and rotated it a little.
Step 23: Assembling the Elements on the Side Part

Step 24: Place Bearings to the Side Part Holes


Bearings: d=8, D=14, H=4
I made bearings holes very precise, just by playing with +- 0.05 - 0.1 mm from the original diameter.
So just use weight to fix them in the holes.
Step 25: Place Axis and Rings


Short sticks length 33mm.
Long stick length 80mm (approx).
- Place the 8mm diameter sticks (axles) into the bearing holes.
- Place Two rings for each stick (4.5 + 2.5 mm)
Step 26: Place Gears to the Axles


Additionally, cover small gears with 2.5 mm rings
Step 27: Assemble Axles Holder


Bearings: d=8, D=14, H=4
- Place bearings into the holes of the axle holder (use weight)
- Place the axle holder at place.
- Cover holes with decorative "bone" part.
Step 28: Place Wax to All Rings We Just Assembled (optional)


Later I decided to put wax on all rotating rings, this added very smooth rotating
Step 29: Fix Axles Holder With Screws


For the decorative "bone" part I used short screws.
Step 30: Fix Tube Holder to the Big Gear


Step 31: Place Chain


To accommodate the chain I temporarily pulled out the large gear.
Be careful that the gear teeth take their places in the holes in the chain
Step 32: Make Second Side Part the Same Way

The only difference between these two parts is that one of them does not have a through hole under the large gear (in the decorative element)
Step 33: Make Handle Wheel


Materials: sliced veneer 4.5 mm Alder and Walnut
- Laser Cut layouts
- Glue and screws
- Placed glue to the central hole
- Place an 8mm stick into the hole
- Wait while the glue is set
- Wax + Oil (do not cover the stick)
Attachments

Step 34: Place Handle Wheel to the One of Side Part


Simply replace the stick that goes through the large gear with an assembled handle-wheel.
All parts are symmetrical, so it doesn't matter if you are right-handed or left-handed.
Step 35: Important Before Join Left and Right Side With Tubes


Make sure that the position of the chain and tray holders are symmetrical !!!
Same as the position of the tube holder on the big gear (ring with a square hole) !!!
Step 36: Join Left and Right Side With Tubes


- Place the tubes on one side (longer tube on the axis with the larger gear).
- Place the tubes on the sticks of the other side part.
- Press down on the sides so that the tubes are completely inserted.
- !!! Important, the upper tube must fit completely into the holder with a square hole.
- !!! Important: You may have to adjust the square hole for the tube holder, this must be very precise, otherwise even a small amount of play will cause the side gears to become out of sync. (I just made several versions of this part with a difference of +- 0.05 - 0.1 mm)
- Fix tubes with sticks by the screws.
Step 37: Making the Bottom


- Laser-cut the layouts
- Tinting
- Screw on the small L-holders with rubber feet
* I planned to glue the bottom to the side parts, that's why it has a laser joints, but at the last moment, I decided that it would be nice to make possibility to disassemble it.
Attachments

Step 38: Fix the Bottom With Sides Parts


- Just place your assembly on the bottom part, laser joints will help you align.
- Fix with screws from inside.
Step 39: Laser-cut and Polish the Tray Parts


Step 40: Glue Magnets in to the Bottom Tray Part Holes


Magnets: 3mm diameter, 4mm height
Glue: just wooden glue before placing the magnet and after, cover the opposite side with masking tape.
!!! Important. Don't neglect this step. Next, I will add magnets to the spice boxes. This will help prevent the spice boxes from shifting as the trays rotate.
* you may make the holes more precise to skip the glue
Step 41: Glue Tray Parts Together


Glue and just fixed parts with masking tape.
Step 42: Rounding Tray Edges


I've used a hand router and R=5mm round bit
Step 43: Tint and Wax + Oil


Step 44: Make 4 of Trays

Step 45: Place Bearings in to the Sides Holes of the Trays


Bearings: d=4, D=9, H=4
I made bearings holes very precise, just by playing with +- 0.05 - 0.1 mm from the original diameter.
So just use weight to fix them in the holes.
Step 46: Attach Trays to the on Chain Holders


BBQ sticks 4mm diameter, length 12mm
- Insert stick to the small bearings, from both sides
- Rotate chains to get the tray holders visible
- Insert tray between two sides of chains
- Push the sticks to insert them into the holes of the tray holders.
- Push them more with some wooden pieces.
- Repeat for each tray
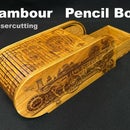
Step 47: Laser Cut -engrave Spice Box Parts


Material: Cherry sliced veneer 4.5mm
SVG include 16 different images for engraving

Step 48: Clean Engravings From the Wooden Burn Dust


I've used a small metal brush and Dremel
Step 49: Bevel Edges for 45 Degrees


I used 45 degrees clone-bit with a hand router placed upside-down
Fix box parts with the two-sided tape to the piece of plywood.
Step 50: Glue Spice Box


- Place aligned parts of the box
- Fix them with masking tape
- Place wooden glue on the edges
- Collapse the parts and fix them with masking tape
- Glue bottom part
- Glue the Top part as a sandwich and fix it with clamps
Step 51: Round Edges of Spice Box


I've used a hand router and R=5mm round bit
Step 52: Place Magnets Into the Spice Box Bottom Holes


!!! Important. The polarity of the magnet should be opposite to the magnets used in the tray.
Step 53: Wax + Oil Spice Box


Step 54: Make 16 of Spice Boxes


Step 55: Add Glass Jars


Material: glass bottles 47 x 80 mm, 90 ml
Spices are best stored in glass containers, so I decided to supplement them with small glass jars with a cork lid.
Glue the spice box lid to the cork lid.
Step 56: Place Spice Boxes to the Tray


Step 57: Final Result


