

Introduction: Wrap Text Around a Cylinder With Fusion 360


Extruding text around a cylinder use to be a tedious process with Fusion 360. After experimenting with the new Sheet Metal environment I found a much simpler way of accomplishing this task. It basically involves creating a cylinder, flattening it, writing and extruding our text, and then re-folding it. I will go through each step in this Instructable.
In the last step I will also include a link to the video tutorial with the narrated instructions.
Enjoy!
Step 1: Create the Sketch

Go to Sketch - Create Sketch and use the circle tool to create a circle with a diameter of 50mm. Create a small opening in the circle by splitting the circle with two intersecting lines and then use the trim tool to cut the small arc between the lines. Turn the intersecting lines into construction lines by selecting them and clicking 'x'.
Alternatively you can use the arc tool to create the same shape in a more direct way.
Basically we just want to create a circle with a little opening so that it doesn't complete a 360 revolution.
Step 2: Enter Sheet Metal & the Flange Tool


On the upper left hand of the screen click to change from the Modeling environment to the Sheet Metal Environment.
Select Create - Flange and select the outline of the circle and extrude it to 40mm.
Step 3: Extrude Flat Surface in Order to Flatten

We are going to want to flatten our extruded cylinder but since we can't flatten a curved surface we will need to create a straight surface. Click on the flat surface of the cylinder where me made the opening and extrude 0.5mm. Make sure to change the operation from cut to join.
Step 4: Flatten and Extrude Text


Click on Modify - Unfold and select the side of the extrusion we just created. Check 'Unfold all bends' and click Ok. The cylinder should now be a flattened body.
Select Sketch - Create Sketch and click on the top surface of the flattened body to select it.
Next select Sketch - Text - and click on the surface to start entering your text. Enter your height on the dialog box and click ok. Use the little blue circle to position and center your text and click ok.
Select the text by left clicking on the blue lettering and click 'e' for Extrude. Enter 1mm, select 'Join' as the operation and click ok.
Step 5: Refold Faces


Now that we have entered and extruded our text we can simply fold the cylinder again. To do this we simply click on 'Refold Faces' on our toolbar. The extruded lettering stays attached to the flat sheet as it is refolded to a cylinder.
Step 6: Close Our Gap

The only thing left to do is to close the gap on our cylinder.
To do this we simply click on 'e' for extrude.
Select the inner flat side of the cylinder.
Change Extent from 'Distance' to 'To Object'.
Select opposite side of flat cylinder face.
Change Operation from Cut to Join.
Change Chain Faces to Extend Faces
Click Ok.
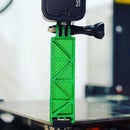
Step 7: Voila!

Voila!
We now have our cylinder with our extruded text. To watch a video of the step by step instructions in this Instructable with narration you can simply click on this link.
If you are interested in learning how to model with Autodesk Fusion 360 then check out my video courses at desktopmakes.com

Participated in the
Makerspace Contest 2017


