

Introduction: Wrapping Paper Storage


Over this pandemic, I decided to clean up the basement. During the organizing and moving around of things my wife mentioned she wanted a little gift station to make it easy to wrap birthday and Christmas presents. As part of it, she wanted some sort of storage for wrapping paper. She started looking for things to buy but there was no way I could allow that when I could easily make something to the specific size we needed with material I already had on hand. The dimensions for this holder were to allow it to fit into a 24 x 14 inch space but you can modify the basic of the design to fit whatever space you want.
Supplies
This is actually a pretty simple build and doesn't need an extensive amount of materials or tools. I used the tools I had but this can be made with more simple tools that more people are likely to have on hand.
Materials:
- Some sort of flat board (plywood, plastic sheets, sheet metal if you are so inclined)
- Fasteners (this depends on the material of your board. Screws or glue should work)
Tools:
- Saw (table saw, band saw, circular saw, or even a hand saw if you are carful)
- Something to cut out large holes (hole saws or in my case a CNC router)
- Drill (if you are using a hole saw or fasteners like screws)
Step 1: The Design

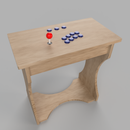
Here is the basic design for the wrapping paper holder. It is just a box with two boards with matching holes in them. I chose two boards to help keep them upright but you could get away with just the top board with the holes.
The measurements on here are for a 23 7/8 x 14 holder that is 17 3/8 inches tall and uses boards that are 3/8 in thick. Again, modify these dimensions to meet your need.
Step 2: Cut the Panels to Desired Sizes


I had some signs that were being thrown out at work that I grabbed and cut to size on my table saw. The most important part here is cutting straight lines and keeping the sides square. This is why I recommend a table saw but if you are careful you can use almost any type of saw.
Cut sizes:
- (1) 23 7/8 x 14 inches [this is the base]
- (2) 23 7/8 x 17 inches [these are the sides]
- (2) 17 x 13 1/4 inches [these are the ends]
- (2) 12 x 13 1/4 inches [these are the first half of the hole boards]
- (2) 11 1/8 x 13 1/4 inches [these are the second half of the hole boards]
I designed the boards with the holes to be two pieces (the 12 inch and 11 1/8 inch pieces) because I needed them to fit in my cnc router but they can be combined into a 23 1/8 x 13 1/4 inch board.
Step 3: Cut the Holes


Now it is time to put the holes in the boards. Everything I could find online mentioned having 2 1/4 inch holes for wrapping paper. I made 20 holes at 2 1/4 inch diameter but I added 5 additional hole at the back that are 3 inches in diameter for any larger rolls we may have.
As I mentioned before, I uses my CNC router to cut the holes but you can just mark out the hole positions you want and use a hole saw to cut them out.
Just make sure that the hole boards you make for the top and bottom match one another so the holes will be aligned when assembled.
My router left the holes a little bit of a mess so I just used my Dremel and a sanding drum to clean them up. You may not need to do this depending on the material and cutting method you use.
Step 4: Initial Assembly


To properly install the boards with the holes, I needed to first attach one of the sides and both ends onto the base. This allows me to place and attach the hole boards much easier than it would be if I had put the other side on as well.
You may attach these with any method you have or want. I was lucky that these were polycarbonate (Lexan) as I could use superglue to attach them (plexiglass or Acrylic sheets need a special glue) This isn't going to be something that sees a lot of abuse so if doesn't need to be fixed together in an overly robust way. A couple screws or glue should work fine.
Step 5: Final Assembly


Now that the three sides are attached, the hole boards can be put in place. I attached the bottom one 6 inches from the base and then put the other at the very top. Make sure if you have different size holes that the top and bottom hole boards align correctly.
Once those are in place, all that is left is to attach the final side.
If you want to put some final touches like paint on it then you can add that once it is all together. This one will be in the basement so I wasn't concerned with covering some minor blemishes.
All this is left is to fill it up with wrapping paper.

Participated in the
Organization Contest


