Introduction: Easy Shibori Print With Inkodye
Turn an inexpensive pashmina into a custom work of art using Inkodye and a bit of sunshine!
This is an easy alternative to tie-dye and shibori that uses sunlight rather than soda ash as a fixative. This technique is incredibly easy and also works beautifully for DIY clothing, pillows and smaller items like handkerchiefs.
This is an easy alternative to tie-dye and shibori that uses sunlight rather than soda ash as a fixative. This technique is incredibly easy and also works beautifully for DIY clothing, pillows and smaller items like handkerchiefs.
Step 1: Used in This Project:
- Inkodye Red
- Inkowash
- Large bowl or bucket
- Water
- Gloves
- Pashmina
- Large work surface (e.g. a big piece of cardboard)
Make sure your pashmina isn’t polyester – Inkodye works best on natural fabrics like cotton, silk and rayon. All you need for this project is a scarf, Inkodye and Inkowash.
- Inkowash
- Large bowl or bucket
- Water
- Gloves
- Pashmina
- Large work surface (e.g. a big piece of cardboard)
Make sure your pashmina isn’t polyester – Inkodye works best on natural fabrics like cotton, silk and rayon. All you need for this project is a scarf, Inkodye and Inkowash.
Step 2: Dilute the Dye
Inkodye is sunlight activated, so find a dim area to work. Total darkness is unnecessary – you just want to avoid being near natural light. Pour your dye into a container and add water to make it go further. Inkodye is water-based and very concentrated so diluted Inkodye will still yield a very bright result. For this project we used 4 oz of Inkodye and about 8 oz of water.
Step 3: Saturate the Fabric
Fully saturate your pashmina in the diluted Inkodye. Wearing rubber gloves is a good idea so your hands stay stain free. Once your scarf is fully saturated wring it out so it isn’t dripping wet.
Step 4: Get Creative!
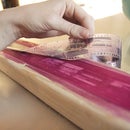
Now for the creative part! Lay your scarf out on a surface that you can take into the sun when you’re ready. We used a rolling cart. A large piece of cardboard that you could use as a work surface would do the same job. We started by accordion folding the ends of the scarf and then pinching in the sides to create interesting folds.
Step 5: Expose to Sunlight
Get ready for magic. Take your project out into the sun and watch the UV rays work their magic. Inkodye develops right before your eyes. Leave it in the sun for 10-15 minutes to allow it to develop to full color. Unlike other dye processes Inkodye doesn’t need to be ironed or steamed, the sun does the work for you!
Step 6: Wash
Once it’s fully developed bring your scarf back into a dim area to reveal your design. Take a moment to bask in its glory and then throw it into the washing machine with Inkowash. Inkowash is the special detergent that helps wash out unexposed Inkodye. Wash your scarf twice on the HOT setting of your machine.
Step 7: You're Done!
This technique is incredibly easy and also works beautifully for DIY clothing, pillows and smaller items like handkerchiefs.


