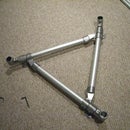
Introduction: Huge PVC Laundry Sorter
Our cat was peeing on our laundry (no, I'm not kidding) so my wife requested a laundry sorter. Since I have three small children (and hope to have more) I was compelled to grant the request. (Plus I don't really enjoy the smell of cat pee.. especially on my clothing). Anyhow, this is 5 bin PVC Laundry Sorter that is built with PVC pipe, fittings, snap clamps, a piece of fabric, some laundry bags, and of course a few safety pins.
Note: I am a partner in a business that distributes these PVC fittings (just so no one is surprised by that).
Here's a video where my family talks about that cat.. it's funny:
Note: I am a partner in a business that distributes these PVC fittings (just so no one is surprised by that).
Here's a video where my family talks about that cat.. it's funny:
Step 1: Come Up With a Plan
This isn't complicated, but here's my basic plan. I decided to put a lid on it (to keep the cat away). The lid certainly isn't required. But it is kind of cool to use the these slip on PVC tees to create things that you might not otherwise be able to do with PVC.
Step 2: Gather Your Materials
I'm assembling this laundry sorter out of PVC parts.
Here's a run down of what I used and where I got them.
Note: all sizes are 1/2"
Structural PVC Fittings - these fittings are made particularly for building things (they do not carry fluid), though you could use standard PVC fittings as well.
8 - PVC20 - Three Way L - These will be for the corners
5 - PVC25 - Tee - These will be for the middle supports and for the top of the lid.
11 - PVC10 - Slip Tee - These hold the "bag supports" and also are used to hinge the lid.
2 - PVC15 - Elbow - These are the corners of the lid.
Snap Clamps
Snap clamps are PVC clips that are used to hold on both the lid fabric and the laundry bags.
12 - For the bag supports
12 - For holding on lid fabric
Snap Clamps on Our Site
Snap Clamp Manufacturer
PVC Pipe Lengths
I kept the lengths simple. I made it three feet tall and 6 feet wide, so I only had two lengths to cut (with the section of the lid "edit" (more about that later). This is all 1/2" Schedule 40 PVC
16 - 3 foot cuts (4 for bottom, 4 for top, 6 for uprights, 2 for lid)
11 - 18" cuts (2 for bottom, 6 for top, 3 for lid)
You will probably want to determine the size based upon the size bags that you are planning to use.
Other Stuff
5 Laundry Bags
1 pc of fabric to cover the top
a bunch of safety pins to help attach the fabric.
Step 3: Assemble PVC Frame
I started by assembling the base. I added the uprights and then built the the top frame.
Notice how I slipped on the PVC Tee fittings onto the pipe. I used 3 on one and 4 on the other, the extra on one side was a support for the middle of the lid.
The only real tricky part was the length of the lid pipes. Because the hinges are offset I had to trim one of the top pipes so that it fit with the offset. Once I got to that part in the project I simply measured it in place and trimmed off a the excess with a hack saw.
I did not glue my PVC together. The fittings I was using had a thigh enough fit to stay together.
Step 4: Attach Bags & Fabric Top
I attached my bags with some plastic clips called Snap Clamps. These clips are great because they allow you to easily clip fabric onto PVC pipe. The bags can be removed and washed when they get smelly or need to be changed.
My wife found some discount fabric that we laid over the top, pulled tight, snapped on with snap clamps and then fasted with a few safety pins (so that the excess fabric didn't flap around).
My wife found some discount fabric that we laid over the top, pulled tight, snapped on with snap clamps and then fasted with a few safety pins (so that the excess fabric didn't flap around).
Step 5: Viola! My Very Own Massive PVC Laundry Hamper
That's it.. pretty basic and straight forward. Drop me a line or comment if you have any questions.
And yes, so far it's cat proof!
And yes, so far it's cat proof!


