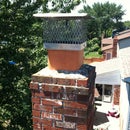
Introduction: Installing a Stainless Steel Chimney Chase Cover
A chimney chase cover is a cap that seals off the top of a wood framed or brick laid chimney chase. Chimney chase covers are typically made from low grade steel, which will rust over a short period of time. The smallest gap or hole on the chase cover can lead to expensive water damage. If you're noticing a leak or rust stains down the side of your chimney, it is time to replace the rusted cover with a stainless steel cover. Stainless steel covers will never rust, so this will be a one-time fix.
Step 1: Getting Started
The tools that are needed to successfully replace your chimney chase cover are the following: hammer, flat or Phillips head screw driver, drill, steel cutting drill bit, razor knife, caulk gun, and 1 tube of weather proof silicone. Take a look at this measuring guide to help you measure the chimney chase cover correctly. http://www.rockfordchimneysupply.com/chase-covers.php?holes=1O#chaseform
Step 2: Removing the Rain Cap
Start by using your flat or phillips head screw driver and remove the rain cap from the vent pipe. There are generally 3 screws located on the side of the rain cap. Make sure you save the screws so you can reuse them to put the rain cap back on.
Step 3: Remove the Storm Collar
Use your razor knife and cut the silicone away from the collar and the vent pipe. If the storm collar shows no sign of rust, hold on to it and reuse it.
Step 4: Remove the Rusted Chase Cover
Using your hammer, remove the nails from the sides of the chase cover. Sometimes you will find nails on the top of the cover. Once you remove the nails, take the rusted cover off of the chimney.
Step 5: New Chimney Chase Cover
Slide the vent pipe through the collar of the chase cover and place the new chimney chase cover on the chimney.
Step 6: Drill Pilot Holes
On the sides of the chase cover, also known as the skirt, drill a pilot hole on each corner. For a larger cover, you will want to have a few more for added stability. For best results, put your drill on a low speed when trying to drill through stainless steel. Once the pilot hole are tapped, use stainless steel screws to screw the chimney chase cover to the chase.
Step 7: Replace the Storm Collar
Place the storm collar around the vent pipe resting it on the top of the chimney cover. Use your caulk gun and tube of silicone to seal around where the storm collar meets the vent pipe. This will keep any rain from getting down the side of the vent pipe inside the chimney.
Step 8: Reconnect the Rain Cap
Place the rain cap back on the vent pipe. Use the screws that you saved to attach the rain cap. If your rain cap is showing signs of rust, it may be time to replace it.
Step 9: Congratulations You're Finished
You have just successfully replaced your rusted chimney chase cover with a new stainless steel chimney chase cover. Repaint the chimney chase for a wonderful finished look. This will be a one time fix because the stainless steel will not rust.


