

Introduction: Programming Arduino Due and MKR1000 With Atmel Studio ASF


This is instructable for people who want to dig more into ARM programing without all Arduino simplicity and hiding stuff under the hood. I assume that You know something about Arduino, programming in C and Atmel Studio. This instructable won't show how to write Arduino code in better IDE. It will show how to start programing Atmel's ARM:
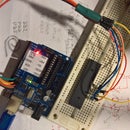
- SAM3X8E, which is Due's CPU,
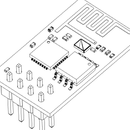
- SAMW25, which is MKR's CPU.
Step 1: Get Software

- BOSSA - program that talks to Due's bootloader allowing to program it. It's on the bottom of the page, mingw version is for windows. You don't have to download that if you have Arduino IDE installed. You just need to find it (turn verbose output during upload in Arduino File>Preferences, BOSSA location should be in first line mine was: C:\Users\PCV\AppData\Local\Arduino15\packages\arduino\tools\bossac\1.6.1-arduino/bossac.exe )
- Atmel Studio
- Atmel Software Framework ASF - do not download from that link. In Atmel Studio select Tools> Extension and Updates find ASF and download it.
Step 2: Setting Up Programming Tool in AS

1. Save bossac.exe to some good location for example C:\bossac\bossac.exe or locate one in Arduino files.
2. In the same folder create 2 batch files (for example Due_Programming_Port.bat) with this code:
for Due:
mode %1:1200,n,8,1,p
"C:\bossac\bossac.exe" --port=%1 -i -e -w -v -b  %2 -R
pause
for MKR1000:
mode %1:1200,n,8,1,p
sleep 5
"C:\bossac\bossac.exe" --port=%2 -i -e -w -v -b  %3 -R
pause
You don't need "pause" but it's helpful. It will make command window wait for pressing button before closing.
3. Identify Due's Programming port COM number. You can also use Native port but it's inconvenient: It disappears when it's not activated, you have to erase manually, it changes numbers depending on Due's program.
For MKR1000: You have to identify it's bootloader COM port number. It is shown in Arduino uploading verbose output and usually is COM(x+1) where COMx is standard MKR1000 COM port.
4. In AS select Tools > External tools and Add new one:
for Due:
Title: 			Due_Programming_Port
Command: 		C:\bossac\Due_Programming_Port.bat
Arguments:		COM13 $(TargetDir)$(TargetName).bin
Initial Directory: 	$(TargetDir)
for MKR1000:
Title: 			MKR1000
Command: 		C:\bossac\MKR1000.bat
Arguments:		COM13 COM14 $(TargetDir)$(TargetName).bin
Initial Directory: 	$(TargetDir)
If you disable MKR's normal serial port (by uploading some new nonarduino code), you'll have to enter bootloader mode before programming: press RST 2 times (Arduino MKR1000 bootloader (COMxx) should appear in device manager). Than you can program it again with AS or Arduino IDE.
You can use Due's tool code for MKR1000, but you'll have to enter bootloader mode before programming by pressing RST two times. This way programing is 5 sec faster, and you won't have problem when USB serial was disabled.
Personally I find version with automatic bootloader mode entering better. I always forget to press something before programming...
Be sure to use your COM port number and proper directory.
Step 3: Example Projects

this step is only for Due. There are no examples for MKR1000 :(
In Atmel Studio select File > New > Example Project (Ctrl+Shift+E) > search for Arduino.
Atmel corp. made 54 example for Due, which will allow you to begin programming ARMs.
Select one which is easy to test, for example PWM_PWM_LED_EXAMPLE1 which fades LEDs connected to D8 and D9.
Description says:
* -# Configure PIN_PWM_LED0_CHANNEL<br>* -# Configure PIN_PWM_LED1_CHANNEL
You can rightclick on variables or macros and select "go to implementation" (Alt+G) which will show where it was declared and what does it mean.
going to implementation of PIN_PWM_LED0_CHANNEL will led you to code that defines PWM channel for LEDs.
Pin definitions are in: src\ASF\sam\utils\cmsis\sam3x\include\pio\pio_sam3x8e.h. Here's part defining PWM ports for LEDs:
/*! PWM pins definition for LED0 */<br>#define PIN_PWM_LED0 PIN_PWMC_PWML4
/*! PWM pins definition for LED1 */
#define PIN_PWM_LED1 PIN_PWMC_PWML5
Due's pinout will guide you to understanding connections. D8 and D9 are PWML4 and PWML5.
This project also sends some stuff via serial (115200 kbps). You can use Arduino's serial monitor or any serial terminal emulator to view that.
Step 4: Programming
It's simple!
Build Project (F7) than select Tools > Due_Programming_Port.
Command window will appear and display some info similar to verbose output from Arduino IDE. When something's wrong It will display warnings.

Participated in the
Microcontroller Contest 2017


