Introduction: Steampunked Plasma-beam Generator
Hi everybody
I just returned from my steam-powered-laboratory (Dampfkraftlabor, in german) to present you my latest invention:
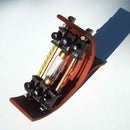
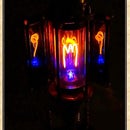
The Steampunked plasma-beam generator:
To get an first impression please watch this short movie
Notice: Don´t wreck your health and please obay the following advices:
***Disclaimers***This instructable works with voltages in excess of 250V. This is more than enough to give you a potentially fatal electric shock if handled incorrectly. If you are unfamiliar with how to work with high voltage, please refrain from performing this instructable. Exercise caution throughout the following steps to avoid electrical dangers and also use insulated tools like pliers and screwdrivers and so on.
If you choose to undertake this instructable, you do so at your own risk.
And here ist the instructable
Step 1: Construction of the Chassis
As you know I love to work a lot with red vulcanized fiber material, brass screws and copper parts.
So I chose an old antique handlamp chassis and modified it as you can see in the following pictures
So I chose an old antique handlamp chassis and modified it as you can see in the following pictures
Step 2: The Electronic Inside
Here you see all the components :
a switch
an green LED
an mini flickering bulb with E10 socket
an E10 socket holder
an AA battery holder (and the AA-battery of course)
an banana-plug ant its counterpart
a small piece of copper wire ø1,5 mm
the well known former flash electronic of an disposal camera
The steampunked modified chassis
Step 3: Step by Step Explanation for the Electronic Works
In this instructable of mine you will find all the answers to your detailed questions about the electronic works;-)))
The mini flickering bulb with an E10 socket can be ordered by the manifacturer Konstsmiede
The mini flickering bulb with an E10 socket can be ordered by the manifacturer Konstsmiede
Step 4: Combine the Components
And now you can build the three parts together
Step 5: Start the Generator
To start the generator switch it on
Maybe a small light spot occurs at the top of the metal flame-cathodes.
If not, just come near to the glass bulb with your hand.
When you move slowly you can see that the spot comes in even if you don´t touch the glass.
Then touch the top of the glass and the plasma-beam rises up.
Maybe a small light spot occurs at the top of the metal flame-cathodes.
If not, just come near to the glass bulb with your hand.
When you move slowly you can see that the spot comes in even if you don´t touch the glass.
Then touch the top of the glass and the plasma-beam rises up.
Step 6: Explanation How It Works
This trick is easily explained: To ignite the neon-gas filled bulb you need about 140 Volts minimum. Because of the high resistance of the whole construction the ignition is impossible. When you touch the glass top you lower the inner resistance and the tension rises up to ignition level. Afterwards the bulb needs only about 90 Volts for running and that is why the plasma beam stays on without touching.
And that´s it
Take care of yourself and enjoy this little gadget
Cheers Aeon Junophor
And that´s it
Take care of yourself and enjoy this little gadget
Cheers Aeon Junophor


