Introduction: Uber Band
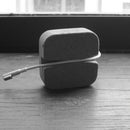
Uber band is a soft, expandable money clip made from durable industrial elastic. It allows simple access to all your cards and cash, while keeping them tightly in place both in and out of your pocket.
Step 1: Materials & Tools
Uber band is pretty easy to make. All you need is:
About a half foot of 2" wide industrial elastic
Thread color of your choice
A sewing machine (not pictured!)
A measuring tape or ruler
Fabric sheers
A little pair of sheers for cutting thread
1 Straight pin
About a half foot of 2" wide industrial elastic
Thread color of your choice
A sewing machine (not pictured!)
A measuring tape or ruler
Fabric sheers
A little pair of sheers for cutting thread
1 Straight pin
Step 2: Measure & Trim
The first thing you'll need to do is trim down your elastic to about a 4.5" length.
Step 3: Defray
Now that you've got the appropriate length of elastic, you'll want to finish the edges so that they don't end up fraying over time. I used an overlock stitch to finish the edges but a zig zag stitch will also do the trick, as jessyratfink shows in her slim elastic wallet instructable.
Step 4: Pin and Sew
After defraying your edges, fold the elastic in half so that the two ends meet. Pin it about half an inch away from the ends; this will help ensure that they stay aligned when making the seam. Make a straight stitch just to the inside of the existing overlock or zig zag stitch to join the two ends together, making sure to go over your stitch twice at both beginning and end.
Step 5: Flip
Next just flip the elastic inside out so that the seam becomes hidden.
Step 6: Stretch and Stuffify
You did it! Stretch your Uber band over top your cards and cash and fall in love. To find easily find a card in the middle of the stack just place your thumb and index fingers on either side to spread them apart; pick the card out without having to remove every card. The extra material thickness of the seam provides a perfect spot to tuck back and insert cash. Enjoy!


