

Introduction: Easy 3D Printing Class: Setup and Print


In this lesson, you'll take the model you designed in the last lesson and print it out on your own 3D printer or send it to a service bureau.
WHAT YOU'LL NEED
3D Printer or Service Bureau: Pretty much any consumer grade 3D Printer will do for this project. I'm using a Dremel Idea Builder, but there is no shortage of options. If you want to buy your own printer, start with Make Magazine's 3D Printer Buyer's Guide, it's an excellent resource:
http://makezine.com/comparison/3dprinters/
If you don't want to buy your own printer, you can setup a free account with a Service Bureau, upload your STL file to their service, and have them do the work and ship it to you.
Step 1: Prepping the 3D Printer
If you're doing lots of prints, I find it's very helpful to have a disposable surface you can replace quickly. An FDM 3D printer builds an object by sticking thin layers of plastic to the build platform, then sticking successive layers on top of each other. It's good to have a removable "sacrificial" layer on top of the build platform because if the surface gets beat up in the printing or cleanup process, you can just peel it off and add another layer when you make a new print.
You can use 3M ScotchBlue 2090 Painter's Tape as a build surface because it's large enough to cover the whole bed.


Apply the Tape: The first step is to line up the tape on the bed so that it doesn't cover up the slots for the build platform's clips. It's really important to smooth out the tape so there are no bubbles. I've found that my driver's license is the best tool for this job.

Sand with 220 Grit Sandpaper: This removes the slippery finish on the tape, allowing the filament to stick to the bed easily. You can also use a specially made Build Platform Tape and skip the sanding step. I used the key knife from my keychain (on the right) to get a clean cut on the edge of the tape.


Wipe Down with Isopropyl Alcohol: This removes the dust leftover from sanding and any oil from your fingers that might still be on the tape. Be careful not to touch the tape once you've wiped it down- getting oil from your fingers on it would defeat the purpose!
Step 2: Level the Build Platform
For lots of FDM printers, including the Dremel 3D Idea Builder, the build platform must be level for prints to build properly. I've found that with near-constant use, I only had to level the platform once in three weeks. If the filament doesn't seem to be sticking to the bed at the very beginning of a print, there's a good chance the build platform isn't level.


The instructions on the touch screen are pretty straightforward. Basically, you just put a piece of paper between the nozzle and the bed and adjust the screws until the gap feels just right. The paper should easily slide in and out in the gap while having a very small amount of friction.
With some FDM printers such as the Printrbot Simple, bed leveling is automatic, so there's no need to do any manual leveling.
Step 3: Unload / Load Filament

Filament is the spooled plastic material that FDM 3D printers use to build objects. Filament comes in a bewildering array of colors, opacities, and material properties, but for this class, we're going to stick to PLA (Polylactic Acid). It's made with corn starch, sugar cane, tapioca roots, and potato starch. This means it's biodegradable and non-toxic (barring additives for color). ABS is another popular option with desktop FDM printers, but it's tricky to work with and requires a heated build platform.
Filament comes in different diameters, so be sure the filament you buy matches the diameter of your extruder! The Dremel Idea Builder has a 1.75mm nozzle, which is the most common. Dremel sells their own filament on spools that fit perfectly on the spindle built into the machine, so I usually just buy their stuff for most projects.
Now, let's load our filament!


LOAD
To load filament, just follow the directions on the screen again. The motor will run automatically for a few seconds to load the filament into the extruder. Check the nozzle and make sure a little filament has come out before printing. You may need to go through the load process again to make sure it's totally full. If the extruder isn't full when a print starts, it's possible that filament won't come out at the very beginning of a print, which can cause problems with your print down the line.


UNLOAD
You'll need to unload filament when you want to switch to a new spool.To unload the filament on the Dremel, just follow the menu. It'll heat up the extruder if it isn't already preheated, then ask you to press the extruder intake spring and pull the filament out.
PRO TIP: To avoid filament jamming, push the filament in for about half a second, then pull it out. I've found that this clears the extruder of any leftover filament blobs, which can create jams if you let the extruder cool down again before loading more filament.
Step 4: Preheat and Print
Preheating is a good way to ensure that the extruder is warmed up and ready to go. I had the best results by preheating the machine for about 5 minutes, then loading the file.


Loading a file to print is really easy with this machine because the touch screen gives you a preview of the model! Just pop in the SD card, select the model from the list, and tap Build.
NOTE: Files may FAIL if they're not in the MAIN DIRECTORY of the SD card. I found that using sub-folders on an SD card made about half of the files fail, so be sure to keep everything in the main directory.
Step 5: Removal and Cleanup
With the print finished, all we have to do is remove it from the platform and we're done. This part is small and has no support structures, so it's easy to remove- just wiggle it until it pops off, then peel the raft off of the bottom of the part.
When things get more complex with larger rafts and support structures, sometimes a plastic spatula is necessary to get the part off of the bed, and sometimes support structures leave remnants on the part surfaces.
Believe it or not, I found the best tool for scraping the support structures off of the models was the can opener on my Leatherman Multitool. It's not sharp enough to cut you if you slip and poke yourself, and the pointy end is great for digging into the little crevasses, which will be necessary if you've printed a complex object that needs support structures in order to print properly.
Step 6: Tinkercad + Minecraft
If you're into Minecraft, hopefully you've already taken Penolopy Bulnick's Minecraft Class. She goes into a lot of detail about how to get TinkerCAD models into Minecraft, but I'll give you a quick overview of the process here.
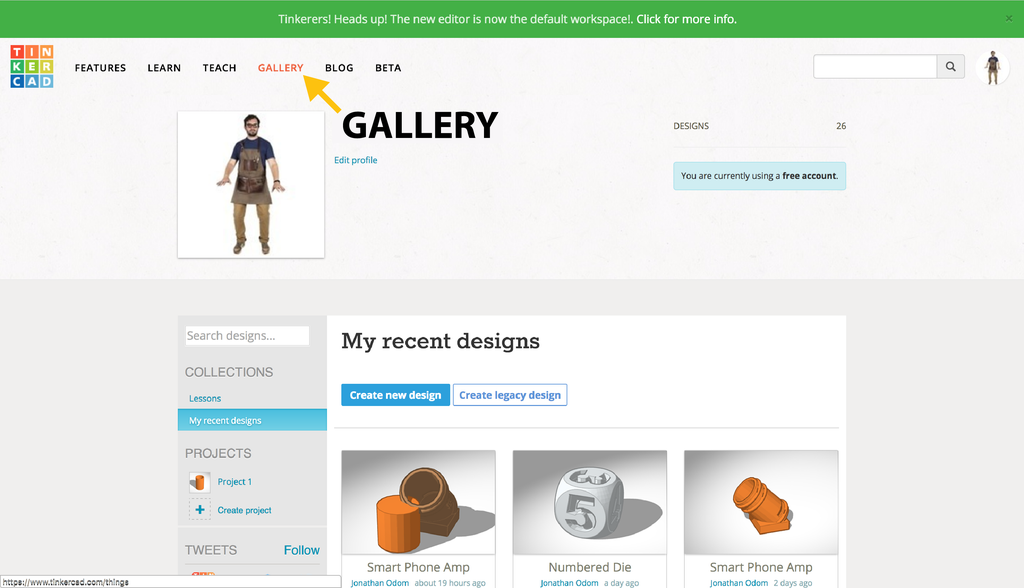
On the main TinkerCAD page, click on the GALLERY to find a cool model to try out.
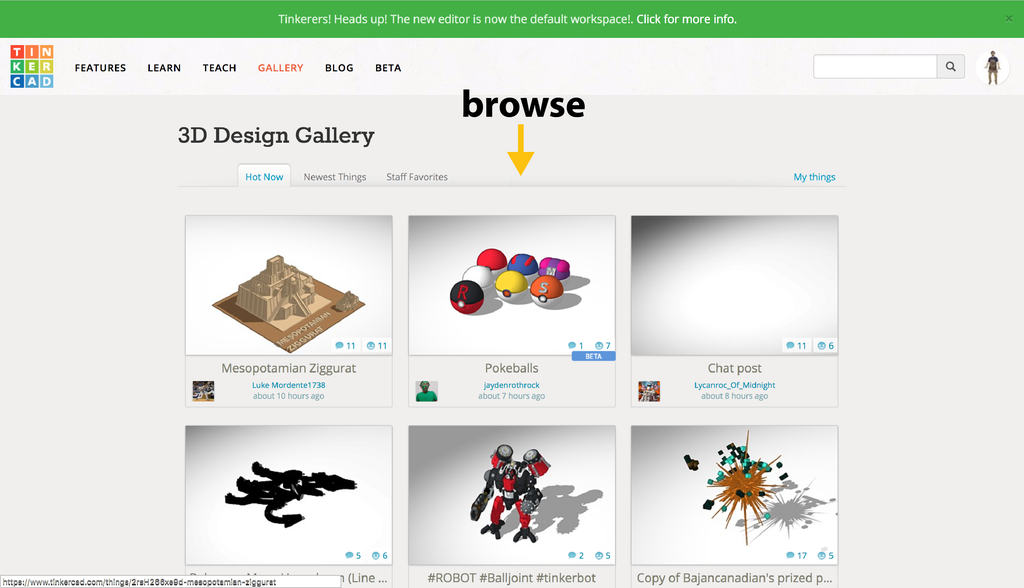
You can browse by Hot Now, Newest Models, or Staff Favorites which is where I found the Mesopotamian Ziggurat model by LukeMordente1738.

Click Copy & Tinker to create your own copy of the model and save it in your own project.
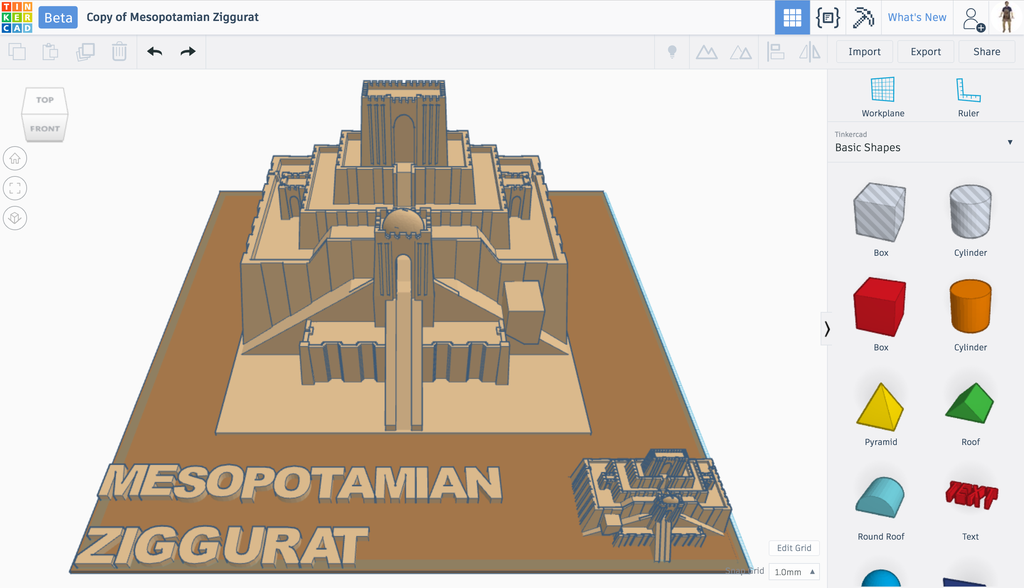
When you bring a model in, it's as if you made it yourself. You can add, subtract, ungroup, or delete parts you don't want as you please.
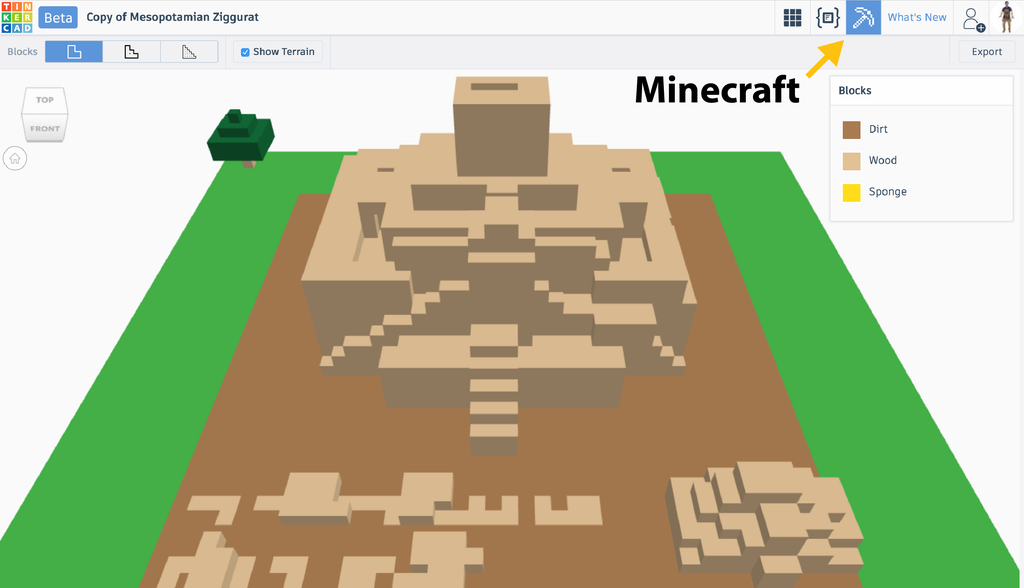
Click the Minecraft icon in the upper right corner, and you'll get a preview of what the model will look like if you bring it into Minecraft.
Click the Block Size buttons on the upper left to cycle through different resolutions.

When you've decided on a block size, just click the Export button to get a file you can import to Minecraft. Remember, the Minecraft Classhas lots of detailed information on this process, so be sure to sign up for it!


