

Introduction: Cardboard Stormbreaker and Thor:Ragnarok Helmet


This instructable will show a quick way to make some Thor props using cardboard for quick cosplay and fancy dress. The whole build took 2 days due to the time required for drying.
Let's start with a project materials list.
Supplies
- An A4 Printer
- A4 Paper
- Scissors
- Scalpel
- Cutting mat/board
- Glue stick
- Cardboard (lots)
- Hot glue and a hot glue gun
- Newspaper
- PVA Glue Paint Brushes (For PVA and for paint)
- Sponges
- Old pot (for glue)
- Spray Primer
- Acrylic paint (silver, a mixture of browns, black, royal blue, gunmetal grey)
- Corse brown string (gardeing string)
- Felt
You will also need access to Pepakura viewer software. This can be downloaded here: https://tamasoft.co.jp/pepakura-en/download/index....
The Pepakura templates for the props can be found in notes on the video links below.
Stormbreaker:
Thor: Ragnarok Helmet:
Step 1: Pepakura Template


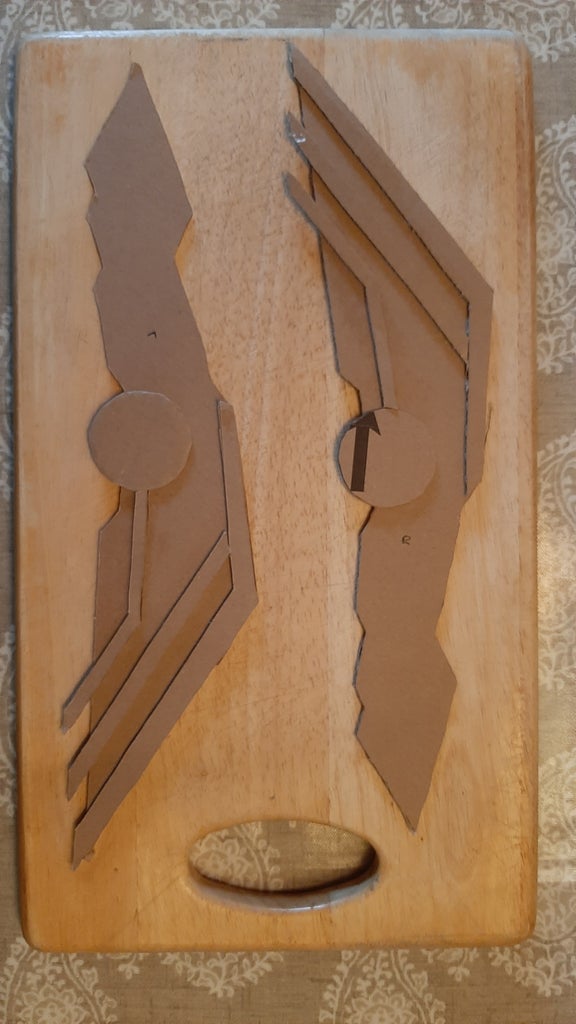
Once you have installed Pepakura, load up the files and open them in Pepakura viewer. Use the ratio tool to scale the templates up or down to suit your needs (specifically for the helmet). These can be printed on A4 paper.
With the templates printed, cut out the pieces using your scissors.
Glue or sellotape the cutout templates onto the cardboard. You can either draw around them or use the scalpel straight onto the cardboard to cut out the templates on the cardboard.
Step 2: Assemble the Cardboard


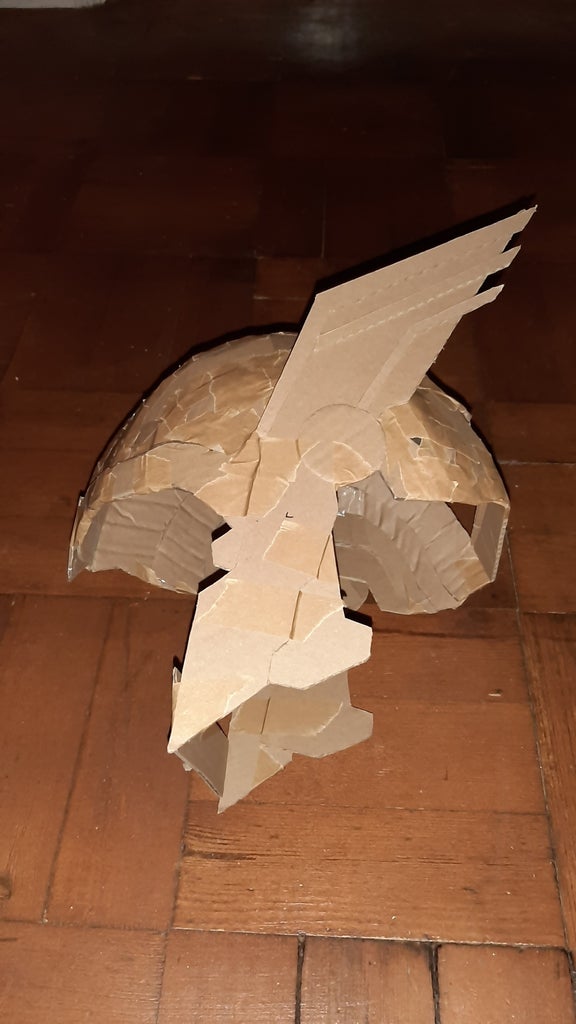
To make this step easier have pepakura viewer open as you do it as a reference for the prop assembly.
With a hot glue gun, piece together the parts to create the cardboard base for your props. A spacer was added on the helmet to keep the proportions and shape correct whilst the build was done.
I closed the seams off with some rather good brown paper-like sello tape. Closing the seams is very important. If this is not done the paper mache stage will look a bit odd.
For the helmet, the winged sides were kept separate for ease then added them on last.
For Stormbreaker, stuff the handle and hammer/axe head with lots of cardboard and/or newspaper to give it some weight.
Step 3: Paper Mache


Once the cardboard has been assembled and all the joints and seams have been sealed begin to lightly apply PVA glue to the prop. On top of the PVA place, the shredded newspaper then apply PVA onto the top of this.
Cover the entire prop in the paper mache and repeat for a few layers making sure to dry the layers before the next is added. Use a hairdryer to speed up the process.
Let dry.
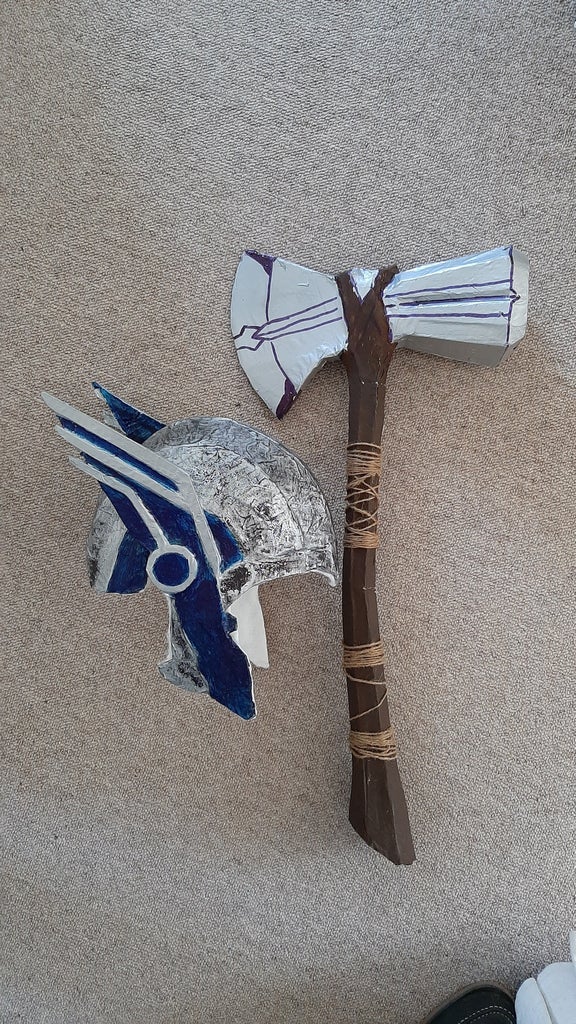
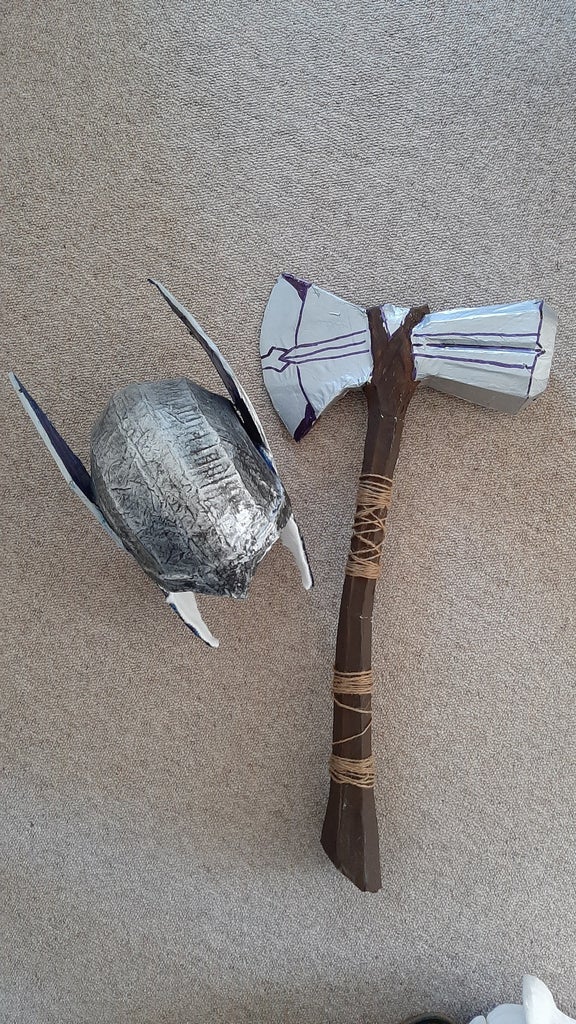
Step 4: Paint


Once the paper mache has dried fully apply a few layers of primer to each prop.
When the primer is dry begin to paint the props with the acrylic paints. Paintbrushes are great for adding wooden detail to the handle of Stormbreaker and sponges are great for adding metallic blemishes to the helmet.
Step 5: Finalise the Props


Corse garden string was added to the handle of Stormbreaker and held on with some hot glue.
The inside of the Ragnarok helmet was lined with felt for comfort.
Here are the finished products.

Participated in the
Cardboard Speed Challenge


