

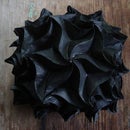
Introduction: Creating a Spinning Greeting Card


This makes a greeting card that will fit in a standard A-6 envelope (6.5” x 4.25”).
Tools and Materials:
- laser cutting machine (I made this at the TechShop: www.techshop.ws)
- vector art software
- USB stick
- (2) sheets of cardstock (or other thick paper) in your favorite color combo; the paper must be thick enough and resilient enough to hold up to some folding and unfolding action along scored folds (don't use construction paper)
- white glue (or your favorite paper glue)
To make the card:
1. If you have CorelDraw, I have included the file which has each piece of art as a separate layer and you can skip to step 5. Otherwise, download the attached PDFs and import them into your vector art software. Note that the blue lines are valley folds (they will fold “down”) and the red lines are mountain folds (they will fold “up”); check out standard origami nomenclature if you are not familiar with these terms. The black lines are cut lines. Also note that the “Card Interior” does not fill the entire page, there is a border around the shape, which will become important when we use the laser for this project.
2. Using whatever vector art software you have, create your vector art using the PDFs as guides. Remember, in order for the lasers to interpret your work as vector art, you must use the “hairline” pen width; the color just helps you to keep things straight when you are looking at the image. Use separate layers for the valley folds, mountain folds, and interior cuts of the image.
3. You will be flipping the paper over in the laser cutter, so you need to create a new layer that is the horizontal *mirror* of the valley folds.
4. You also need a way to ensure that the image is registered when you flip it over (the laser guides are not nearly as accurate as you need them to be), so you need to create a new layer that is a rectangle that defines the border around the image (mine is 1” away from the top left corner).
5. Setting up on the laser, you will want some way to hold the paper down such that it doesn’t move around in the process. Either use tape or weights to hold down the edges. The bottom edge is most important to pin down because of the air flow, but you will want to keep at least three sides of the paper border firmly in place, as it creates the registration for the front and back images. Also, keep in mind that the laser will be cutting close to the edge of the paper – don’t laser the weights!
6. Now you can start laser scoring and cutting. Exact settings will vary by the thickness of paper and the specific laser that you are using, but scoring is similar to cutting (which you learned in the TechShop SBU) only a lot lighter on the power setting. Additionally, there is a threshold power setting below which the paper will not be scored at all. This makes it easy to determine your scoring level, as you can start with a power setting of, say, 3, and work up from there if you aren’t getting any visible mark on your paper (stop the process, change the power to 4, and try again; if that didn’t work, try 5; etc.) Since this paper is fairly thick, you may have to go up to a power setting of ~6-7 to get a good score. All of this is done at a speed of 100%. If you accidentally overscore your paper (where it won't hold together when you fold it), you will have to start again with a new sheet! Jot down the settings that work for this particular paper in case you want to make another.
7. For the Card Interior (CI):
- First *score* the *reverse* valley folds that you made above.
- Adjust the laser settings and *cut* out the rectangular border around the image. Be sure that the cut is clean all the way around the edge. Carefully pick up the cut rectangle so as not to disturb the border which is now providing the registration.
- Turn the paper over as you would turn the page of a book (mirrored horizontally, not vertically), and set it back down into the border that is still on the laser bed. Tape or weight the paper firmly in place for the next set of scoring and cutting.
- Now adjust the settings back, and *score* the mountain folds that you made.
- Adjust the settings back, and *cut* the outline of the image. Set the card interior aside for now, and resist the urge to fold it! (If you must, laser a second card interior to practice on, but leave your “pretty” one unfolded.)
8. For the Card Exterior (CE):
- Adjust your settings back to *score* the centerline fold.
- Adjust the settings a final time, and *cut* the card exterior. Again, resist the urge to fold it. You are finished with the laser!
9. Before creasing *anything*, glue one half of the card interior to the card exterior, lining up the centerlines and keeping the twist mechanism free. Note that the card interior is 1/8” smaller than the card exterior on all sides (to show the color contrast on the inside of the card).
10. Now, crease all of the card interior score lines to create the twist mechanism. Note that all the creasing should be done *away* from the laser score line. When you are finished, the unglued side of the card interior should be in the correct orientation to align with the unglued side of the card exterior.
11. Glue the remaining halves of the card together. Note: the two halves of the card interior are cut to keep the card from wrinkling at the centerline when you close it after gluing, not because you can't fold the twist once the two pieces are glued in place. It is *easier* to fold the twist the first time through with one side being “free”, but if you have practiced already on a separate CI, you can glue both sides down before creasing.
12. When all of the glue is dry, open and close your card to see the twist mechanism.
Add your custom message and send it out into the world....


