

Introduction: Gesture Controlled Wooden DNA Desk Lamp

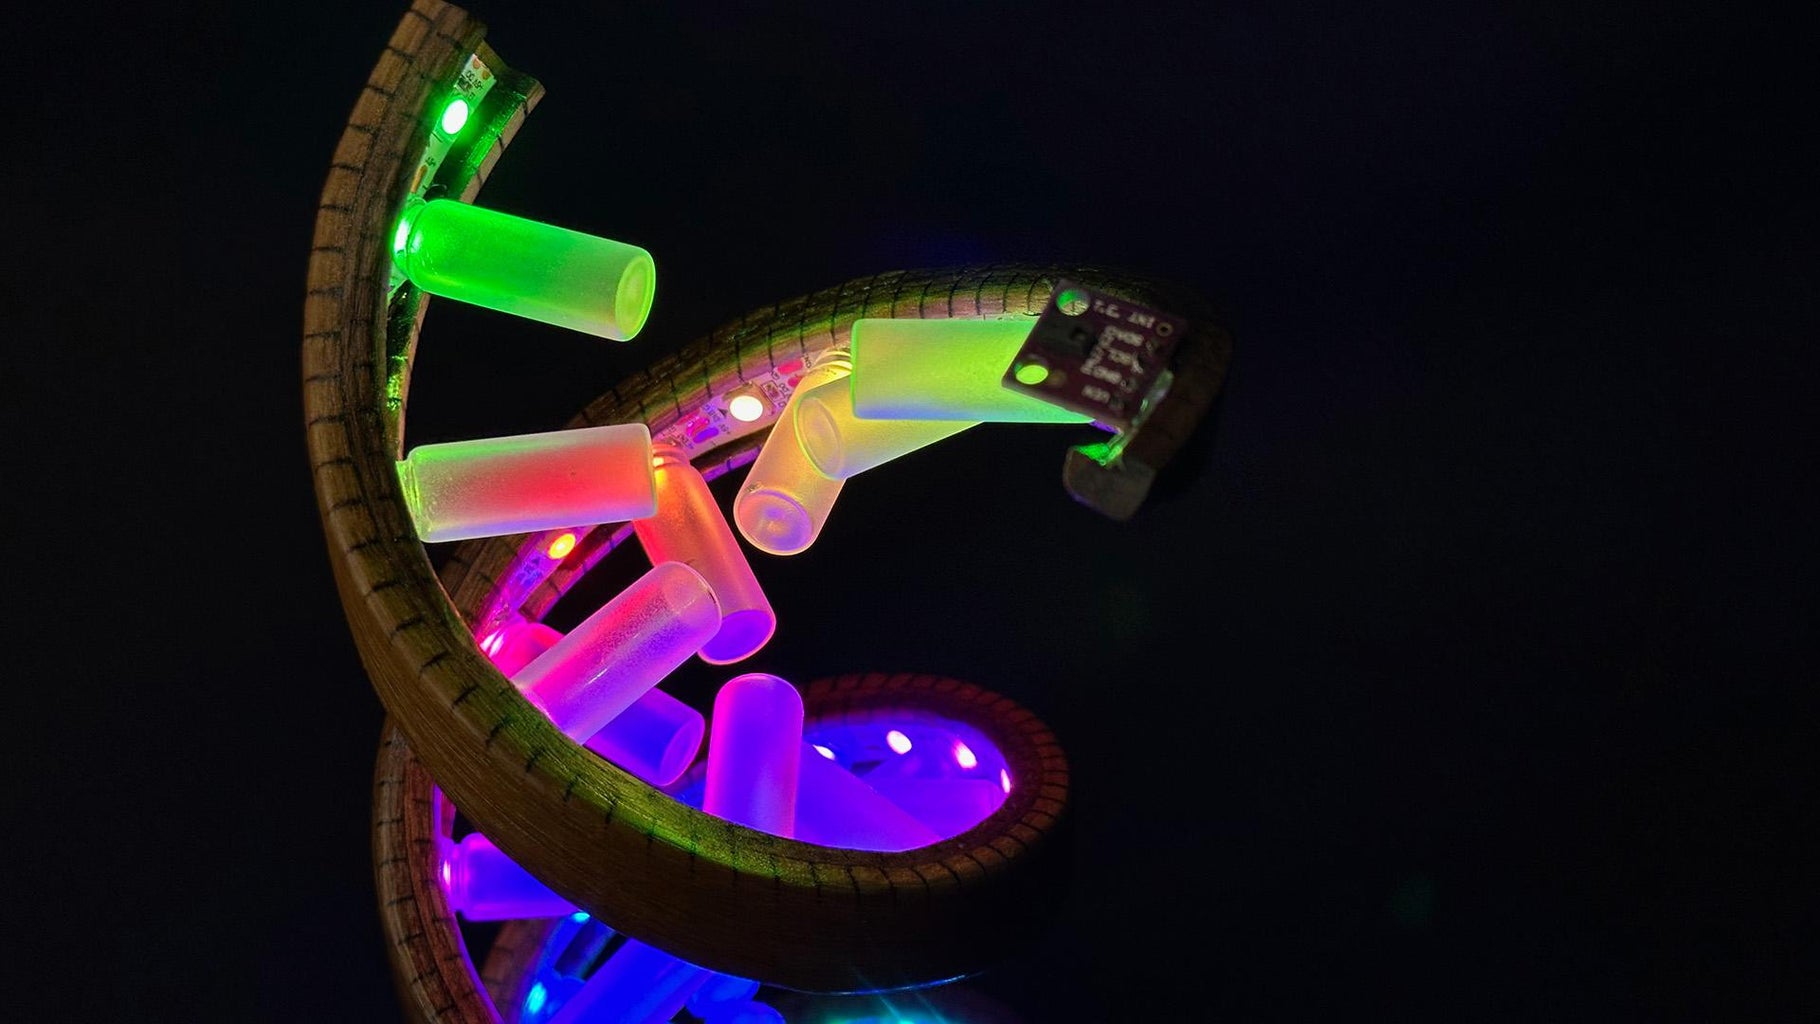


Introducing the Gesture Controlled DNA Wooden Desk Lamp!
This unique decorative piece combines the elegance of a wooden DNA model with the versatility of an addressable LED strip.
Mini glass bottles serve as diffusers, adding an organic touch to the lighting.
With gesture control technology, you can effortlessly adjust brightness, choose from a variety of color palettes, and enjoy mesmerizing lighting effects—all with a wave of your hand.
Join me as we delve into the intricacies of this innovative project, blending artistry with technology to illuminate your workspace in style.
The video is about the process of making
Gesture Controlled DNA Wooden Desk Lamp
#tablelamp #dna #woodworking #lasercutting #diy #wled #led #gesture
Supplies
Tools:
- DIY Laser cutter/engraver 520x520mm, 5.5w
- Disk Sander
- Hand router 1600 W, Round bit R=5 mm
- Dremel, Sanding rings 90, 100 grit
- UV Lamp
- Hot glue gun
- Soldering iron
Components:
- Tube 76mm
- Mini glass bottles 11x35 mm
- Walnut sliced veneer 4.5 mm
- Plywood 3.15 mm
- Screws 2.5x10 mm
- Masking tape
- Scotch
- Wooden Glue Titebond 2 black
- CA Glue (Akrifix 702)
- CA Glue Gel (Akrifix 705) + Activator
- UV Resin (Hard)
- Alcohol 99%
- Acrylic matte spray varnish
- Mini Clamps
- Rope Clamps
- Tung Oil with Carnauba Wax
- Esp8266 controller
- PAJ7620U gesture sensor
- WS2812b addressable LED strip
- USB-C plug
- Color wires
Step 1: Preparing and Marking the Tube


For the tube, I used a water tube with a diameter of 76 mm. A little heavy, but that's all I found in the right size.
Preparation:
- Wrap the tube with (scotch) tape (this will prevent super glue from sticking to the tube)
- Apply a strip of masking tape and mark the pitch of our spiral on it
- In my case, a full revolution of the spiral is 166 mm (I will do 1.5 revolutions)
Step 2: Download Layout and -Cut -Engrave With Laser


Sounds easy, doesn't it?
The file that I prepared contains information for engraving grooves.
I used Walnut sliced veneer 4.5 mm
You need to adjust your laser speed and power (each laser is unique) so that the depth of the grooves engraving is 3-3.5 mm, then the thickness of the rest piece of wood will remain 1 mm or 1.5 mm.
I did this in a few tries.
Attachments

Step 3: Preparing Sticks


- Clean carbon deposits and resin after laser cutting with alcohol
- Wet the solid side of the stick with water (I used a kitchen sponge)
- Wait for a couple of minutes
Step 4: Bending Stick


At this stage, you need to bend a wide stick around the tube by spiral.
The markings made earlier help control the height of the complete revolution of the spiral.
Secure one end of the stick with a belt clamp, go around the tube and secure the other end.
Step 5: Soak the Stick With CA Glue


!It is important to wait until the wood is dry.
(Very wet wood will not allow the CA glue to be absorbed; it will immediately begin to react with excess moisture on the outside of the wood.)
I waited several days.
- Wet and soak the stick with CA glue around the perimeter on both sides.
- Wait until the glue dries well.
- Separate the stick from the tube.
Step 6: Preparing of Borders-sticks


- Clean carbon deposits and resin after laser cutting with alcohol
- Wet the solid side of the sticks with water (I used a kitchen sponge)
- Wait for a couple of minutes
Step 7: Glue of Borders-sticks


- Place border sticks along the edges of the spiral
- Make sure they fit snugly
- Temporarily secure them with clamps
- Apply CA glue to all joints
- Wait until the glue dries well.
- Release the clamps.
Step 8: Sanding, Polishing of the Spiral


- Rough cleaning of glue and rounding edges using Dremel with 80 grit sanding ring
- Final manual polishing with 200 - 400 grit sandpaper
Step 9: Repeat Steps 1 - 8 and Make the Second Spiral
Step 10: Download the Layout and Laser-cut the Stand Parts


Step 11: Glue Stand


Just glue the rings and the top together
I used weight to hold the piece in place while gluing.
Step 12: Bottom Cover-stand


- Chamfer the bottom cover holes
- Screw it on with screws
Step 13: Fitting of a Wooden DNA Model


I tried to assemble a DNA model and realized that the spirals are quite difficult to place evenly and accurately
So I decide to make a helper holder
Step 14: Helper Holder for Spirals


- Download and laser-cut holder parts
- Glue parts to make a wired cylinder
- Put the spiral on the assistant holder,
- Insert the spirals into the holes in the stand
- Praise yourself )))
Attachments

Step 15: A Place for Gesture Sensor


The gesture sensor should be positioned straight up.
Therefore, let’s mark the cutting line parallel to the plane of the head of the holder assistant
I decided to sand it off using of disk sander
Step 16: Tuning the Stand


Sanding the sides with a disk sander
Rounding corners with a flipped-over manual router
Hand sanding with 200-400 grit sandpaper
Step 17: Join Spirals and the Stand


- Join spirals and the stand
- Put spirals on the helper holder
- Put wooden glue to the corners of spirals
- Place spirals into the holes of the stand
- Put a few drops of CA glue (gel) into the joints and spray with an activator
- Paint cracks with wooden glue (I use dark glue, so it will be less visible on the walnut after the final oil)
Step 18: Make a Hole for the USB-C Socket


- Mark the hole dimensions
- Drill few holes
- Widen the holes and straighten the hole with the mini file.
Step 19: Gesture Sensor


- Solder color wires to the paj7620u gesture sensor
- Unplug the helper holder
- Put a small line of hot glue on the corner of the spiral
- Fix the sensor on the spiral
- Put wires inside spiral (I used small drops of hot glue for this)
Step 20: Addressable LED Strip


* As an addressable LED strip I use WS2812b with 60 LEDs per meter
- Cut 2 strips of 26 LEDs each
- Solder color wires to the LED strips
- Put Strips inside spiral (Strip already has a sticky base)
Step 21: Glue Wires With Hot Glue


Just hot glue the wires inside the stand, this will prevent accidental breakage
Step 22: Solder the Components According to the Diagram


Step 23: Glue the USB-C Socket and the Rest of the Wires


Step 24: Firmware


Here I will not delve too deeply into how to compile/upload the firmware, since this is very well described on the website of the original project WLED
I developed a small usermod for the paj7620u gesture sensor.
If you want to compile it by yourself sources you can find on my GitHub repository.
Also, I uploaded the already compiled binary to the repository.
Quick guides:
Attachments

Step 25: Making a Light Channel


I decided to use small 11x35mm glass bottles as the light channel (just Google it).
I glued them with double-sided tape
Painted with matte acrylic spray varnish
Step 26: Glue the Light Channels


!Important: cover the sensor with opaque tape. (UV light may damage it)
- I used masking tape to temporarily hold the bottles in place.
- Used 2-3 bottles at a time
- Glued bottles to each odd LED
- One or two drops of UV thick epoxy resin into the joint
- 1-2 minutes exposure 40 watt UV lamp
Step 27: Screw the Bottom Cover-stand


Step 28: Finish With Oil + Wax


Step 29: Final Result


Gestures:
- Clockwise - Turn On, Increase Brightness
- Counterclockwise - Decrease Brightness, Turn Off
- Left, Right - Change Preset
- Forward, Backward - Change Color Palette

This is an entry in the
For the Home Contest


