

Introduction: #MyoCraft: Gesture-Enable Your Arduino Project With a Myo Armband


You can build a lot of cool stuff with an Arduino. Wouldn't it be nice to be able to control it with a flick of your wrist?
Let me show you how to add wireless gesture control to an Arduino project using a Myo armband. We’ll do this via MyoDunio (available for free in the Myo Market) running on a PC. This sample was built to connect up to the display you see above, but it's definitely not specific to it, and you can use it to activate any pin on your board.
Let’s go!
Step 1: Requirements

Before we get started, you’ll need the following items.
- A Myo armband running the latest firmware
- An Arduino board like the Uno
- The Arduino software/IDE
- A Windows PC
- An Arduino project you want to to gesture-enable. We hooked our board up to a bunch of LEDs. If you're not sure, something basic like this would probably work.
- The MyoDuino project. You will also need the Microsoft Visual C++ Runtime, if you don't already have that installed.
Step 2: Import Sample Library

Make sure you have extracted the MyoDuino project somewhere. Open up the Ardunio SDK and add the MyoDuino/Arduino/Myo Controller folder as a library.
Step 3: Open the Sample

Import the MyoController example project.
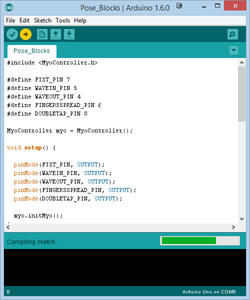
Step 4: Set Up Your Arduino

The sample is set up to use pins 4-8, with one pin for each hand pose (wave in, wave out, fist, fingers spread, and double tap). When a new pose is detected, that pin is set to HIGH. When the “rest” pose is detected (which generaly happens between every pose), all the pins are set to LOW. You can either make sure your project works with that setup or..
Step 5: (Optionally) Change the Sample

(The above code is copyright 2014 Thalmic Labs Inc. and licensed under the MIT License)
If you don't like the pin activation scheme, change the sample. If you check out the code (attached) you will see it's pretty straightforward to change which pins are activated by which gesture. Just change the defines up top.
So
#define FIST_PIN 4
could be changed to
#define FIST_PIN 5
to make the 5th pin active on a fist.
All five Myo poses are supported. You can use as many or a few as needed.
Step 6: Upload Your Sketch
Upload the project to your Arduino via USB, and leave it connected.
Step 7: Launch MyoDuino

Make sure you are wearing your Myo armband, it's connected to your computer via Bluetooth, and your are synced. Then, navigate to MyoDuino/bin/ and launch MyoDuino.exe. Set the COM port to the one your Arduino is on (you can see this in Tools->Ports in the Arduino IDE). It’s up to you whether you want locking to be on or off, but I recommend off for our test.
Now you should be staring at a terminal window. It will tell you which arm you are wearing the armband on and the current gesture (for debugging purposes). Make sure this window is in the foreground, and start making poses!
Step 8: Next Steps

Easy peasy. This was a pretty simple hack, but it’s a good place to start.
From here, you could obviously go crazy with complicated Arduino setups, but you could also modify the source code of MyoDuino itself. The Myo Armband has a built in 9-axis IMU that normally captures arm motion, but isn't being used here. By expanding MyoDuino you could create motion gestures to really open up your control options.
You could also build your own pose “edge” behaviour, like you see in Myo Scripts (Meaning that you get one event when a pose is started, and another when one stops). As it stands this will keep setting the relevant pin to HIGH over and over as long as you hold a pose, which may not be ideal for your application.
Finally, if you want to enable casual usage you could tweak the locking behaviour so it won’t lock you out in the middle of a pose.
That's all beyond the scope of this guide though! If some of those ideas sound interesting to you, you can get started at http://www.myo.com/makers

Participated in the
Automation Contest


![Tim's Mechanical Spider Leg [LU9685-20CU]](https://content.instructables.com/FFB/5R4I/LVKZ6G6R/FFB5R4ILVKZ6G6R.png?auto=webp&crop=1.2%3A1&frame=1&width=306)


