

Introduction: Make Simple Robot With 3d Printed Parts That Works | DIY Vibrobot


Hi creative minds, In this project I made a simple robot that was built completely with 3d printed parts (Obviously except the electronics!).
This robot vibrates and moves here and there and is a fun thing to watch! This is a must try project if you are a beginner and have a passion for robotics, Well this can be your stepping stone!
Not only does building this project engage your time but also helps to understand various concepts of physics and electronics.
You can build this as a hobby project or just for fun one thing is sure you will definitely have quality time spent.
I have given all the instructions with complete detailed explanations so that those who are new to this can easily understand.
Thank you for showing interest in my project and I can assure you will get the most from this :)
Supplies


- Tiny vibration motor
- Lithium polymer battery
- Micro switch
- Charging board(TP4056)
- Super Glue
- Hot Glue
- Soldering Iron
- 3D printer
- PLA filament
Note that on purchase from these links, I may receive a small commission at no extra cost to you
Step 1: Designing and Slicing


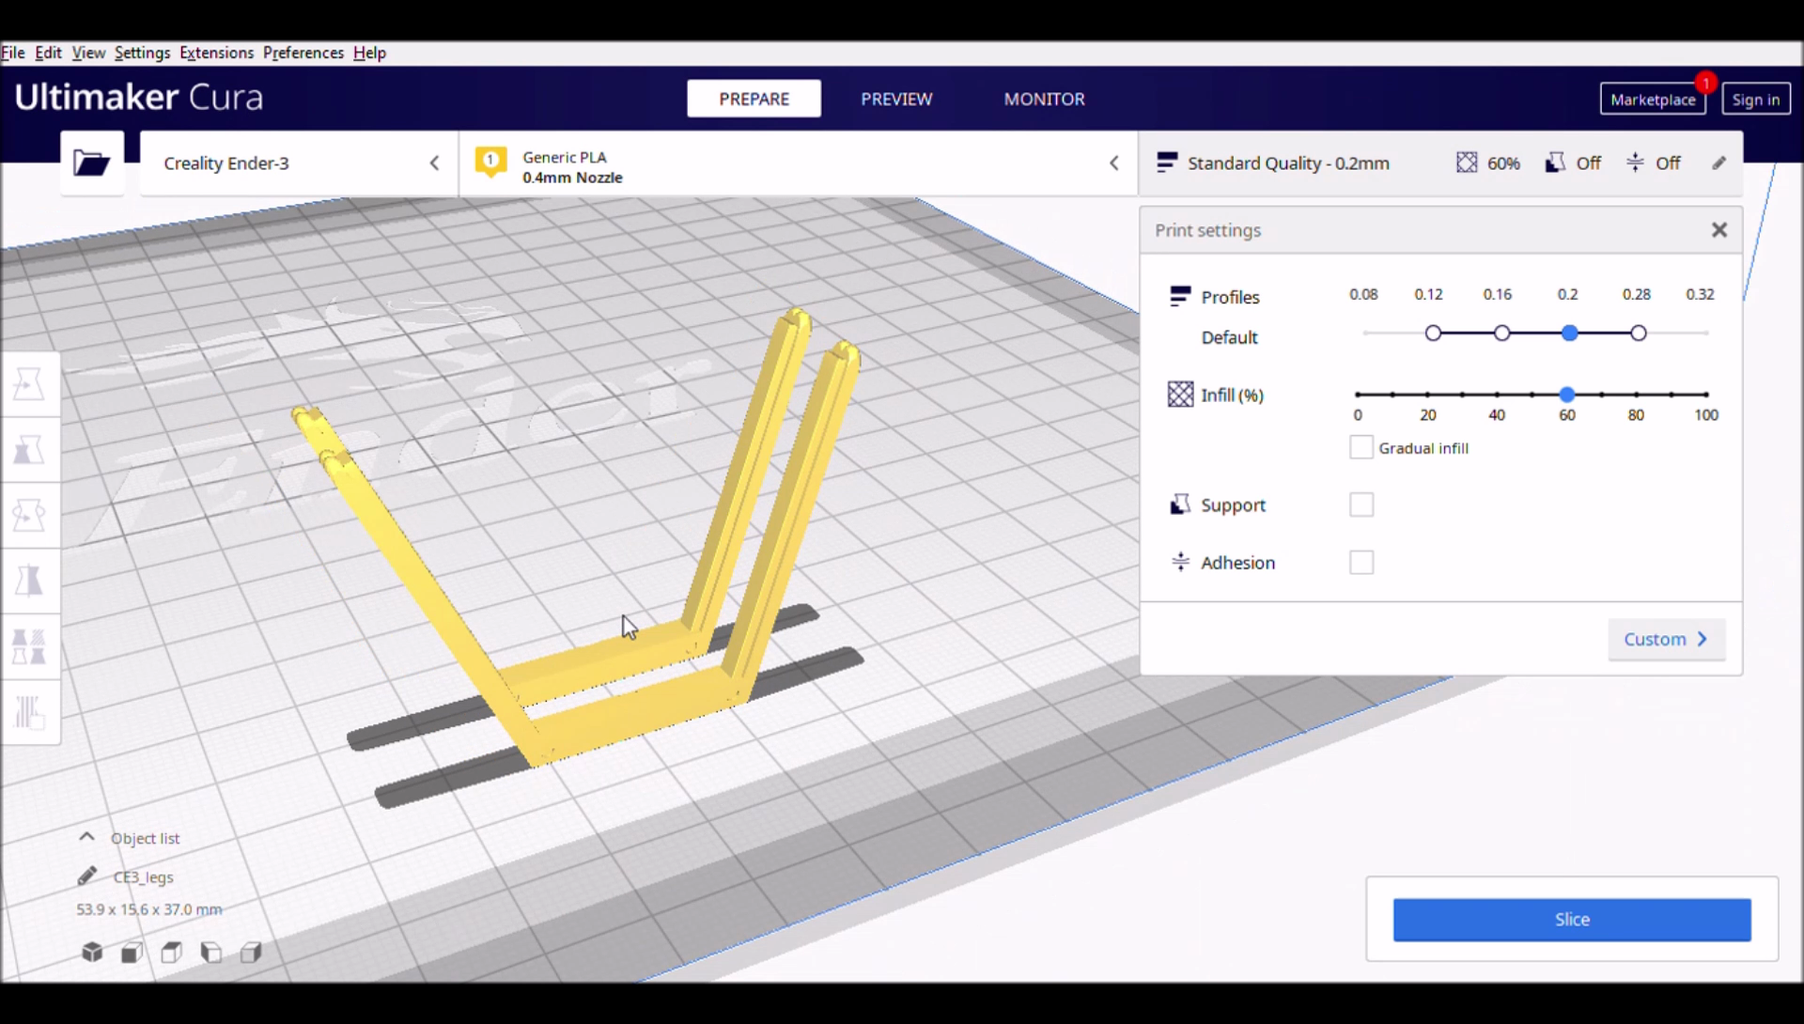

I used Tinkercad software to design this robot, It took me several trials and errors to come up with this final model that works well without any flaws.
Once you have the 3d model ready we can export the STL to slice the model.
The orientation of the model along with the print settings for each part is given in this step with the images.
In short, all the 3 models are printed without using any rafts or supports, you can use a 40 to 60% infill rate to get very good quality print.
You can use the STL files below to print the models without any limitations


Step 2: 3d Printing


I will use PLA filament to print the models, The choice of color is left to you.
in my case I used red pla filament to print the legs, you might see the first image on this step and think what are those extra layers.
Those were the overhangs that happened because of moisture on my filament, You might not face this issue.
After you print all the parts, There is no need for post-processing, Well if you have filaments that were exposed to moisture you might need some basic cleaning of the prints.
There will be 3 total 3d printed parts, and now we can head over to assembling them.
Step 3: Building Circuit


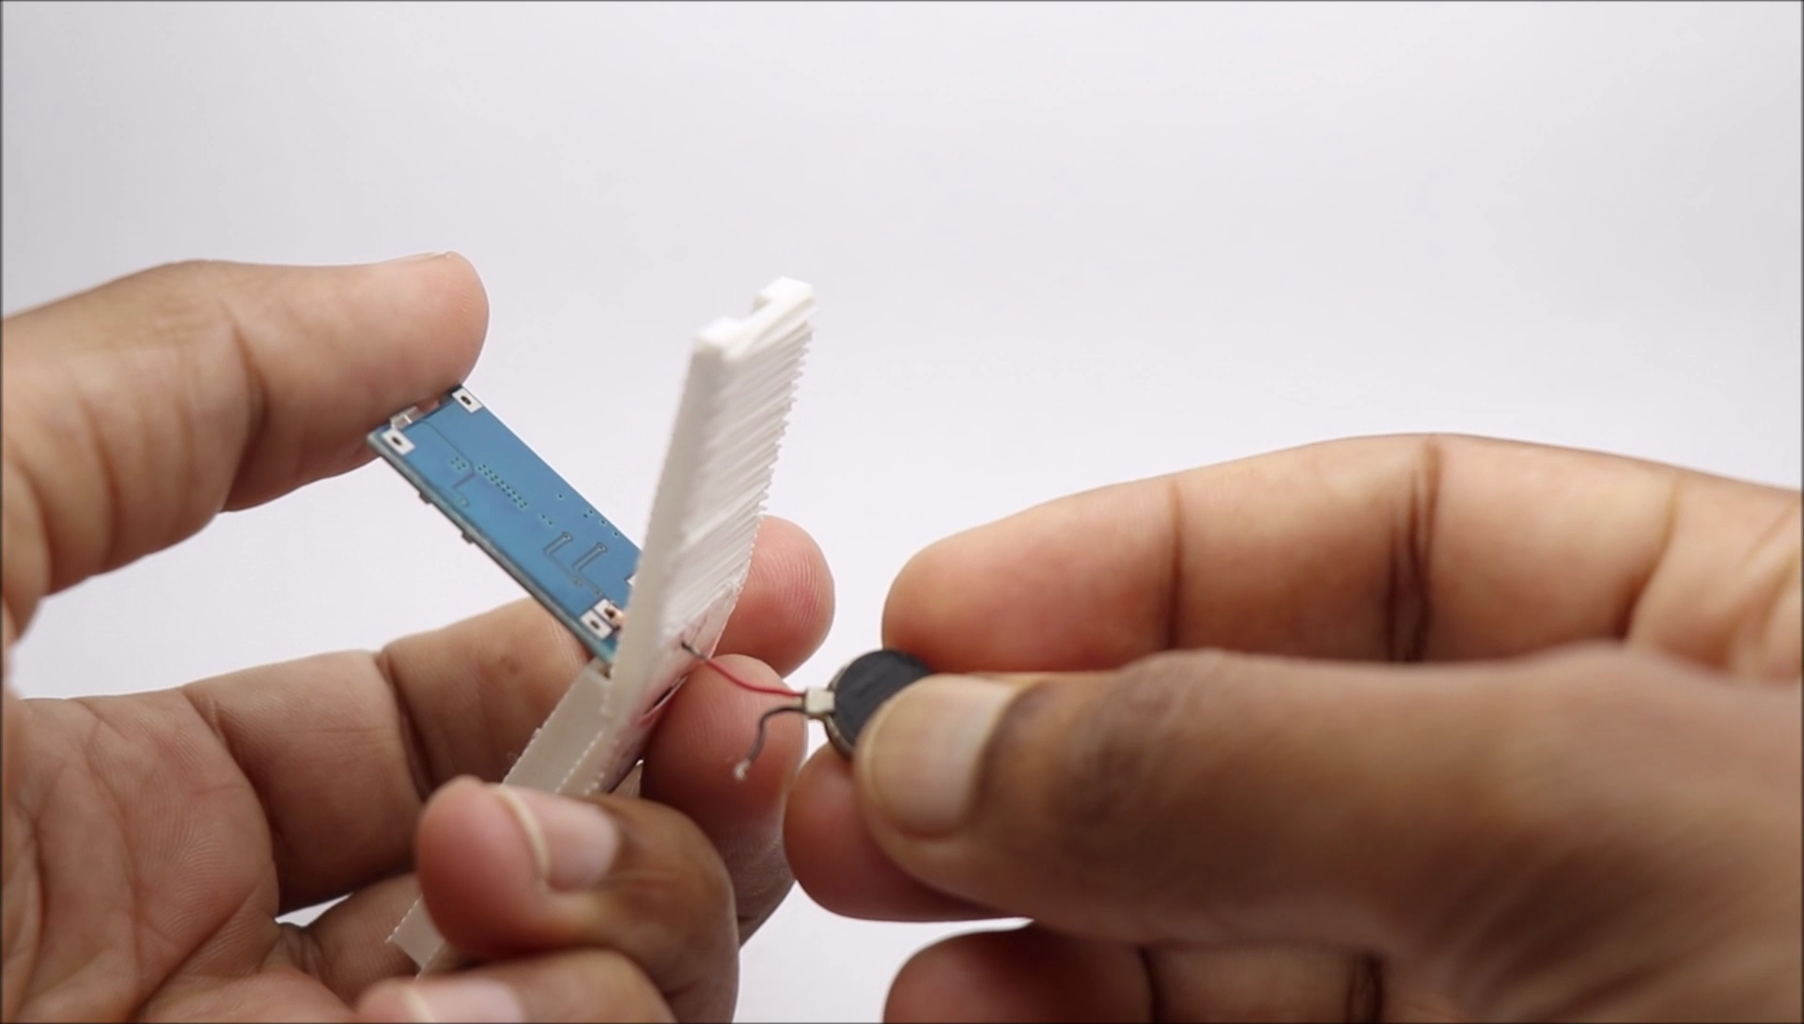


The circuit is pretty much straightforward for this project.
The charging board has terminals for battery connections and to these, we are directly soldering the battery, Wires of battery were cut to the required length before soldering so as to utilize the most of spaces.
Now at the base of the body i have given slots, These slots are for connecting the wires of the vibration motor to the charging board.
The other terminal of motor is connected to the board via a mini switch, the soldering part is a little complex if you are a beginner into soldering, if you have prior experience this step is very simple.
After all the components are soldered i secured everything with hot glue, make sure you are not leaving any loose hanging parts which may cause problem when the robot is working
You also can simplify this circuit with a PCB, Complete your electronic projects in the best way from PCBWay
Check here to check their Christmas Activities, where you can enter to win gifts and get discounts.
Unbox blind boxes and have a chance to win robot dog.
Why them? They have provided me with the best PCB and The quality is just amazing compared to other providers in the market
Check Here for Rigid-flex Pcbs with this your circuit becomes flexible! I have added the images to this step kindly check.
A revolutionary solution that combines the best of both rigid and flexible circuitry to elevate your electronic projects to new heights.
With their expertise in advanced manufacturing techniques, they offer a seamless integration of rigid and flexible components, ensuring enhanced reliability, durability, and space-saving benefits
Step 4: Adding Legs


Legs are the part that help move this robot here and there, The method of adding 3d printed legs to the robot is very easy.
I marked down the areas where this will be glued, In the first place add a drop of superlue and couple it to the body of this robot.
Now when the glue is dry completely add drops of hot glue to the same place and wait for dry.
This gives the strength to withstand vibrations from the vibrating motor, check for any loose parts, and if any secure them with hot glue.
Step 5: Finishing


We are about to finish this project, to give it an extra layer of finishing i will add a head with eyes!
Though you cannot expect it to be like real eyes this somewhat resembles the eye of a robot, i added a small circle that was cut from paper to make the eyes highlight.
Use superglue later add an extra layer of strength with hot glue and this finishes the building of this project.
To test this project all you have to do is power on the button and place it on the ground.
The robot hovers from place A to place B in no time and looking at the working of this robot is satisfying.
That was everything about making this vibrobot, If I didn't mention anything that was supposed to be included you can ask me in the comments.
Happy build and happy holidays
Step 6: Working Video
If you want more detailed instructions on building this project you can watch this video tutorial, This is an interesting project if you are a beginner in building electronic projects.
All the very best if you are building this cool robot, Have a good day :)

Participated in the
Anything Goes Contest


