

Introduction: Make Your Own Drawer Dividers: Easy Craft Organization!


Spring is just around the corner, which means it's time for some Spring cleaning! I'm not sure about y'all, but we struggle with cluttered drawers---especially now that we have a Cricut.
Drawer dividers are necessary to keep clutter in drawers at bay, but it's not always easy to find the right size dividers. Add on the fact that a lot of drawer dividers or drawer organizers are a bit pricey for what they are, and most people resort to either using things like mismatched boxes or worse...not organizing their drawers at all.
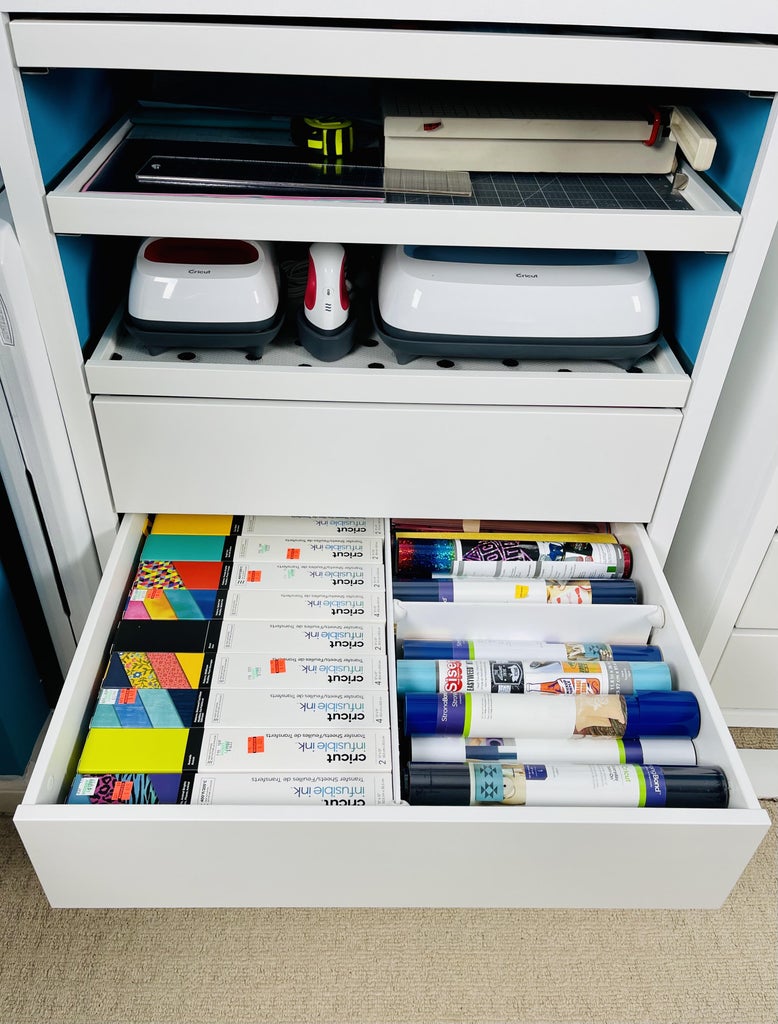
When we built our new craft cart and installed three large drawers in it to hold all of our vinyl and other Cricut materials, we knew we'd need to find a way to organize the drawers. With some foam poster board and cord clips, we were able to make our very own drawer dividers, custom fit to our needs, in under an hour.
So grab the few materials below, and let's get started!
Supplies
(Amazon links = Affiliate Links)
Foam Board - https://amzn.to/3vzzl17
Cord Clips - https://amzn.to/2P6EBZc
Cutting Mat - https://amzn.to/3cKNHD3
Box Cutter - https://amzn.to/3s1Uy1v
T-Square - https://amzn.to/2P2uzbA
Speed Square - https://amzn.to/2QlkPda
Measuring Tape - https://amzn.to/3r4F0Zs
Rubbing Alcohol - https://amzn.to/3eTyfat
Affiliate Notification
We are a participant in the Amazon Services LLC Associates Program, an affiliate advertising program designed to provide a means for us to earn fees by linking to Amazon.com and affiliated sites. You don't pay anything extra for the items you buy - we just get credit for referring you!
Step 1: Decide How You Want to Divide Your Drawers

The success of this project is really in the planning. Before we cut a single divider, we laid all of our drawers out on the floor and decided which materials would go in each drawer. That way, we could build the drawer organizing system to fit our materials rather than trying to fit materials into a pre-determined layout.
Step 2: Cut Foam Board Into Strips


The first thing we did was cut several pieces of foam board to the right height for the insides of the drawers. That way, we could ensure consistency in height across all the drawers. We waited to cut our pieces to length until later in the process.
Gather the following materials: cutting mat, several pieces of foam board, box cutter, straight edge (we used a T-square), measuring tape
Follow these steps:
1. Measure the height of the inside of your drawers.
2. Lay a large cutting mat down on your table.
3. Using whatever measuring tools you prefer, mark the height on your foam board.
4. Place a straight edge on your foam board and use a box cutter to slice the foam board to height.
5. Repeat until you have enough strips to make the dividers for your drawers.
Step 3: Install First Divider


Now that you have all of your pieces cut to the right height, it's time to break out the cord clips and install your first divider!
Gather the following materials: everything you used in the first step plus cord clips, alcohol, paper towels, speed square
Follow these steps:
1. You'll want to take two measurements on your cord clips before you start sticking them in the drawers:
First, measure the depth of the clip so you'll know how much to subtract from the length of the drawer divider. Ours were 1/4" deep.
Second, measure the diameter of the cord clip so you'll know where the center is. Ours were approx. 1" wide.
2. Clean the inside of your drawer with rubbing alcohol and allow to air dry briefly to ensure good adhesion.
3. Measure across your drawer and secure the first cord clip in place, ensuring that the groove is straight up and down.
4. Use the speed square to line up the second cord clip perfectly.
5. Repeat on the other side of the drawer.
6. Cut one of the foam strips to the right length.
Note: Be sure to subtract the depth of the cord clips. In our case, we subtracted a half inch.
7. Gently slide the foam strip into place.
Step 4: Install Additional Dividers


Once you have your first divider in, you can install additional dividers. If you are planning to keep all of your divider running parallel, you'll just need to repeat the steps above. If you will be making some perpendicular dividers like we did, there are a few important notes.
Keeping the same materials as you used before, follow these steps:
1. Measure where you'd like to divide the area.
2. Clean the drawer side only with alcohol.
Note: As foam board is made out of paper, do not attempt to clean that surface with alcohol.
3. Adhere the cord clips to the drawer wall and foam board divider on the other side.
4. Cut a piece of foam board to the correct length.
5. Insert foam board into cord clips.
6. Repeat as necessary to created all desired sections.
Note: If you want to have reinforcement on the long divider, try placing the two perpendicular dividers close to each other to prevent any bending.
Step 5: Enjoy!


Now that you've learned this method, you can go hog wild on organizing all of your drawers! The beauty of this system is how easily it is customized to what you are storing in each drawer--and you can change it as often as you like.
Speaking of liking things...if you liked this project, please head over to JustMightDIY.com for other tips, DIY stories and more. And if you’re interested in checking out more of our tutorials, check out our Instructables profile or YouTube channel.

Participated in the
Paper Contest


