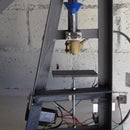
Introduction: 3D Printed Plastic Cooling With an Aquarium Air Pump
Having tried a few cooling approaches on my 3D printer with minimal success, I decided to make a Berd Air style system.
The downside is that the pump isn't controllable from the Arduino due to it using mains power.
There is also more noise from the humming pump than the radial blower fan it replaced.
Step 1: Parts
Basically just a length of air hose, 3mm dia brass tube, plastic bracket for the brass tube and the air pump.
I'm using a Dophin 7500 which has a dual outlet as well as a high low setting
The tube was bent around my thumb, no fancy printed tubing benders needed. I then covered the tube surface closest to the hotend with high temp silicone, left the bottom facing the print bed clean and drilled 7 x 1.3mm dia holes in the ring section.
The PLA bracket was designed in Tinkercad so as to be similar in size to my end stop micro switch.
Attachments
Step 2: Failure Postmortem
The failed part is a 11hr print which I left on overnight.
For what its worth, its the XY joiner for Allted's MPCNC machine.
I had earlier heard some hiccuping from the extruder motor as it struggled with a too cool nozzle.
The hotend's core temp is fine at 200 deg C but the nozzle tip cools down and the back pressure builds up until the extruder motor begins skipping.
This results in grinding of the filament which snaps off.
Step 3: Optimizing the Cooling.
Initially I started off using the high setting and both outlets, but this proved to be a disaster on long print times.
I then started a print using the low setting on the pump after the initial 3 layer bottom surface.
I'd already determined that the crucial area of the overhang started at about 60mm to 75mm of print height, so I popped by every 2 hrs and switched the pump onto the high setting at 60mm.
Later on I swung by to change it back down to "low" from the 80mm print height onwards.
This strategy worked out well as evident by successful first pic.
Step 4: Some Bonus Tips.
Sometimes you need to change filament mid print as a reel runs out, it would be nice if you knew how much filament was left before starting a print job, but I have a feeling that would involve muttering over a crystal ball.
How I solve the issue, is to cut the tail of the old filament square as it climbs up to the extruder and prep the new reel with a square cut and some blue marker. Then I just feed it up behind the old filament and watch it as it travels through my bowden setup. Once the hotend starts printing the blue color, I can then relax knowing all is well.
On another note, I now optimize layer heights according to the slicer software reported Z height of the STL model.
In my example the part was 99.36mm which I then enter into a spreadsheet and set it up to divide by my slicer layer range.
It is quickly apparent which Z layer slices have no fractions of a whole number and will be best for this particular model. I chose the 0.36mm slices to reduce the print time.


