Introduction: ATtiny85 Tiny Light With Single WS2812B RGB LED


ATtiny85 (Digispark) is one of the smallest and cheapest Arduino board available in the market. In this project, we will connect a programmable RGB LED to the ATtiny board and program it to show rainbow colors. We will also create a 3D printed enclosure to make it wall/desk mountable.
Supplies
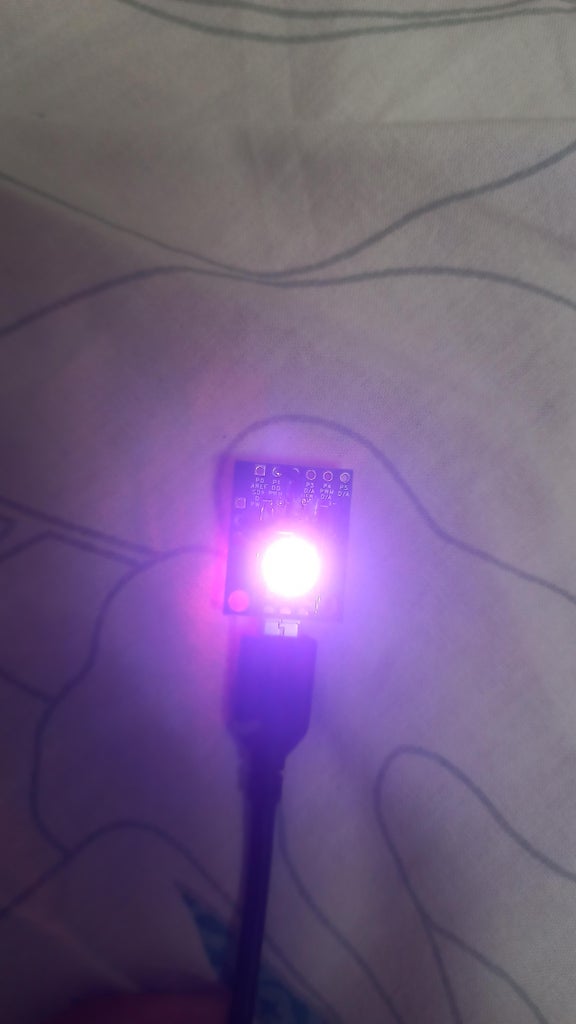
1) ATtiny85 (Digispark)
2) Addressable RGB LED (WS2812B)
3) Soldering iron and wires
Step 1: Install Libraries and Drivers
You need the following libraries/drivers for this project:
1) FastLED: https://github.com/FastLED/FastLED
Download the libraries as zip files and add them to your Arduino sketch as follow:
Sketch -> Include Library -> Add .zip library
2) Download and install USB drivers for the ATtiny from here:
https://github.com/digistump/DigistumpArduino/releases
Step 2: Arduino Board Manager
By default, Arduino IDE does not support ATtiny85. Hence, we need to add the following link in the additional board manager URL:
http://digistump.com/package_digistump_index.json
Then, search and install “Digistump AVR Boards” from the Board Manager.
Then, go to Tools--> Board --> Digistump AVR Board --> Digispark (Default -16.5mhz)
Step 3: Connection
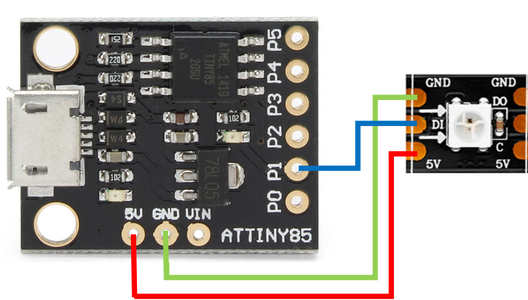
ATtiny85--> LED
5V --> 5V
GND --> GND
P1 --> Din
Step 4: Arduino Sketch
#include <FastLED.h>
#define LED_PIN 1
#define NUM_LEDS 1
CRGB leds[NUM_LEDS];
void setup()
{
FastLED.addLeds<WS2812, LED_PIN, GRB>(leds, NUM_LEDS);
FastLED.setMaxPowerInVoltsAndMilliamps(5, 500);
FastLED.clear();
FastLED.setBrightness(255);
for (int i = 0; i < NUM_LEDS; i++ )
leds[i] = CRGB::Black;
FastLED.show();
}
void loop()
{
uint8_t thisSpeed = 10;
uint8_t deltaHue= 10;
uint8_t thisHue = beat8(thisSpeed,255);
fill_rainbow(leds, NUM_LEDS, thisHue, deltaHue);
FastLED.show();
}
Attachments

Step 5: 3D Printed Enclosure
Will be added soon