

Introduction: Animated, 3D Printed, Clothespin Characters


It's fun to download STLs and 3D print those amazing articulated designs - the pieces are connected but they move independently. How is that done?
Learn the secret here to making the CAD model and create your own animated 3D character, powered by an old-fashioned clothespin.
Ready to make it light up too? Add a simple circuit and use the clothespin as a switch as well as a motor.
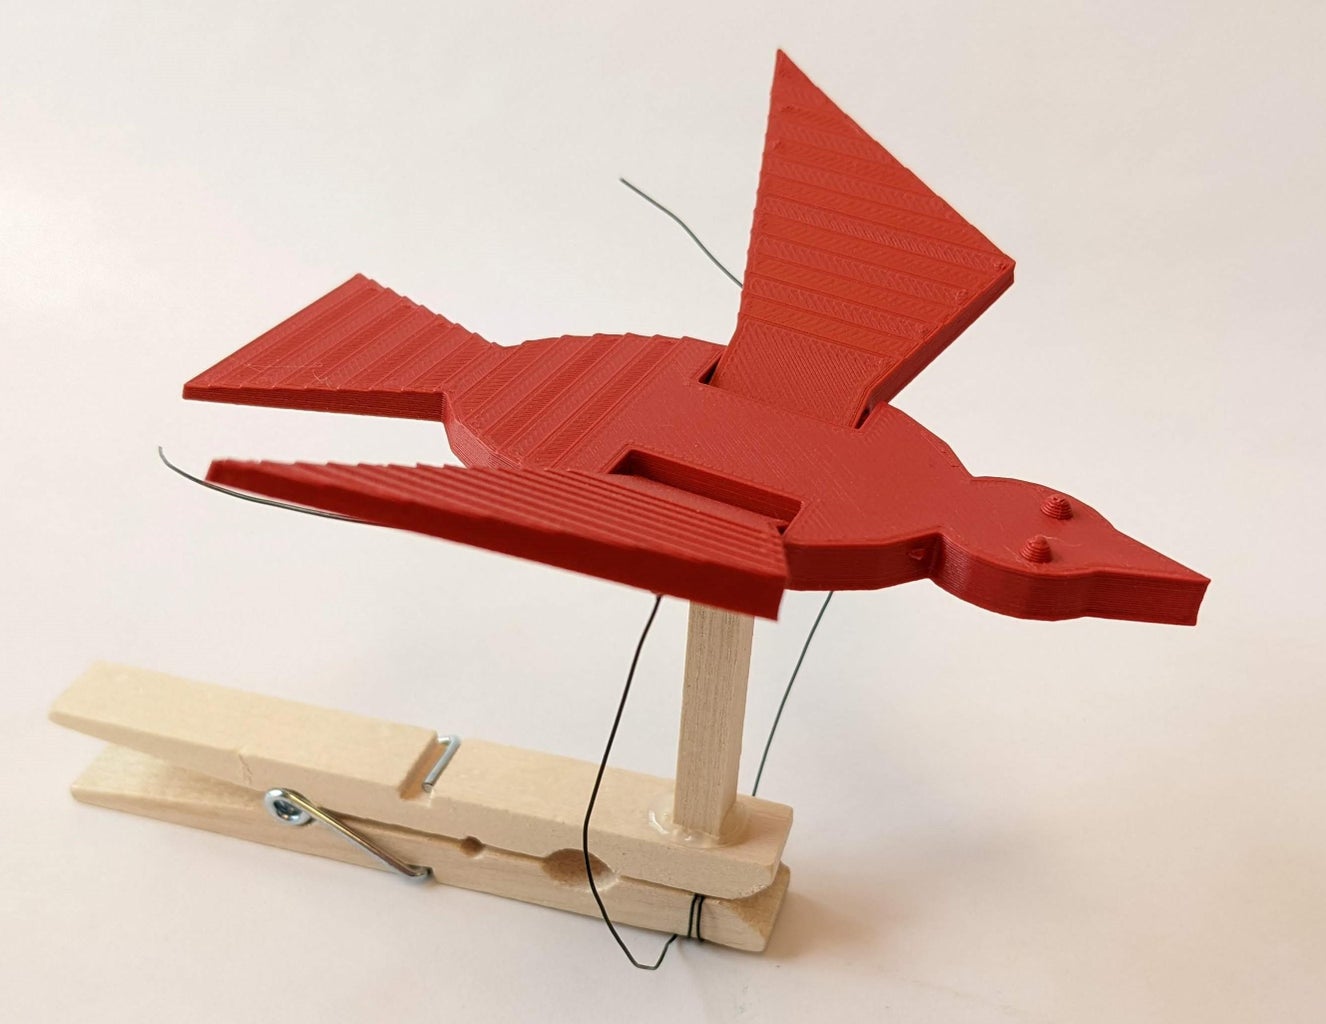
This project has instructions to make a 3D printed character with moveable parts, animate it with a clothespin, and light it up with LEDs. The basic character is a bird with moveable wings, but that can be adapted to another design.
Supplies
Materials
- Clothespins (wood with hinge) such as 3 ¼ “ long, 4” long
- Thin strong solid wire, such as 26 gauge floral wire
- Decorative craft materials
- Sturdy craft materials, such as wood dowels
- 3D printer filament
Tools
- 3D printer
- Wire cutters
- Needle nose pliers
- Hot glue
Optional Tools and Materials to add electronics
- LEDs
- Flexible hook-up wire 24AWG, best with silicone insulation
- Coin cell batteries (3V) such as CR2032
- Soldering and wiring tools
Step 1: Prototype a Character With a Simple Motion


Collect the craft materials, clothespins, floral wire and start tinkering!
Here are some ideas to consider:
Characters
- Animals: birds, flying bugs, unicorns, lizards, penguins, hippogriffs, etc.
- Plants: flowers, grass, venus flytrap, etc.
- Objects: hammers, bats (baseball, etc.), rackets (tennis, etc), light sabers, etc.
Motions
- Down, or rotating downwards, is easy with horizontal clothespins
- Sideways, or rotating sideways, is easy with vertical clothespins
- Motion variations are possible with a wire linkage, just harder to build
Choose a character and make a simple structure that represents it. Leave the details of appearance for later, they may not even be necessary. Use flexible flat material, or tape, to create a simple hinge (a 1-degree of freedom motion). Try string, yarn, or dental floss to create motions that also rotate (2 or more degrees of freedom). These are more difficult to control but could produce interesting motions.
Step 2: Animate the Character


Connect the character to the body of the clothespin with a sturdy material, such as a wooden dowel, or rolled up cardboard.
It’s important that this connection to the clothespin be sturdy. Hot glue is a good choice here, but apply it in layers, not all at once, and build up the strong connection.
Attach the floral wire to the clothespin by wrapping it around the jaw. Fasten the wire to the character with a little bit of hot glue or by poking it through the material and bending. Leave some extra wire.
Adjust the wire to create motions in the character. Experiment, observe, vary, observe… The wire can be “shortened” by adding a bend or a twist. Use needle-nose pliers for fine adjustments.
Step 3: Simplify!!
Walk away from your design for a bit and come back with a fresh mind. Better yet, show it to a couple of other that enjoy design and timkering and ask them to review it with you.
How can you make it smpler?
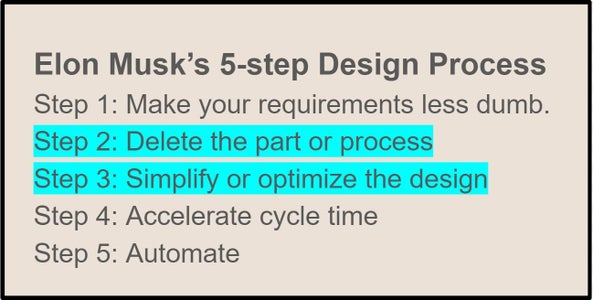
Learn this principle from an engineering master - Elon Musk!
Full video interview [SUMMER 2021] Starbase Tour with Elon Musk [PART 1]
Summary of the key points Elon Musk’s 5 Manufacturing Principles
Examples of simplifying and deleting in this project:
- Look for parts that are not really necessary. For example, in the bird design, it's good to have flapping wings,but a moving beak is not necessary.
- To make something go both left and right or up and down, start the motion at one side and move fully to the other, rather than starting in the middle and creating 2 motions.
- To show an animal, just show the face and/or ears, the entire body is not necessary.
Step 4: Create a Tinkercad Model and 3D Print It


Video Tutorial and Starter file on Tinkercad
This video tutorial shows how to use Tinkercad to design a 3D printed, “articulated” character. Here articulated means the object will have parts that can move freely while being connected, and are printed all at once.
The tutorial uses this starter file https://www.tinkercad.com/things/lfZjBQSS08GTinkercad Starter Project which specifies the dimensions used in the hinge parts, as well as the Tinkercad workflow to make the parts.
Key dimensions
See image in this Instructable
Key point 1: For a layer of 3D printing filament to print on top of another layer, and NOT stick, leave a 0.5mm (0.020 inch) gap between them. See red dimensions in diagram.
Key point 2: for pieces next to each other to move freely, leave a gap of at least 1.0 mm (0.040 inch). See blue dimensions in diagram
How the articulation is made
In this design the body has cutouts for the wings.The cutouts are 2mm wider than the wing end so they can slide freely. In the cutout on the body there is a 3mm diameter pin, which fits in the 4mm diameter hole cut through the wing.
The wings and the body begin printing at the same time. After the bottom of the holes in the wings are printed, the pins in the body start printing. The pins are supported by the surface of the holes in the wings below them, but due to the 0.5 mm (0.020 inch) gap, they do not stick. When the pins in the body have completed printing, they serve as the support for the tops of the holes in the wing. See the image of a partially printed articulated bird model.
Workflow and Tinkercad features
In any CAD system, the order of the builds, cuts, and groups is very important. The locations of the items are also important, and sometimes a part must be moved out of the way while a cut happens. Tinkercad has several features that make these processes easy: Group/Ungroup, Workplanes, Drop to Workplanes,Snap movements, and Box select. Visualizing in 3D is often easy, but not when the parts are solid - use the Tinkercad Transparent function to make checking fits easier.
The workflow and the Tinkercad features and functions are all demonstrated in the video tutorial. https://youtu.be/fhO5u8Kv5x8
Step 5: Make the 3D Model Move


As done in Step 2, connect the character to the body of the clothespin with a sturdy material, such as a wooden dowel, or rolled up cardboard.
It’s important that this connection to the clothespin be sturdy. Hot glue is a good choice here, but apply it in layers, not all at once, and build up the strong connection.
Attach the floral wire to the clothespin by wrapping it around the jaw. Fasten the wire to the character with a little bit of hot glue or by poking it through the material and bending. Leave some extra wire.
Adjust the wire to create motions in the character. Experiment, observe, vary, observe… The wire can be “shortened” by adding a bend or a twist. Use needle-nose pliers for finer adjustments.
Step 6: Make It Light Up

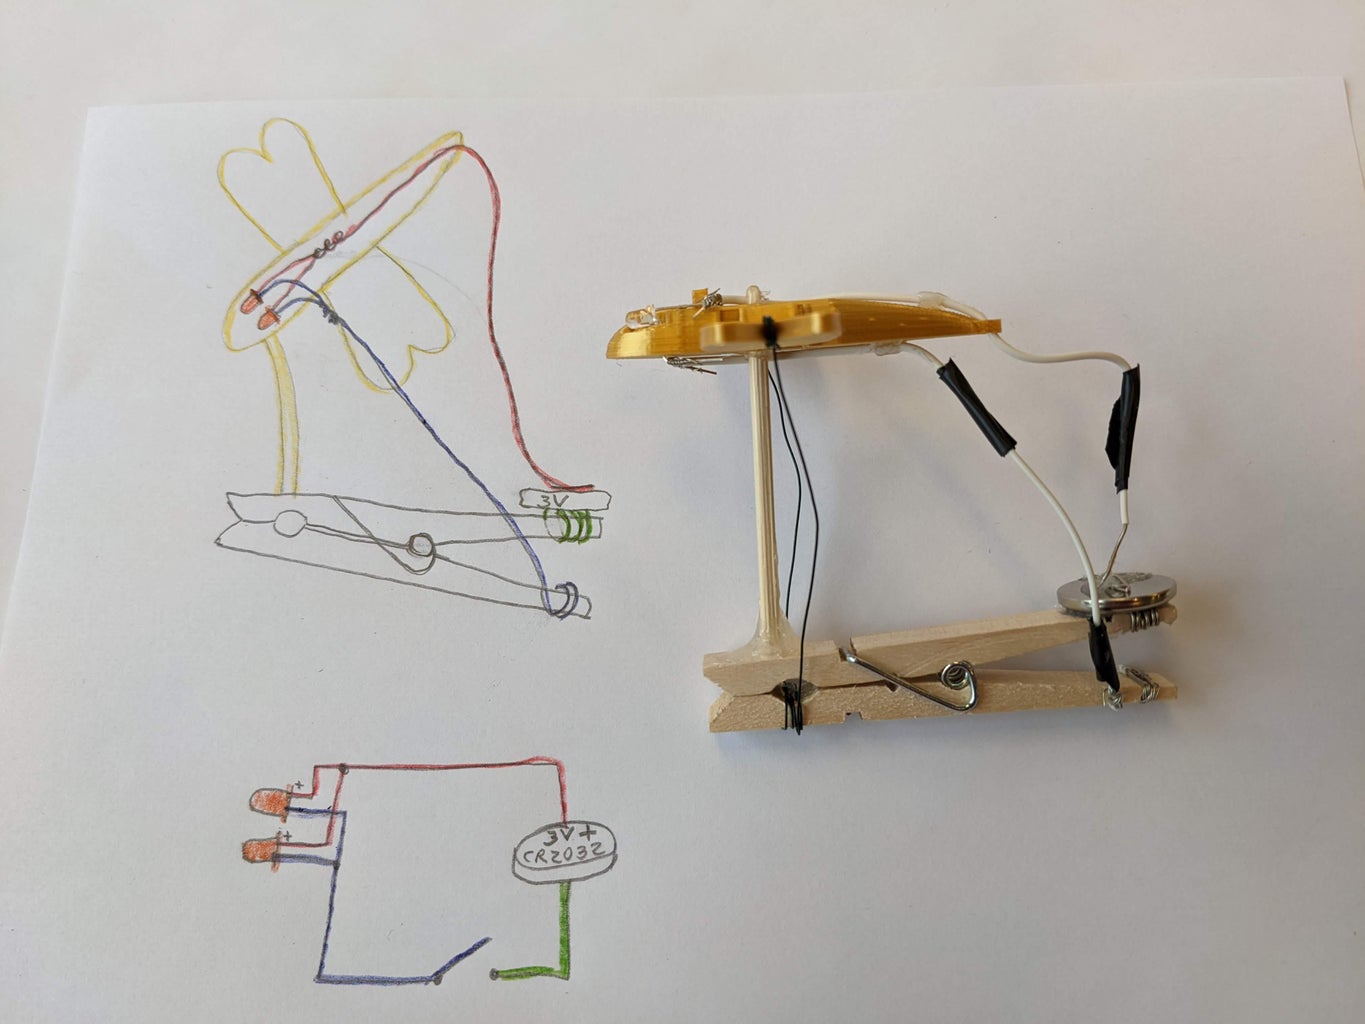
Adding LED lights to the animated character is fairly easy and LEDs can be hot glued right on to the model.
Most LEDs will light up with 3V, as long as the current is limited. Without getting into too much detail, it is best to use 2 LEDs of the same color and type so they will light up with the same brightness. WIth different types, test them first on the battery and see how they look before installing them.
A coin cell battery, such as a CR 2032 or CR 2016, provides 3 Volts, but cannot provide much current, making it ideal for very light loads like 1 or 2 LEDs.
Create the circuit with soft flexible wire like 24 AWG stranded silicone insulated wire listed above. This wire is very flexible and will not interfere with the springy floral wire on the model.
Connections to the ends of the LED are best done with solder.
For multiple LEDs, arrange them in parallel, connecting the long (+) leads together and the short (-) leads together creating one LED assembly.
Connecting to the battery is simple: spread out the strands of the wire and tape them to the top of the battery. Make sure not to go around the edge of the battery as it might short out the (+) and the (-) ends.
Step 7: Design Your Own Character or Object!


Get creative, or technical, or both!
Use the clothespin on its side, or use multiples.
Add linkages and create different motions.
Create characters or scenes that are meaningful or expressive for yourself or as a gift.
Have fun!
What did you make? We'd love to see what you came up with - share your makes here, or drop us a message. If you did this activity with K-12 students, let us know what grade level and content area.
Step 8: Get More Maker Resources for Your Education Community
We hope you had fun creating Animated, 3D Printed, Clothespin Characters with Tinkercad and craft materials.
The K-12 Maker team at the MIT Edgerton Cneter supports teachers in creating and delivering fun, enriching Maker experiences for their students, no matter what subject they teach.
Join our mailing list to get the latest news, tips, and insights from the K-12 Maker Lab!
Visit our website k12maker.mit.edu to get free Maker resources for K-12 teachers!
- Starter projects - simple things to make while you learn to use Maker tools
- Maker skills workshops for K-12 educators - Spring, Summer, and Fall.
- Makerspace Design Guide for K-12 Makerspaces.
- Lists of Tools and Materials and illustrated charts to print and post.
- Supervision and safety guidelines for shop administrators.
- Training guides for common tools (including student checklists and refresher guides).
- Our Maker Methodology for designing Maker Projects for core curriculum, including sample projects.

First Prize in the
Teach With Tinkercad Contest


