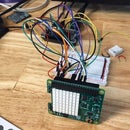
Introduction: Arduino Base
I was experimenting with my Arduino, and became worried about accidentally making contact with the back of the board. I looked up "Arduino Base" for purchase and realized I had everything I needed to build my own.
Supplies
full breadboard
6V, 4AA battery pack
acrylic board, 6" by 7½"
4× tiny nuts
4× ¾" bolts
4× ½" spacers
double-sided tape
4× rubber feet
Step 1: Prepare the Board
Cut the acrylic board to size and sand the edges and corners. Use the Arduino as a template to mark and drill holes.
Step 2: Attach the Pieces
Attach the Arduino to the board with the bolts, using the ½" spacers to lift it off the surface of the acrylic board. I put the nuts on the back. I would have preferred plastic spacers, but I only had aluminum ones.
Peel the backing off the breadboard and affix it in place.
Use double-sided tape to affix the battery pack. My pack even had an on/off switch which is quite handy.
Finally, put rubber feet on the back of the board to prevent slippage and to prevent the nuts from contacting your work surface.


