

Introduction: Arduino Led Lights


By utilizing Arduino Leonardo in this Arduino project, I have successfully made decorative lights with LED. There are many kinds of Led lights available, but I decided to create one on my own. The simplest thing that I can think of is to hook up some LEDs to the Arduino and light them up. Without using an ic, you can connect at most 13 LEDs so you do not burn up the chip. I decided to use 9, just for aesthetic reasons.
This design originated from this link:
(https://www.instructables.com/Arduino-Christmas-Li...)
Supplies
1. Arduino Leonardo
2. Arduino Breadboard
3.10 M-to-M jumper wires
4. 9 LED lights
5. USB cable
6. 9 220-ohm resistors (or similar)
7. A4 paper
8. tape (stick the paper)
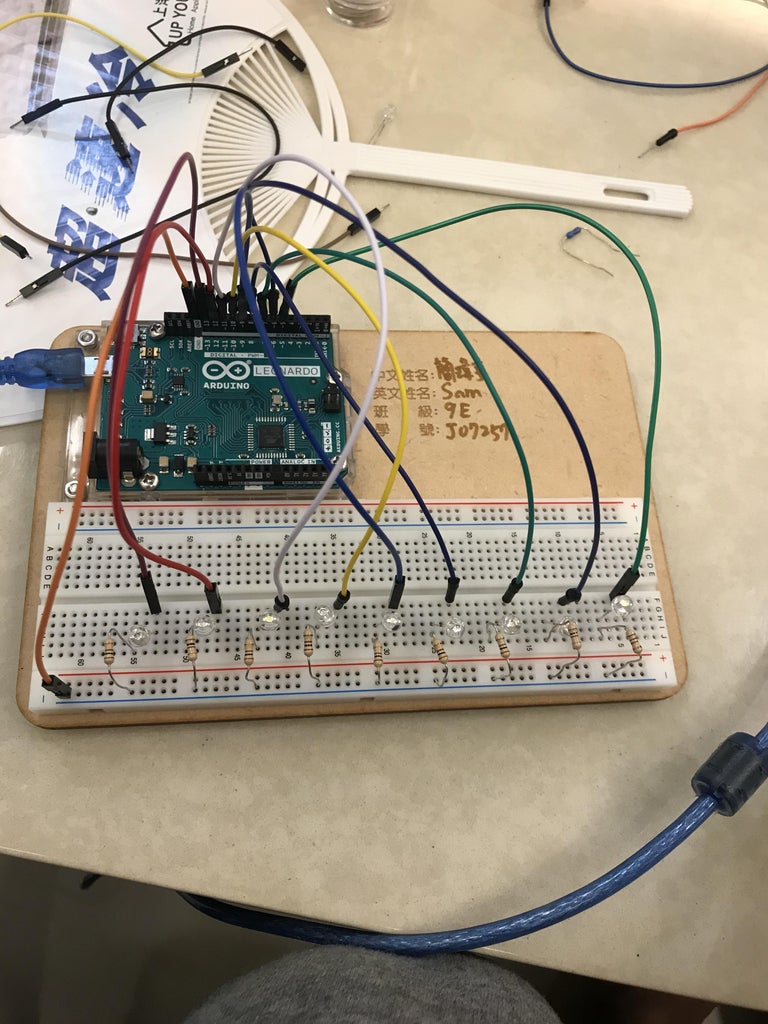
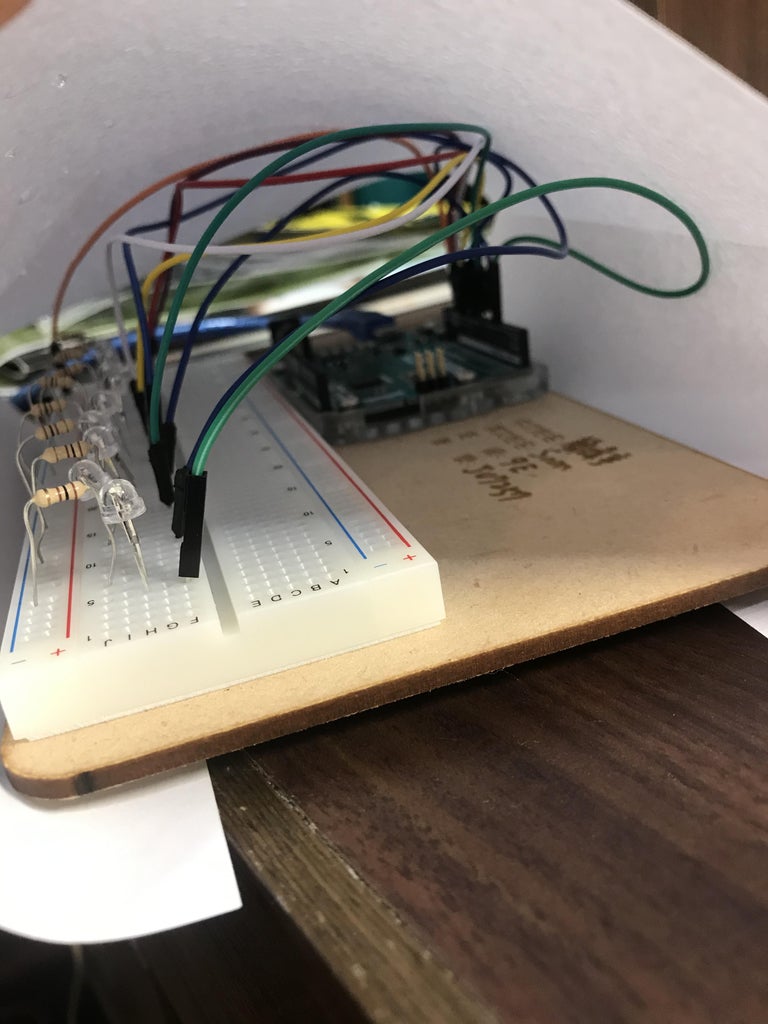
Step 1: Connecting the LEDs


Now, you need to plug in each led on the breadboard. I’ve aligned them in a row, 2 holes from each other so they can fit. The right side of the led needs to be the longer lead (positive) that connects to a digital pin of the Arduino. The cathode goes to the negative rail of the breadboard, with a resistor. The rail is connected to the GND (negative) of the Arduino.
Step 2: Modifying and Uploading the Code


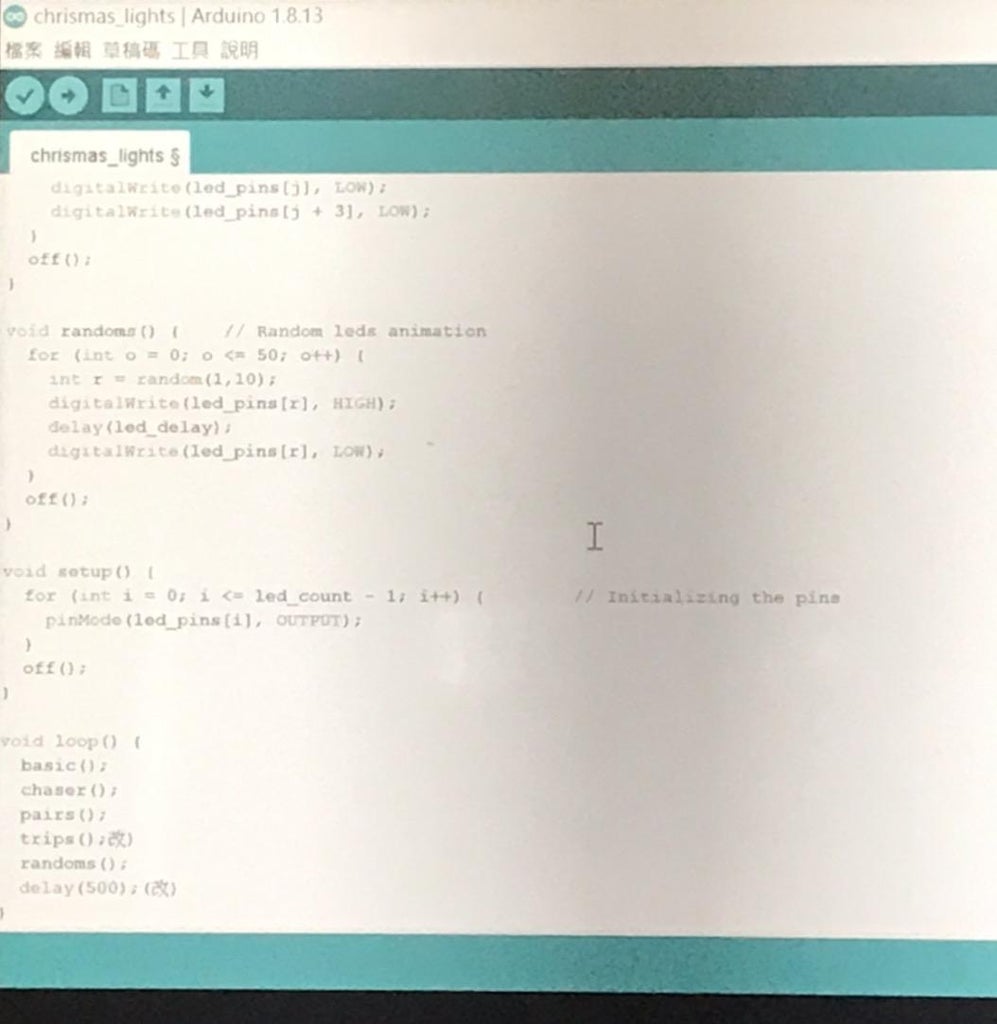
Connect the Arduino to your computer using the USB cable. Start up the Arduino IDE and paste in the code. The different delays can be changed and also the sequence of animations.
I changed the speed, sequence and I changed the Led light it can flashing three times
Code from the original: https://pastebin.com/ztkDNbdf
Code from me:
const int led_count =9; // Number of leds
const int led_delay = 200; // A delay constant
const int led_pins[led_count] = {5,6,7,8,9,10,11,12,13}; // Pins of the leds void off() { // All leds off for (int i = 0; i <= led_count; i++) { digitalWrite(led_pins[i], LOW); } delay(led_delay * 5); } void basic() { // Basic animation for (int j = 0; j <= led_count; j++) { digitalWrite(led_pins[j], HIGH); delay(led_delay); } off(); } void chaser() { // Chaser animation for (int j = 0; j <= led_count; j++) { digitalWrite(led_pins[j], HIGH); delay(led_delay); digitalWrite(led_pins[j-1], LOW); delay(led_delay); } off(); } void pairs() { // Pairs animation for (int j = 0; j <= led_count; j++) { digitalWrite(led_pins[j], HIGH); digitalWrite(led_pins[j + 2], HIGH); delay(led_delay * 1.5); digitalWrite(led_pins[j], LOW); digitalWrite(led_pins[j + 2], LOW); } off(); } void trips() { // Pairs animation for (int j = 0; j <= led_count; j++) { digitalWrite(led_pins[j], HIGH); digitalWrite(led_pins[j + 3], HIGH); delay(led_delay * 1.5); digitalWrite(led_pins[j], LOW); digitalWrite(led_pins[j + 3], LOW); } off(); } void randoms() { // Random leds animation for (int o = 0; o <= 50; o++) { int r = random(1,10); digitalWrite(led_pins[r], HIGH); delay(led_delay); digitalWrite(led_pins[r], LOW); } off(); }
void setup() { for (int i = 0; i <= led_count - 1; i++) { // Initializing the pins pinMode(led_pins[i], OUTPUT); } off(); } void loop() { basic(); chaser(); pairs(); trips(); randoms(); delay(500); }
Step 3: Understanding the Animations

For simplicity of the code, I’ve separated each sequence of blinks into a new function. Long story short - each animation has its function. In everyone you can find a loop, which cycles through the array, containing the number of each led and the corresponding digital pin of the Arduino. Then, it turns them on/off to create those fancy effects. Each function ends with the execution of the off animation, which turns off all LEDs to get ready for the next one.
Step 4: Project Demonstration
In this prototype, I’ve included 5 basic animations - all-on (one by one), the chaser, the chaser with pairs, and 50 random blinks.
Here is the video of the finished project!!!

