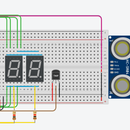
Introduction: Automated Photobooth
This will show you how to make an automated photo booth using the raspberry pi, an ultrasonic distance sensor, and a few other accessories. I wanted to do a project that uses both sophisticated hardware and a program that is sophisticated. I researched projects like this on the raspberry pi resources page, some of these projects are physical computing with python, and micro bit selfie. One of these showed how to use the raspberry pi camera and the other showed how to use the ultrasonic distance sensor.
Step 1: Materials
Before we start to build our circuit you will need some materials:
1 x Raspberry Pi 3
1 x T-Cobbler
1 x Pi Camera
1 x Ultrasonic Distance Sensor
3 x RGB LEDs
10 x 330 Ohms Resistors
1 x 560 Ohms Resistor
5 x Spool of different coloured cables
1 x Breadboard
Step 2: Building the Circut
This is the way that I went about connecting my circuit:
1. To make this circuit you would want to plug in the Raspberry Pi camera to the appropriate socket
2. Plug in the T-Cobbler to the breadboard.
3. Using custom length jumper cables connect one to the power rail and one to the ground rail
4. Plug in the ultrasonic distance sensor and plug the 'vcc' leg into power, the 'gnd' into ground, 'trig' into a GPIO pin, and the 'echo' into a 330 ohms resistor which connects to a 560 ohms resistor that is connected to ground and a GPIO pin.
5. Put the three RGB LEDs on the breadboard inline connecting the anode of the LEDs to power, and connect the different legs that control the colour of the LEDs to 330 ohms resistors and then to GPIO pins.
Step 3: The Code
In order to have the Raspberry Pi use the GPIO pins we would need to code the pins to do something. To make the code that I made I used python 3 IDLE. The code that I made uses the RPi.GPIO as well as the gpiozero library to function. There are procedures for the different colours and there is a function that calculates the distance using the ultrasonic distance sensor and when there is something in range it will open the pi camera preview and the LEDs will countdown and then a picture is taken.
Here is the code that I used:
from picamera import PiCamera
from gpiozero import Button, LED from time import sleep import RPi.GPIO as GPIO import timer = [LED (23), LED (25), LED (12)] g = [LED (16), LED (20), LED (21)] b = [LED (17), LED (27), LED (22)] button = Button(24) GPIO.setmode(GPIO.BCM) GPIO_TRIGGER = 19 GPIO_ECHO = 26 GPIO.setup(GPIO_TRIGGER, GPIO.OUT) GPIO.setup(GPIO_ECHO, GPIO.IN)
def red(x): r[x].off() g[x].on() b[x].on()
def off(x): r[x].on() g[x].on() b[x].on()
def off(): r[0].on() g[0].on() b[0].on() r[1].on() g[1].on() b[1].on() r[2].on() g[2].on() b[2].on()
def green(x): r[x].on() g[x].off() b[x].on()
def blue(x): r[x].on() g[x].on() b[x].off()
def run(): camera.capture('selfie.jpg') camera.stop_preview()
def distance(): GPIO.output(GPIO_TRIGGER, True) time.sleep(0.00001) GPIO.output(GPIO_TRIGGER, False) StartTime = time.time() StopTime = time.time() while GPIO.input(GPIO_ECHO) == 0: StartTime = time.time() while GPIO.input(GPIO_ECHO) == 1: StopTime = time.time() TimeElapsed = StopTime - StartTime distance = (TimeElapsed *34300) / 2 return distance
off() while True: d = distance() if int(d) <= 30: with PiCamera() as camera: camera.start_preview() red(0) sleep(1) blue(1) sleep(1) green(2) sleep(1) off() camera.capture('selfie.jpg') camera.stop_preview()


