Introduction: Carved Wooden Pumpkin Box
I now love Halloween. I got married last Halloween so now feel a bit of a commitment do doing something special every year. This year includes the creation of this little carved wooden pumpkin box.
The eagle eyed gamer's out there might have noticed that the pumpkin face is inspired by Reapers Halloween costume in the game Overwatch. A game that I have had a lot of fun with :)
Step 1: Round, Spigot and Part
If your not already somewhat aware of wood turning I have made a primer which can be found here http://makezine.com/2015/08/13/quick-guide-7-basic...
If you are familiar with wood turning then I can make the explanation a little more concise.
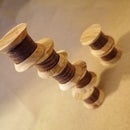
I first found a spindle of beach and turned it to round. I then turned a spigot on each end.
I then parted the spindle in the center.
Step 2: Chuck Up and Make the Box
I used the chuck on my lathe to hold the spigot of one end of the box and used a small bowl gouge to create the indentations for the boxes tenon as well as hollowing the box.
I then chucked up the other end of the box and turned the mail part of the tenon checking fit with the part I had just turned to ensure a good fit.
Step 3: Turn That Pumpkin Shape
I turned the pumpkin shape knowing where I had hollowed to.
I had originally intended to keep the stalk. handle of the pumpkin box in beach but I had a slight brake due to a lack of thinking about the project hard enough. The beach broke where the handle would have been.
Step 4: Turn a Cool New Stalk
Luckily one mistake doesn't have to kill a project.
I held the lid in the chuck holding onto the tenon and I turned an indentation into the lid ready to hold a new stalk/ handle.
I had a small chunk of rosewood left over from another project so I changed the jaws in my chuck to pin jaws and chucked up the rosewood before turning a tenon to fit the indentation in the lid and then turning a nice stalk/handle.
I also turned a nice bottom onto the pumpkin. (I would have found a less damaging way to hold a box to do this if I wasn't about to carve the outside of the box)
Step 5: Carving Fun Time With the Dremel
I drew the Overwatch Reaper Halloween pumpkin face onto the wooden pumpkin as well as lines for associated with a pumpkin before using a dremel rotary tool co carve out the details.
I primarily used the large engraver to establish details and then used a sanding mandrel to blend and re affirm lines.
Step 6: Coloring Fun
For this project I used felt tips to stain the pumpkin.
I initially colored the eyes yellow and used a number of shades and tones to create a difference before toning the whole thing down using sand paper.
After a little while I decided that yellow eyes and mouth were not ideal for this little pumpkin so used black ink over the yellow which resulted in the pumpkin looking a bit more fearsome.
The last thing to do was glue in the stalk and the pumpkin is now ready to trick or treat my wife on our anniversary.
Spoiler alert its treat. :)


