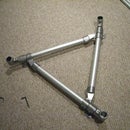
Introduction: Coffee Table (Hack of IKEA LACK)
A couple of years ago we were in IKEA and saw a coffee table for around fifty dollars. Who could pass up such a deal. Well, after two toddlers and people who like to put their feet on the table, it started to get a little wobbly. We got a few years out of it and knew from the looks of the top and joints that it was time to go, or at least be renovated. In this project I renovate our old IKEA coffee table with decoupage and Kee Klamp fittings.
Step 1: Materials, Tools, & SketchUp File
Materials
- (1) Old Coffee Table or Top
- (16 ft) 1 -5/8" fence post or Aluminum Pipe
- Kee Lite Fittings:
- (6) L10-7 (Tees)
- (4) L61-7 (Flanges)
- (4) L84-7 (Plugs)
- (16) Screws for Flanges
- Decorating Supplies
Tools
- Pipe Cutter
- Allen Wrench
- Marker
- Tape Measure
Also included below is a Sketchup File of the Coffee Table. See more of these type of sketchup projects in our SketchUp Library.
Attachments
Step 2: Dismantle Existing Coffee Table (or Locate Top)
As mentioned above we built this table by deconstructing an IKEA LACK coffee table. But there is really no reason you could not build this table with any other table top. I am sure that just about any old coffee table or salvageable piece of wood worthy of a table top would work fine.
Step 3: Decorate/Finish Table Top
My wife chose to use decoupage for this project. Decoupage is a technique that uses a glue substance to mount paper to a surface. The paper is dipped in the glue so that it is entirely soaked and then placed on the surface. For more about decoupage click here. Other ideas for table top:
- Glue down a poster
- Break up old tiles and make a mosaic
To finish the top I applied three coats of Minwax® Polycrylic. If you have money to throw away you might consider using the epoxy coat that they use to coat bar tops. The Polycrylic seals the surface so that the paper is not exposed moisture (e.g. from the bottom of your coffee cup).
Step 4: Mount Table Legs
In this step we will cut the pipe legs and mount them to the bottom of the table to form the pipe base.
3.1 – Screw flanges to the bottom of the table top. I just eyed the distance from the edge because I was mounting the flanges so close to the edge.
3.2. – Cut table legs to desired length. I used the old table legs from the IKEA coffee table to determine the leg height.
3.3 – Insert table legs into the flanges that have been attached to the bottom of the table.
3.4 – Measure the distance between the end pipes and cut the pipe to that length to form the brace ends.
3.5 – Slip on a tee fitting onto the brace pipe that was just cut and then put a tee fitting on either end. At this point you should be able to slide that piece down onto the two legs at the end of the table.
3.6 – Once both the side braces are on, measure the distance from brace to brace. This will give you the length of the pipe that runs down the middle of the table.
3.7 – Once you cut the middle runner pipe then month the pipe between the two middle tee fittings to complete the leg bracing.
3.8 – At this point you can begin to tighten your fittings. You may want to wait to do your final adjustment until after the table is flipped over.
3.9 – Insert end caps. The end caps I used were designed for use with schedule 40 pipe, not aluminum fence post, so you will need to apply a bit of epoxy or glue to the end caps before inserting them.
3.10 – At this point you can flip the table over and do your final adjustments.


