Introduction: DIY Cloth Dopp Kit
This is a useful little zippered case that can hold toiletries or other things. Its fairly easy to make and you can easily customize it with your own fabric choices, measurements and details. It's a great project for a beginning to intermediate sewer because it helps you practice attaching zippers and linings, and also demonstrates how sewing is a puzzle about spatial relations and order of operations.
So much of what you do when you construct a sewing project involves figuring out how to do everything inside-out so that when you flip it around, the work you've done is hidden. Learning to think this way takes a little practice, and can be brain-twistingly frustrating!... but mastering it is incredibly useful, and really rewarding if you have a penchant for puzzle solving :)
If some of the skills required for this project, like attaching zippers, seem a little out of your comfort zone, check out my free Machine Sewing Class, especially the Sewing Zippers and Buttons lesson.
Step 1: Tools and Materials
For this project you'll need some basic sewing tools:
- Sewing machine
- Iron and ironing board
- Extra bobbins
- Zipper foot
- Standard sewing machine needles
- Fabric shears
- Thread snippers
- Seam ripper
- Hand sewing needles
- Pins
- Magnetic pin holder
- Transfer paper
- Tracing wheel
- Tailor’s chalk or disappearing marker
- Clear 18"x2" ruler
- Metal ruler or thick plastic quilting ruler (optional)
- Cutting wheel (optional)
- Cutting mat (optional)
Materials:

- Fabric: 1/2 yard canvas, light upholstery fabric or denim, 1/2 yard quilting cotton or cotton blend for lining
- Materials: 16" standard non-separating zipper, matching thread, 1/4 yard fusible interfacing (white if your fabric is light, black if it's dark).
Step 2: Cut the Fabric
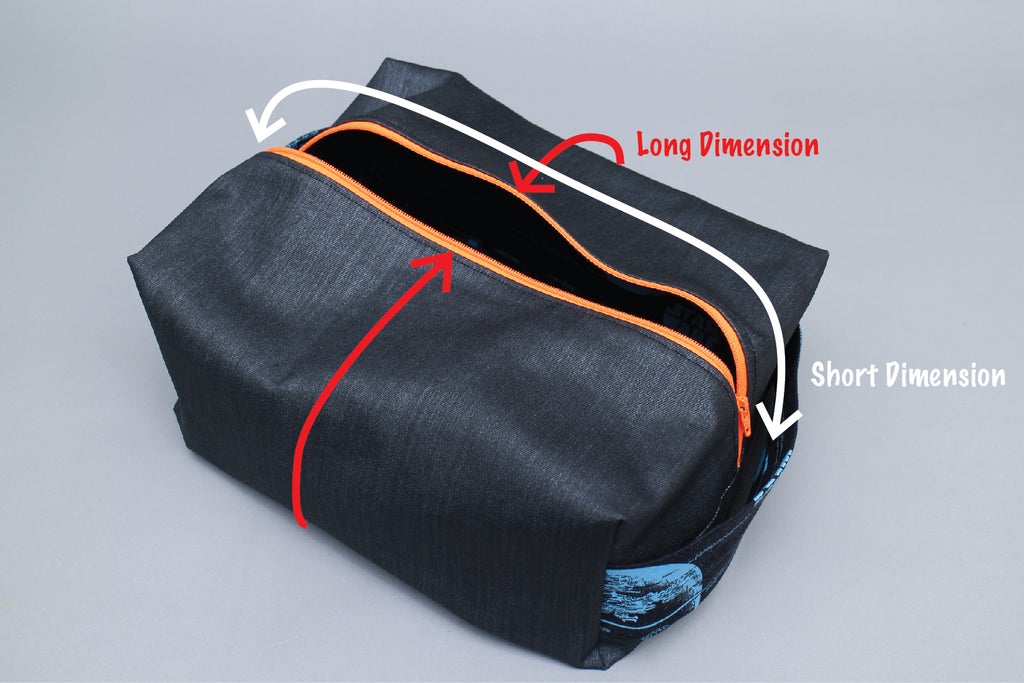
We don't really need to follow a pattern for this project because it is such a simple shape. All you need to do for the body of the case is cut out two identical rectangles, one in your lining fabric and one in your outer fabric. The short dimension of the rectangles will be the length of the bag and the longer dimension will be the distance all the way around the bag:

You can vary the size easily, as long as the shorter ends of the rectangles aren't longer than your zipper. I am using a 16" zipper, so I made my rectangles 16" x 24". In the end I thought this was a bit too big, so I'd suggest a size of about 15" x 22".

I cut my rectangles out with a ruler and cutting wheel because they have nice straight lines that are easy to cut, but you could use scissors too. I cut them out individually, but you could also lay them on top of each other and cut them together.

Step 3: Attach the First Side of the Zipper
Lay your lining fabric out with the right side facing up. Unzip your zipper and lay it right side up, lined up with one of the short sides of the fabric. Line the zipper tape up with the edge of the fabric with the top zipper stop about 5/8" in from on edge of the fabric.


Pin the zipper tape down in a few places.

Take your outer fabric and lay it over the same side of the zipper with the right side facing down. Align this piece with the lining piece and pin all three together. Removing the first set of pins as you go.


To make sure this zipper goes in really cleanly, I basted the three layers together about 1/4" from the edge, tying my thread off at both ends.


Put a zipper foot on your machine, oriented to the right side of the needle, then sew along the edge of your fabric close to the zipper sandwiching the the zipper tape between the two layers of fabric.


When you are done, you should be able to fold back both sides of your fabric to expose the zipper.

Step 4: Attach the Second Side of the Zipper
Now we are going to do the same thing to the other side of the zipper. Lay what you've sewn so far out like this, with the two layers of fabric folded down, exposing the attached side of the zipper and the lining layer folded back under to meet the unattached side of the zipper.

Line the unattached side of the zipper up with the raw edge of the lining, and pin it down the same way we did on the first side.

Now fold the outer fabric up from the front, and line it up on top of the zipper with the wrong side out.

Pin it down so you are sandwiching the zipper tape between the two layers of fabric like you did on the other side.

Baste and sew in the same way. When you're done the whole thing will look like this:

Step 5: Press and Topstitch
To make sure the zipper is sitting neatly in the case and doesn't catch on the fabric when we zip it closed, we need to press the fabric away from it on each side and topstitch it down.
To do this, first flip the layers of fabric around so they are arranged like this:

Then press the outer fabric and lining back away from the zipper with your iron on both sides.


Put the regular foot back on your machine and set your stitch length to about 3. Topstitch over the folded layers about 1/4" away from the fold. I used the zipper itself as a guide for the far right edge of my foot.

Repeat on the other side of the zipper.

Step 6: Cut the Corners
Now we are going to cut out little squares from the corners of the fabric that will be sewn to create the box corners of the case.
First flatten all the layers with the zipper in the middle, measuring to make sure it is even on both sides, and placing a couple of pins through all the layers next to the zipper to keep it in place.

Then use your ruler to mark a box in each corner. The size of this box will determine how tall the sides of the case are (they will be about 1/2" taller than the diagonal of the square). You can choose the size of the square, but you need to make it 1/2" longer on the side parallel to the zipper (the side I'm marking with the chalk here) to account for the seam allowance on the end. 2" x 2 1/2" is a good size.

Place a pin in each corner as you mark them, and when all the corners are marked, cut them out with your scissors.

Step 7: Sew the Ends Closed
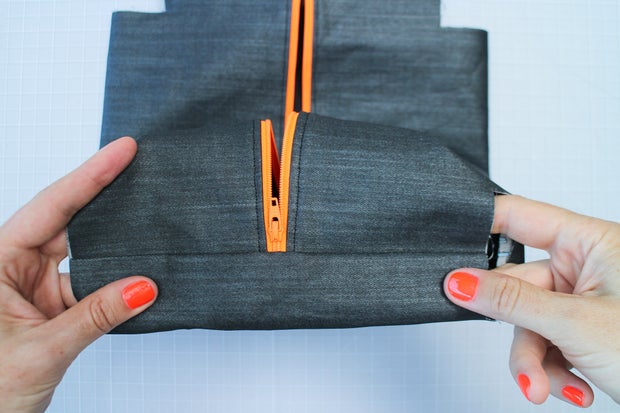
Once you've cut the corners, flip the layers around again back to the way they were right after you sewed in the zipper with the loop of lining fabric on one side and the loop of out fabric on the other, right sides facing in. The cut out corners should all be matching up with the zipper in the middle.

Open the zipper a little so you don't sew over the zipper slider, and pin both ends closed across the ends of the zipper.


Sew the ends closed 1/2" in from the edge with your stitch length set back at 2.5.

Step 8: Flip and Topstitch
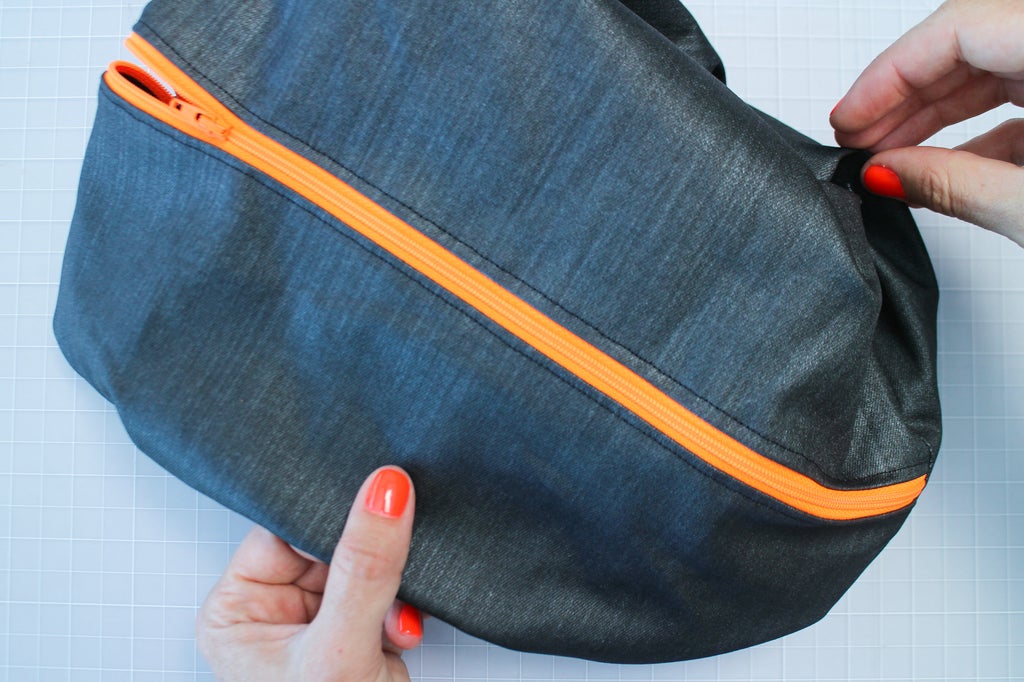
Now you need to turn the whole thing right-side out. Reach into one of the cut out corners and start turning it.

This will take a little fiddling, but eventually it should look like this:

I decided to topstitch the seams along the ends, because I thought that would look nice, but you don't have to. To do this, open the zipper, and use your hands to flatten the lining against down away from the end seam below the zipper.


Change your stitch length to 3. Take the accessory box off your sewing machine to expose the free arm, then maneuver the seam under the presser foot by sticking the free arm inside the case through the open zipper. Topstitch about 1/4" below the seam, and repeat on the other side.

Step 9: Pin and Sew the Corners
Now we are going to sew the first of two sets of seams that will create clean finished edges on the corners of the case (french seams).
Keeping case turned right side out, pinch all the corners and pin them together like this:

Then sew about 1/4" in from the edge on each corner.

Trim away the excess so only about 1/8" remains. Repeat on all four sides.

Step 10: Create the Handles
Before we sew the seams that will finish these edges, we need to create the handles that will be sewn into them.
I decided I wanted my handles to be 1 1/2" wide, so I cut a strip of my star wars cloth 4 1/2" wide and 16" long. I also cut a strip of fusible the same length and fused the back of the fabric.


Then I folded the long edges of the strip in 3/4" and then another 3/4" like a double fold hem on each side that met in the middle.

I topstitched down each side, and then cut the whole strip in half creating two 8" long sections.


Step 11: Sew in the Handles
Now we are going to do the final step which will both finish the corner seams and attach the handles.
To do this, line the ends of handle strips you created up with the corner seams. The middle of the handles, should sit right at the end seams of the case.


Pin the handles down about 1" from the corner seams on each side, then flip the whole case inside out.


Pinch the corners and pin them together like this:

Sew the corners about 3/8" in from the edge, creating a french seam that encloses both the seam allowance of the corner seam and the end of the handle.


Turn the whole case right side out again and the ends should look like this:

Step 12: You're Done!
Flipping the whole thing inside-out and back so many times can get a bit dizzying, but it's kind of magical how it all ends up finished in the end, isn't it? No hand sewing required!
Now you can use your little case to store whatever you like (and, if you use the same lining as me, whatever you put in there gets to live in a galaxy far far away! :). I especially love how adding an interesting lining gives this simple bag a fun twist. I'm sure you can see how this design is easily customizable by adjusting the size, fabric and notions. If you've created your own version, show us what you've come up with by an 'I Made It' below!
If you're looking for more beginning sewing instructions, check out my free Machine Sewing Class.


